Nothing kills winter momentum like a snow blower that sputters, groans, and stops cold, choked by a frozen clump of wet snow. If you have ever wrestled with a clogged chute mid-storm, you are not alone. How to keep snow blower chute from clogging is one of the most common winter maintenance questions, and the answer lies in prevention, not panic. Wet snow, worn parts, and poor preparation turn your machine into a snow jammer instead of a snow blaster. This guide delivers battle-tested strategies from real-world operators, backed by technical insights and proven fixes that work.
Prevent Clogs Before They Start
Stopping clogs begins before the first flake falls. A proactive approach involving lubrication, inspection, and tuning keeps your machine running smoothly when you need it most.
Wax the Auger and Chute

One of the most effective anti-clog steps is applying Minwax Finishing Paste Wax to snow-contact surfaces. Unlike sprays that wear off after one storm, paste wax forms a durable, slick barrier that repels wet snow for multiple uses.
Apply wax to these surfaces:
- Auger blades and paddles
- Inside of the discharge chute
- Chute collar where the auger housing connects
Clean all residue, ice, and dirt first, because wax will not stick to grime. Use room-temperature wax and apply with a soft cloth or old sock for even coverage. Let it set for a few minutes, then wipe off excess. Users in the Great Lakes and New England report zero clogs across 12 consecutive snow events after waxing.
Use Non-Stick Sprays for Quick Touch-Ups
If waxing feels too involved, commercial snow blower sprays offer a fast alternative. Designed like cooking spray, they coat internal parts with a slick film.
Apply spray before each use or every few storms, spraying evenly into the chute, auger housing, and collar. Reapply after clearing slush or wet snow. Popular brands include SnoBlast and Blaster, but generic silicone sprays like WD-40 Specialist Silicone Lubricant also work. Avoid regular WD-40, because it is not formulated for snow adhesion and may harm rubber or plastic over time.
Skip Cooking Spray Long-Term
In a pinch, Pam or other cooking sprays can prevent sticking. But they attract dirt and degrade quickly, making them poor long-term solutions. Use cooking spray only when nothing else is available, and re-clean surfaces afterward.
Optimize Operation Speed
Blowing snow too slowly is a hidden clog trigger. When you crawl forward, snow piles up faster than the auger can process it, especially in wet conditions.
Match Speed to Snow Type
Going too slow lets snow compact in the auger housing, where it can freeze and jam the impeller. Think of it like feeding a shredder: steady, controlled input keeps things flowing.
Adjust your pace based on conditions:
- Wet snow: Move at a steady, moderate pace, and do not linger in one spot
- Dry snow: You can go slower, but maintain consistent motion
- Deep drifts: Take multiple passes instead of overloading the intake
Avoid Overfeeding the Intake
Even powerful dual-stage blowers can choke if you push them too hard. In heavy snow, narrow your path or make two passes. This reduces strain and keeps snow moving smoothly from auger to impeller to chute.
Maintain Mechanical Components
A well-lubricated, properly tuned snow blower resists clogs better than any coating alone. Many clogs stem from worn or misadjusted parts that reduce throwing power.
Check the Auger Drive Belt

A stretched or loose auger belt slips under load, slowing the auger and impeller. This reduces snow flow and increases clogging risk.
Inspect the belt annually or after 40 hours of use. Look for cracks, fraying, or glazing, which appears as shiny spots. Replace if slack exceeds one-half inch when pressed. Tighten or replace the belt to restore full rotational speed. On older models like Craftsman or early Ariens units, belt wear is a frequent culprit behind weak discharge.
Test Impeller-to-Housing Clearance
The impeller must seal tightly against the housing to create strong airflow. If the gap exceeds three-fourths inch, snow recirculates instead of ejecting.
Measure clearance with your pinkie finger. If too wide, consider an aftermarket impeller kit, which is available for Ariens Compact 24 and similar models. These kits reduce clearance and boost throwing distance by up to 50 percent.
Inspect Shear Pins and Clutch Cables
A broken shear pin stops the auger from turning, even if the engine runs. This leads to immediate clogs because snow is not being fed into the impeller.
Remove and inspect pins periodically. Replace if cracked or bent, and carry spares in your snow tool kit. Similarly, a frayed or loose clutch cable may not fully engage the auger. Adjust tension or replace the cable to ensure full power delivery.
Tune the Engine for Maximum Power
Factory settings often underutilize your machine is potential. For example, the Ariens Compact 24 ships at 2,800 RPM, well below the ideal range for snow ejection.
Increase Engine Speed to 3,500 to 3,700 RPM
Use a tachometer to verify current RPM. Adjust the engine governor screw, consulting your manual for specific instructions. Target 3,500 to 3,700 RPM for optimal impeller velocity.
Users who make this change report dramatically better performance, describing it as like upgrading to a bigger machine. Higher RPM means faster snow processing and less dwell time for clogs to form.
Clear Debris Before You Start
Rocks, gravel, and sticks can sneak into the auger housing, causing blockages or damage.
Inspect the Driveway and Walkway
Clear visible debris before starting. Avoid blowing over gravel areas, and use a shovel to clear tight spots instead of forcing the blower. Foreign objects can lodge in the chute or damage paddles, leading to imbalances and clogs.
Recognize Early Signs of a Clog
Catch problems before they stop you cold. These symptoms mean a clog is forming or already present.
Watch for these warning signs:
- Weak or no snow discharge: Snow trickles out or stops completely, even though the engine runs
- Snow sprays in wrong direction: A partial blockage disrupts airflow
- Engine runs but snow does not move: Auger spins, but nothing comes out
- Unusual noises: Clunking or grinding from the chute area
- Machine feels harder to push: Back pressure from a clogged chute
How to Clear a Clogged Chute Safely
If a clog happens, never use your hands. Rotating parts can cause serious injury, even if the engine is off.
Shut Off and Disconnect Power
Turn off the engine. Remove the key if your model has electric start. Disconnect the spark plug on gas models to prevent accidental restart. Wait 30 seconds for all parts to stop.
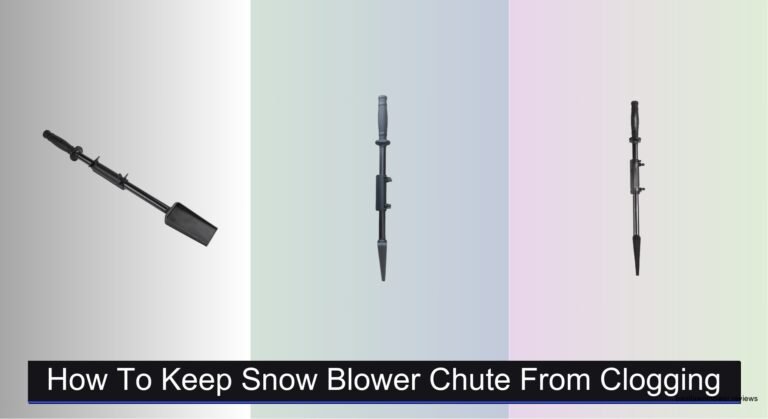
Use a Clean-Out Tool
Most snow blowers come with an onboard clearing tool, a curved plastic or metal rod stored on the frame. Insert from the discharge end and gently break up packed snow. Work outward, and do not force it deep into the auger.
If the tool is missing, use a wooden broomstick or plastic rod. Never use metal, because it can damage plastic chutes or unbalance the impeller.
Restart and Test
Reconnect the spark plug. Restart the engine. Let it run for 10 to 15 seconds to clear residual snow. Resume operation at a moderate pace. After clearing, reapply wax or spray to prevent re-clogging.
Upgrade for Better Performance
Some models are prone to clogs due to design limitations. Upgrades can transform their reliability.
Install an Impeller Kit
For models like the Ariens Compact 24, an aftermarket impeller kit reduces the gap between blades and housing, improving airflow and throwing power. This is an easy DIY installation with noticeable improvement in wet snow. It reduces clogs and extends run time.
Replace with a High-Output Belt
Aftermarket belts are thicker and more durable than stock versions. They resist stretching and maintain tension longer, ensuring consistent auger speed.
Consider a Dual-Stage Model
If you battle wet snow regularly, a dual-stage blower is worth the investment. These models separate snow collection from ejection, reducing clog risk and increasing throwing distance.
Post-Storm Care to Prevent Future Clogs
What you do after snowfall matters just as much as prep.
Clean Snow and Ice Buildup
Wipe down the auger, chute, and housing. Remove all slush and residue. Let the machine dry before storing. Leftover moisture freezes overnight, creating a sticky base for next time.
Reapply Lubrication
Touch up wax or spray before storing. Focus on high-contact areas. This ensures the next use starts clean.
Store Properly
Keep in a dry, covered area. Avoid damp garages where condensation forms. Elevate off concrete if possible to reduce moisture exposure.
Real-World Tips from Veteran Operators
Experienced users share these insights:
- Wax once, blow all winter: One thorough waxing lasts multiple storms in most conditions
- Speed kills clogs: Going too slow is worse than going too fast
- Fix the RPM first: Tuning engine speed is the single biggest performance upgrade
- Check the belt every season: It is cheap insurance against breakdowns
- Combine wax and spray: Use wax as a base, then spray for mid-storm touch-ups
Users in heavy snow zones swear by this combination: wax plus RPM tune plus impeller kit equals clog-free operation.
Frequently Asked Questions About Snow Blower Chute Clogging
Why Does My Snow Blower Clog More in Wet Snow?
Wet snow contains high moisture content, making it stick to metal and plastic surfaces inside the auger housing and chute. It packs rapidly and freezes quickly, forming solid blockages. This is especially common in lake-effect regions like the Great Lakes and New England.
How Often Should I Apply Wax to My Snow Blower?
One thorough application of Minwax Finishing Paste Wax typically lasts multiple snow events. Users report 12 or more consecutive storms without clogs after a single waxing. Reapply if you notice snow starting to stick or after heavy use in slushy conditions.
Can I Use Cooking Spray Instead of Snow Blower Spray?
Cooking spray like Pam works in emergencies but wears off quickly and attracts dirt. It is not recommended for regular use. For best results, use dedicated snow blower non-stick sprays or paste wax designed for this purpose.
What RPM Should I Set My Snow Blower Engine To?
Target 3,500 to 3,700 RPM for optimal snow-throwing performance. Many models ship at lower settings, like the Ariens Compact 24 at 2,800 RPM. Using a tachometer, adjust the governor screw to increase RPM and dramatically improve throwing power.
Is It Safe to Clear a Clog With My Hands?
Never use your hands to clear a clog. Always shut off the engine, remove the key, and disconnect the spark plug first. Use the onboard clean-out tool or a wooden broomstick to break up packed snow safely.
Key Takeaways for Keeping Your Snow Blower Chute Clear
Clogs are not inevitable. They are preventable with the right approach. The key is treating your snow blower like a precision machine rather than a brute-force tool. Start by waxing the auger and chute with Minwax Finishing Paste Wax, which creates a hydrophobic barrier lasting multiple storms. Combine this with non-stick spray for quick mid-season touch-ups. Next, tune your engine speed to 3,500 to 3,700 RPM to maximize impeller velocity and throwing power. Inspect and replace worn auger drive belts annually, and consider installing an aftermarket impeller kit if clearance exceeds three-fourths inch. Finally, operate at a steady pace, avoid overfeeding the intake, and clear debris before starting. By combining lubrication, mechanical maintenance, and smart operation, you can avoid 95 percent of clogs. Wax it, tune it, run it right, and keep that chute clear all winter long.