Is your snow blower refusing to start, sputtering, or dying right after it fires up? A dirty carburetor is likely the culprit. Over time, stale fuel breaks down and leaves behind sticky varnish that clogs tiny fuel passages, preventing proper fuel delivery to the engine. This guide walks you through exactly how to clean a snow blower carburetor, whether you need a quick in-frame fix or a complete rebuild.
You’ll learn to diagnose carburetor problems, choose the right cleaning method for your situation, avoid common mistakes, and get your machine running like new. We’ll cover in-frame cleaning for mild issues, full disassembly for stubborn clogs, and preventive maintenance to keep your snow blower starting effortlessly season after season.
Signs Your Snow Blower Carburetor Needs Cleaning
Before diving into the cleaning process, confirm the carburetor is actually the problem. Many starting issues mimic carburetor failure but stem from other components.
Watch for these symptoms indicating a clogged carburetor. The engine starts only with full choke but stalls when you throttle down. It runs briefly then dies, especially under load when engaging the auger. The snow blower requires constant priming with no success, or you notice sputtering and uneven running during operation.
Try this quick diagnostic test. Remove the air filter and spray a small amount of carb cleaner or starting fluid into the intake manifold. If the engine fires and runs momentarily, you have a fuel delivery problem pointing directly to the carburetor.
Why Snow Blower Carburetors Get Dirty
Understanding the root cause helps you prevent future problems. Most carburetor issues aren’t mechanical failures, they stem from fuel deterioration.
Gasoline, especially ethanol-blended fuel (E10), breaks down in as little as 30 days. This degraded fuel forms sticky varnish that clogs the carburetor’s microscopic passages. Ethanol attracts moisture, promotes corrosion, and degrades rubber seals. Without fuel stabilizer, the residue builds up during winter storage and creates stubborn clogs.
Old untreated fuel is the kiss of death for poorly maintained snow blowers. Using fresh fuel with stabilizer and running the engine briefly before storage dramatically reduces carburetor problems.
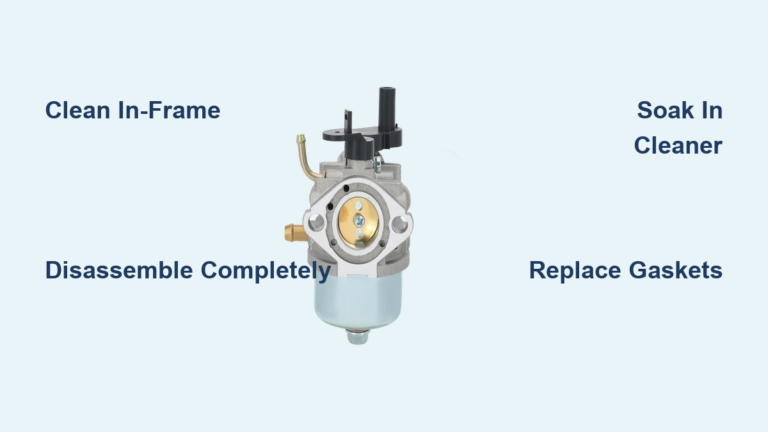
In-Frame Carburetor Cleaning Method
For mild clogs, surging, or poor idle, you can clean the carburetor without fully removing it. This method works for approximately 60-70% of light clogging cases and takes 15-30 minutes.
Gather these tools before starting. You need a 10mm socket, screwdriver, carburetor cleaner aerosol, compressed air, thin wire (guitar string works well), and a rag.
Follow these steps to clean in-frame. Tip the snow blower on its side with the engine facing up. Remove the float bowl using the 10mm socket. Extract the emulsion tube and jet if accessible. Support the float with a small wood block to prevent fuel spill. Scrub each hole in the emulsion tube with thin wire. Spray carb cleaner into the main jet, fuel inlet, throttle bore, and primer tube. Blow out all passages with compressed air. Reinstall components and tighten securely.
This approach cannot reach internal idle circuits or Welch plugs. If it doesn’t resolve your issue, move to full disassembly.
Full Carburetor Removal and Disassembly
When in-frame cleaning fails, remove the carburetor completely for deep cleaning. This method has a 97-98% success rate for hard starting and no-start conditions.
Take these safety steps first. Disconnect the spark plug wire to prevent accidental starts. Drain fuel or close the shut-off valve. Photograph all linkages and routing before disconnecting anything.
Remove the front shroud by taking out 2-4 bolts (common sizes are 8mm and 13mm). Watch for egg-shaped nuts that require a #10 wrench. Remove the choke knob by spraying WD-40 around the base, then pull straight off. Disconnect the fuel line using pliers to loosen the clamp. Detach the primer line, governor linkage (the Z-shaped metal arm), and any ground wires or kill switches.
Now disassemble the carburetor. Remove the two mounting bolts securing the carb to the engine intake. Unscrew the bowl nut (typically 7/16″ or #10) and drain any remaining fuel. Remove the bowl gasket and O-rings. Pull out the float pin, then remove the float and needle valve. Unscrew the main jet without forcing it if stuck. Optionally remove throttle and choke butterfly plates for complete access.
Never soak rubber seals, gaskets, or plastic floats in cleaning solution—they’ll disintegrate.
Deep Cleaning Methods for Stubborn Clogs

Choose the right cleaning method based on how much fuel residue has built up.
The soaking method works best for heavy varnish buildup. Place all metal and plastic components (excluding rubber) in a strainer pan with Simple Green, Super Clean, Dawn dish soap, or dedicated carb soak solution. Let it soak for several hours. Light varnish needs 20 minutes to 1 hour. Moderate buildup requires 2-4 hours. Heavy sludge needs 8-24 hours, but never exceed 48 hours or aluminum will corrode.
The spray cleaning method works for light deposits. Use high-quality aerosol carb cleaner and spray directly into the main jet holes, fuel inlet nipple, air bleed ports, throttle bore, and idle circuit passages. Repeat until fluid flows cleanly through all channels. Avoid cheap brands like Gunk—they’re ineffective on ethanol-induced varnish.
Ultrasonic cleaning offers professional results for stubborn deposits. Fully disassemble the carburetor and place parts in an ultrasonic tank with water and Simple Green. Run 20-minute cycles, rinse with warm water, and dry thoroughly with compressed air.
After any cleaning method, rinse parts with clean water or alcohol. Blow out every passage with compressed air. Clean the needle seat in the fuel inlet—it must be clear for proper fuel flow. Use a Scotch-Brite pad on exterior surfaces but avoid wire brushes on aluminum bodies.
Inspecting Components Before Reassembly
A clean carburetor won’t work if its components are damaged. Inspect each part carefully.
Check the float by holding it near your ear and shaking gently. If you hear sloshing, the float is fuel-logged and must be replaced. The float should move freely without sticking. With the carburetor upside down, the float should lie parallel to the body. Use an 11/64-inch drill bit to check the gap between float and housing. Bend the float slightly upward or downward to adjust as needed.
Inspect the needle valve tip for nicks or wear—replace if damaged. The seat installs with the ribbed side down. Ensure all jets and passages are completely clear. Use a thin wire or jet cleaning tool, never a drill bit which can enlarge holes.
Replace brittle or cracked gaskets. Consider a carburetor rebuild kit for full restoration.
Reassembling Your Snow Blower Carburetor
Reverse the disassembly process carefully, referring to your photos throughout.
Install the float and needle valve onto the hinge pin. Reinsert the main jet and tighten securely. Place a new bowl gasket and screw on the bowl nut, tightening evenly but not over-tightening. Reconnect the fuel line, ensuring no kinks. Reattach governor and choke linkages. Mount the carburetor to the engine, aligning with the intake manifold. Reinstall the shroud and all lines. Press the choke knob back on firmly.
Alignment matters—route the drain bolt toward the primer elbow to prevent fuel leaks. Linkage errors are common mistakes, so double-check your reference photos.
Testing and Troubleshooting After Cleaning
Time to fire up your snow blower. Reconnect the spark plug wire. Fill the tank with fresh gasoline plus fuel stabilizer. Prime the engine 3-5 times. Set the choke to full position and open the throttle fully. Pull the starter cord or use electric start. The engine should start within a few pulls. Gradually reduce choke as it warms up.
If problems persist, consult this troubleshooting guide. If the engine starts but dies, you likely have a residual clog, stale fuel, or a float issue—re-clean, use fresh gas, and check float movement. Hard to start even with choke points to a main jet clog or blocked fuel inlet—disassemble and inspect the emulsion tube. Surging or hunting indicates a clogged idle circuit—use fine wire to clear those tiny holes. Fuel leaks from the bowl mean a damaged gasket or stuck float—replace the gasket and check the needle. No fuel in the bowl suggests a clogged inlet filter or stuck needle—clean the fuel line and check the float valve.
Preventing Future Carburetor Problems
An ounce of prevention saves hours of repair time. Follow these maintenance habits to keep your carburetor clean.
At the end of each season, add fuel stabilizer and run the engine for 5 minutes to circulate it through the system. Alternatively, drain all fuel from the tank and carburetor. Store with a full tank of stabilized fuel to prevent condensation. Remove the spark plug and add oil to the cylinder to prevent rust.
Before the first use of the season, replace fuel with fresh gasoline. Inspect the carburetor if the machine sat more than 3 months. Check all linkages, belts, and skid shoes.
Ongoing, use ethanol-free fuel when possible—it eliminates 90% of carburetor problems. Add fuel stabilizer with every tank fill. Clean the air filter regularly. Run the engine at full throttle for 5 minutes monthly during the off-season to keep the carburetor functioning.
Recommended products include Stabil (2 oz per 5 gallons protects up to 24 months), Ethanol Shield (preferred by professionals), and Sea Foam (can revive mild clogs—pour in tank and soak 2-4 hours before starting).
When to Replace the Carburetor Instead
Sometimes cleaning isn’t enough. Replace the carburetor if you notice severe rust or corrosion inside the bowl or passages. Damaged Welch plugs, a cracked or warped aluminum body, or cleaning failures after multiple attempts also indicate replacement is needed.
Consider OEM versus aftermarket options. OEM carburetors cost $50-100 but fit perfectly and work reliably out of the box. Aftermarket carbs run $15 but are often hit or miss with poor quality seals. Many professionals prefer OEM for reliability.
Frequently Asked Questions About Cleaning Snow Blower Carburetors
How do I know if my snow blower carburetor is clogged?
Common signs include the engine starting only with full choke and dying when throttled down, running briefly then stalling, requiring constant priming, or sputtering during operation. A quick test is spraying carb cleaner into the intake—if the engine runs momentarily, the carburetor is the problem.
Can I clean a snow blower carburetor without removing it?
Yes, in-frame cleaning works for mild clogs, surging, or poor idle. Remove the float bowl, extract the jet and emulsion tube, spray carb cleaner into passages, and blow out with compressed air. This method resolves about 60-70% of light clogging cases.
What is the best way to clean a heavily varnished carburetor?
Soaking provides the best results for heavy buildup. Submerge metal parts (excluding rubber) in Simple Green, Super Clean, or dedicated carb soak for 8-24 hours. Rinse thoroughly and blow out all passages with compressed air. Ultrasonic cleaning is also highly effective for stubborn deposits.
How often should I clean my snow blower carburetor?
Inspect the carburetor every 2-3 years even if running well. Clean it if the machine sits for more than 3 months without use, or immediately when starting problems appear. Annual maintenance prevents most carburetor issues.
Should I replace or rebuild a bad carburetor?
Replace if there’s severe rust, corrosion, damaged Welch plugs, or a cracked body. Cleaning typically fails twice indicates replacement is needed. OEM carburetors offer the best reliability, though aftermarket options work for budget situations.
Key Takeaways for Cleaning Your Snow Blower Carburetor
Cleaning a snow blower carburetor is a straightforward DIY task that solves the majority of starting and running problems. Most issues stem from stale fuel, not mechanical failure. Start with in-frame cleaning for mild symptoms—it’s quick and resolves many cases. Move to full disassembly and soaking when needed—the success rate approaches 98%.
Always dry all passages with compressed air before reassembly. Replace gaskets and inspect the float for damage. Use fresh fuel with stabilizer every time to prevent future clogs. If cleaning fails after two attempts, replace with an OEM carburetor for reliable performance.
With proper maintenance, your snow blower will start on the first pull every winter for years to come. Don’t let a clogged carburetor ruin your morning—clean it now and ride through the snow with confidence.