
That dark, gritty oil clinging to your snow blower’s dipstick isn’t just dirty—it’s actively destroying your engine. Unlike your car’s sophisticated oil system, your snow blower’s small engine has no oil filter, meaning contaminants like carbon buildup and moisture accumulate with every use. When you fire up a machine with degraded oil, metal components grind against each other without proper lubrication, causing irreversible wear. Most homeowners skip this critical maintenance, assuming it’s complicated or unnecessary, but neglecting oil changes is the #1 cause of premature snow blower failure. The truth? You can prevent costly repairs and ensure reliable starts all winter by changing your oil in under 30 minutes. This guide reveals exactly how to do it right—no mechanic skills required.
Spot These Critical Oil Failure Signs Immediately
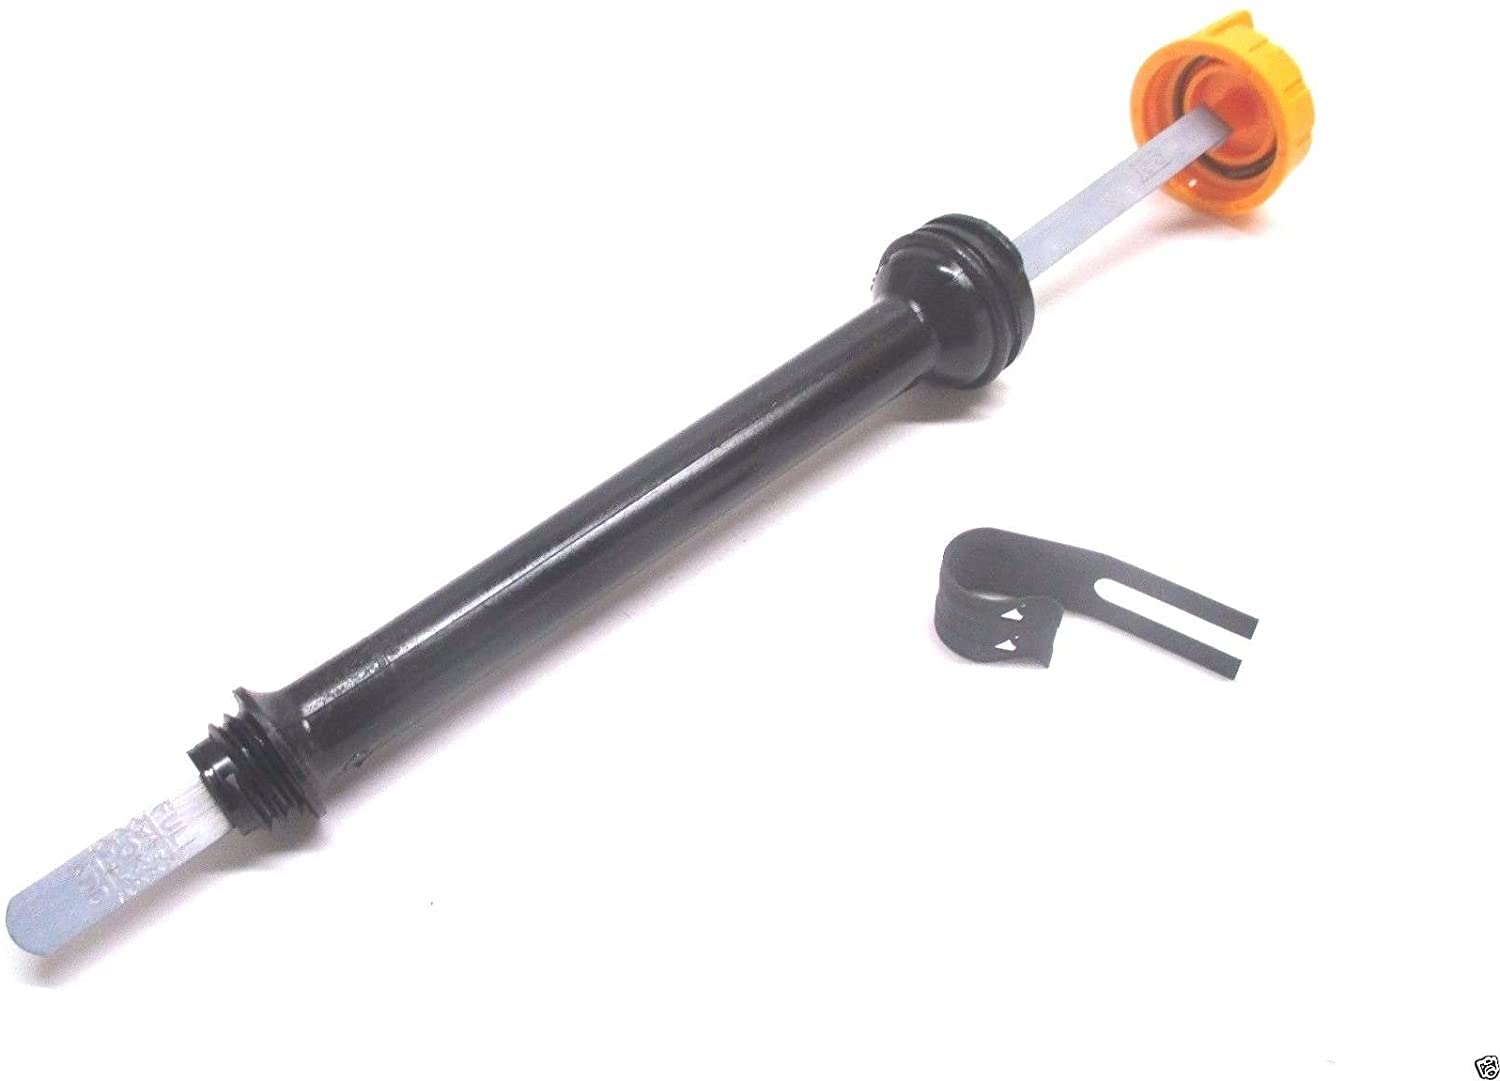
Metal Shavings on Dipstick = Engine Danger
Wipe your dipstick clean and reinsert it. If you see tiny metallic flecks clinging to it, your engine bearings are shedding material. This indicates severe internal wear that will only worsen with contaminated oil. Stop using your snow blower immediately—continuing operation could seize the engine within hours.
Why Black, Gritty Oil Demands Action
Fresh oil is amber-colored and translucent. When it turns thick, black, and feels grainy between your fingers, it’s lost its lubricating properties. This happens because heat and combustion byproducts break down the oil’s molecular structure. Most residential users run their snow blowers 5-10 hours per season, but even this minimal use creates enough sludge to damage cylinders and pistons over time.
Schedule Oil Changes for Maximum Engine Life
End-of-Season Change Beats Spring Panic
Change oil after your last snowfall, not before winter starts. Running the engine for 5 minutes warms the oil, suspending contaminants for complete drainage. Then, fresh oil protects internal components during summer storage. If you wait until fall, last season’s acidic sludge will etch metal surfaces all summer—explaining why so many “stored properly” snow blowers fail to start in December.
50-Hour Rule Simplified for Homeowners
While manufacturers specify oil changes every 50 operating hours, typical single-stage residential units see just 5-10 hours annually. For most users, this means one oil change per season is sufficient. Two-stage commercial models used frequently may need mid-season changes—always verify in your owner’s manual.
Select Climate-Specific Oil Like a Pro
5W-30 Synthetic: Non-Negotiable for Sub-Zero Zones
If temperatures regularly dip below 0°F (-17°C), conventional oil thickens into sludge at startup. Synthetic 5W-30 flows instantly at -40°F, lubricating critical parts before damage occurs. The “W” (winter) rating means this oil maintains fluidity in extreme cold—skimping here risks dry starts that wear piston rings prematurely.
Avoid These Oil Selection Mistakes
– Never use automotive multi-grade oils (like 10W-40)—they contain detergents that foam in small engines
– Don’t mix synthetic and conventional oils—they have incompatible additives
– Ignore “universal” oil claims—snow blowers require specific API service classifications (usually SJ or higher)
Gather These Exact Tools Before Starting
The $15 Cardboard Trick That Saves Your Garage Floor
Lay a full sheet of cardboard under your workspace. Oil seeps into concrete permanently, but cardboard absorbs spills and can be rolled up for disposal. This beats scrubbing stained floors all summer. Pair this with a 2-quart drain pan—smaller containers overflow when oil gushes during plug removal.
Critical Safety Gear You Already Own
– Work gloves (nitrile preferred—they resist oil and won’t snag on sharp edges)
– Safety glasses (oil splashes when tipping the machine)
– Spark plug wrench (prevents stripped terminals during disconnection)
Execute These Safety Steps Without Fail
The 10-Minute Warm-Up/Cool-Down Protocol
1. Start engine and run for 5 minutes (warms oil for complete drainage)
2. Shut off and wait 5 minutes (prevents burns from hot components)
3. Disconnect spark plug wire (pull firmly until it clicks free—this is non-negotiable for safety)
Why Draining Fuel Prevents Garage Disasters
Siphon remaining gasoline into an approved container before starting. Gasoline vapors ignite easily from static electricity during oil changes. Never work near pilot lights or heaters—just one spark could cause a flash fire in your garage.
Drain Old Oil Like a Seasoned Technician
Locate the Hidden Drain Plug in 10 Seconds
Crouch behind your snow blower and look beneath the handlebars at engine base level. You’ll see a horizontal metal tube extending from the engine block—a 1/2″ hex plug seals the end. On Ariens or Troy-Bilt models, it’s often near the recoil starter; for Husqvarna units, check left of the engine crankcase.
The Backward Tilt Technique for Complete Drainage
After removing the plug:
– Tip the machine 15-20 degrees backward (toward you)
– Rest the front auger on a cinder block
– Wait 8 minutes minimum (oil clings to internal surfaces)
– Rotate the machine 90 degrees left/right once to dislodge oil in corners
Rescue Dropped Plugs Without Panic
If the plug falls into the drain pan:
1. Retrieve with needle-nose pliers
2. Wipe threads with lint-free cloth
3. Apply light coat of fresh oil to threads before reinstalling
4. Tighten to “finger-tight plus 1/4 turn”—overtightening cracks the housing
Refill Oil Using Precision Methods

Dipstick Measurement Hack for Accurate Levels
Most manuals specify oil capacity, but dipstick markings are more reliable. After pouring 80% of the recommended amount:
1. Insert dipstick without screwing in
2. Pull out and check level against “FULL” mark
3. Add oil in 1/4 cup increments
4. Recheck until level hits the mark’s center
Overfill Disaster Prevention
Excess oil causes white exhaust smoke and spark plug fouling. If you accidentally overfill:
1. Remove dipstick
2. Suck out oil with clean turkey baster
3. Recheck level with dipstick unscrewed
4. Never drain through the plug—this wastes fresh oil
Verify Your Work in 4 Crucial Steps
Leak Test Protocol That Catches 90% of Errors
1. Reconnect spark plug
2. Start engine and run 20 seconds
3. Shut off and inspect drain plug area with flashlight
4. Wipe clean and recheck after 5 minutes
Break-In Period Oil Check
After your first post-change snowfall:
– Run engine 2 minutes
– Shut off and wait 1 minute
– Check dipstick—oil may appear slightly darker (normal as it cleans residue)
– Top up only if below “ADD” mark
Dispose of Used Oil Legally and Safely
Auto Parts Store Drop-Off Secrets
Most O’Reilly Auto Parts, Advance Auto, and NAPA locations accept up to 5 gallons free. Call ahead—some require oil in sealed containers (milk jugs work). Never mix with antifreeze or solvents, or they’ll reject it. Keep a dedicated 1-gallon plastic jug labeled “USED OIL” in your garage for future changes.
Emergency Spill Cleanup
If oil hits concrete:
1. Cover with cat litter or oil absorbent
2. Wait 15 minutes for saturation
3. Scoop into heavy-duty garbage bag
4. Wipe residue with degreaser and paper towels
Maintain Peak Performance All Season
Pre-Use Oil Checks That Prevent Stranded Starts
Before each snowfall:
– Pull dipstick and wipe clean
– Reinsert fully, then pull to check level
– Look for milky residue (indicates coolant leak)
– Smell for gasoline odor (sign of fuel contamination)
Season-Ending Oil Preservation Trick
After your final oil change:
1. Remove spark plug
2. Spray 1 oz of fogging oil into cylinder
3. Pull starter cord slowly 3 times
4. Reinstall plug—this coats internals for summer storage
When to Call a Professional Instead
Situations Requiring Expert Help
– Oil smells strongly of gasoline (indicates carburetor issues)
– Metal shavings persist after two oil changes
– Drain plug threads are stripped
– Oil level rises unexpectedly (sign of fuel pump failure)
Most authorized dealers (like Briggs & Stratton service centers) offer $35 “winter readiness” checks including oil changes. For newer models under warranty, improper DIY maintenance voids coverage—check your manual first.
Your snow blower now contains fresh, protective oil ready to conquer winter’s worst. This 30-minute ritual prevents thousands in engine repairs while guaranteeing reliable starts when snow piles up. Remember: Contaminated oil is silent engine suicide. By changing it end-of-season like clockwork, you’ll double your machine’s lifespan and never face that dreaded “click-click-click” of a seized engine on a stormy morning. Mark your calendar for April 1st—next season’s first snowfall will thank you.


