
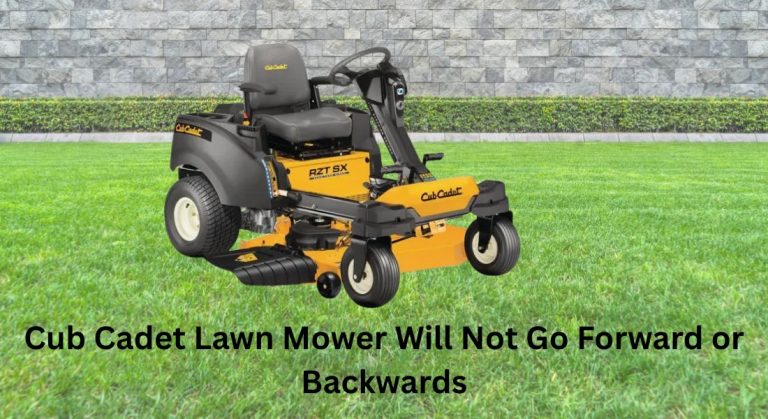
When your Cub Cadet lawn mower will not go forward or backwards, it can derail your entire yard day. The fastest quick fix? Check and reattach the freewheel/bypass lever on the rear of the mower—it may be in “push” mode, which disengages the transmission. Also verify the parking brake is fully released. These two steps solve a surprising number of no-movement issues in minutes.
In this comprehensive guide, you’ll get multiple solutions—from simple checks to advanced drive system diagnostics—for both riding mowers and zero-turn models. We’ll cover hydrostatic transmission issues, belt routing, safety switch failures, linkage adjustments, and how to prevent this problem from returning. By the end, you’ll know exactly how to get your Cub Cadet driving again.
Common Causes of a Cub Cadet That Won’t Move

- Freewheel/bypass lever engaged (transmission in push mode)
- Parking brake still engaged or brake switch defective
- Drive belt off, worn, or broken (hydrostatic or manual drive)
- Debris wedged around pulleys, idlers, or transaxle fan
- Hydrostatic transmission fluid low, overheated, or aerated
- Release valve stuck open on the hydrostatic unit
- Axle key/shear key missing or broken (wheel spins freely on axle)
- Linkage/cables disconnected or out of adjustment
- Safety interlock switch failure (seat, brake, PTO)
- Differential lock engaged (on some models) or drivetrain binding
- Transmission failure (internal pump, motor, or seals)
- For zero-turns: drive arms out of calibration, pump belt off, or wheel motor issue
How to Fix a Cub Cadet That Won’t Go Forward or Backwards
Method 1: Quick Fixes (5–10 minutes)
Diagnosing the Issue
- Symptoms: Engine runs, blades may engage, but mower doesn’t move in forward or reverse.
Fix Steps
1) Set safety first
– Park on level ground, shut off engine, remove key, engage parking brake.
– Allow hot components to cool for 10 minutes.
2) Check the freewheel/bypass lever
– Location: typically behind the mower near the transmission or at the rear plate.
– Ensure it is in “drive” or “engaged” position. Push the lever inward or downward per your model’s decal.
– On some zero-turns, there are two release rods—one per wheel motor. Make sure both are fully engaged.
3) Verify parking brake is released
– Disengage the brake completely. If the pedal feels soft or the brake doesn’t release, the brake switch or linkage may be sticking.
4) Inspect the drive belt at a glance
– Look under the frame for a loose, broken, or thrown belt.
– Check the idler spring—if it’s off or broken, the belt won’t tension.
5) Reset safety interlocks
– Sit in the seat, disengage PTO, depress brake, and try engaging drive.
– Wiggling the seat or brake lightly can reveal a flaky switch.
Testing
- Start the engine, disengage PTO, release brake, and slowly try forward/reverse.
- If there’s no improvement, continue to Method 2.
Method 2: Belt, Pulley, and Linkage Inspection (20–40 minutes)
Diagnosing the Issue
- Symptoms: Mower moves weakly, jerks, or not at all. You may hear belt squeal or smell rubber.
Fix Steps
1) Lift and secure the mower
– Use wheel chocks. If lifting the front, use jack stands.
– Remove the deck if needed for access (note belt routing before removal—snap a photo).
2) Inspect the drive belt
– Look for glazing, cracks, fraying, or a stretched belt that sits low in the pulley V.
– Ensure the belt is routed correctly around the engine pulley, idlers, and transmission pulley.
3) Check idler pulleys and tension spring
– Spin idlers by hand—replace if noisy or wobbly.
– Confirm the tension spring is intact and attached; replace if stretched.
4) Clean debris and verify pulley movement
– Remove sticks, wire, or grass clumps around pulleys and transmission fan.
– Make sure the transaxle cooling fan spins freely.
5) Inspect linkage/cables
– Look at shift linkage on gear-drive units and the control linkage on hydrostatic pedals/arms.
– Tighten loose hardware; replace worn bushings.
– Confirm the pedal returns to neutral properly.
6) Wheel hub/axle keys
– If the engine runs and belts spin but the mower won’t move, check for missing shear keys at the wheel hubs. Replace if sheared.
7) Reinstall the deck and verify belt tracking
– Double-check belt path using the routing diagram under the hood or in the manual.
Testing
- Start the engine and test drive. If it moves briefly but fades, proceed to Method 3.
Method 3: Hydrostatic Transmission Checks (30–60 minutes)
Hydrostatic (hydro) drives rely on fluid pressure. Air, low oil, or a stuck release valve can stop movement.
Diagnosing the Issue
- Symptoms: No movement, sluggish performance after warm-up, or jerky motion. Mower may roll freely when off if bypass is open.
Fix Steps
1) Confirm the bypass/release is fully engaged
– Manually push/pull the bypass lever or rods while gently rocking the mower to seat the mechanism.
2) Purge (bleed) the hydro system
– With the mower safely on stands and wheels off the ground:
1. Place bypass in drive position.
2. Start engine at low throttle.
3. Slowly move the drive control forward for 5 seconds, then reverse for 5 seconds.
4. Repeat 5–6 times.
5. Lower to ground and test drive.
– This removes air from the system after belt changes or towing.
3) Check fluid level/type (if serviceable model)
– Many Cub Cadet transaxles are “sealed” and non-serviceable. If yours has a reservoir, use the fluid specified in your manual (often 20W-50 or transaxle-specific oil).
– Top off only with the recommended fluid and re-purge.
4) Inspect the transmission fan and cooling
– Replace broken or missing fans. Overheating reduces hydro power.
5) Check for external leaks
– Look around the axle seals and case seams. A wet case indicates fluid loss—repair before continued use.
6) Neutral and control linkage adjustment
– Verify the neutral return and control arms are centered. Misadjustment can keep the pump swashplate from stroking.
– Follow the service manual for your model to center the neutral position and adjust linkage length.
Testing
- After purging and adjustments, run at medium throttle and attempt forward and reverse.
- If no change and all external components are good, internal hydro failure may be likely.
Method 4: Safety Switch and Electrical Interlocks (15–30 minutes)
On most Cub Cadet riders and zero-turns, the seat, brake, and PTO interlocks can inhibit drive.
Diagnosing the Issue
- Symptoms: Engine runs but drive won’t engage, especially when shifting weight on the seat or with PTO engaged.
Fix Steps
1) Seat switch
– Sit firmly in seat and try drive. If it only moves when you lean a certain way, the seat switch may be failing or misaligned.
– Inspect the connector for corrosion. Replace if defective.
2) Brake switch
– The system may require the brake pedal to be released to drive. If the switch is stuck, the control module may think the brake is still on.
– Test continuity or swap with a known good switch if available.
3) PTO switch
– Some systems won’t allow movement if the PTO circuit is in a fault state. Cycle the PTO switch off and on; inspect the connector.
4) Wiring harness
– Look for chafed wires near the frame and under the seat. Repair any breaks and secure with zip ties.
Testing
- With PTO off, seat occupied, and brake released, try driving. Replace any faulty switches.
Method 5: Zero-Turn Specific Steps (20–45 minutes)
For Cub Cadet zero-turn mowers (e.g., RZT, ZT1, ZT2, Ultima series):
Diagnosing the Issue
- Symptoms: One side moves and the other doesn’t, or neither side moves.
Fix Steps
1) Drive arm calibration
– Ensure both control levers are fully outward to neutral when starting.
– If it creeps or won’t move, adjust the neutral control per the manual.
2) Pump belt and idlers
– Remove seat/center cover to access the pump drive belt. Replace worn belts; verify idler tension and spring.
3) Wheel motor release valves
– Confirm both release valves are closed. If one is open, that side won’t move.
4) Wheel hub keys
– Check the drive wheel hubs and keys; replace if missing.
5) Purge both hydro units
– Follow the purge procedure for each side as in Method 3.
Testing
- Test each lever independently. If one side remains dead with proper belt tension, the affected pump or wheel motor may need professional service.
Prevention Tips and Maintenance Advice
- Keep the drive belt and pulleys clean; inspect every 25 hours.
- Replace drive belts every 100–150 hours or at first sign of glazing/cracks.
- Never tow hydrostatic mowers long distances with the bypass closed; you can damage the pump.
- Purge the hydro after storage or any drive/belt service.
- Clean the transaxle cooling fan and fins every few mows.
- Inspect safety switches and connectors seasonally.
- Store the mower on level ground to prevent fluid migration in hydros.
Pro Tips
- Photograph belt routing before removal to save time on reassembly.
- If movement returns when the unit is cold but fades hot, suspect hydro fluid breakdown or internal wear.
- A squeal on takeoff often means a slipping belt or weak idler spring—replace both as a set.
- Use OEM or high-quality belts; cheap belts stretch and ride low in pulleys, reducing drive.
- Mark linkage positions before adjustments so you can revert if needed.
- For stubborn bypass rods, apply penetrating oil and cycle the lever several times.
- If one wheel spins freely by hand with the brake off, check for a missing hub key.
When to Call a Professional
- No movement after verifying bypass, belt, idlers, and purging hydros.
- Visible transmission fluid leaks or severe overheating.
- Grinding noises from the transaxle or wheel motors.
- Repeated belt throw despite correct routing and tension.
- Electrical interlock diagnostics beyond basic switch checks.
What to look for in a service provider:
– Experience with Cub Cadet and hydrostatic systems
– Access to OEM parts and service manuals
– Offers pickup/delivery and a written estimate
Typical costs (may vary by region/model):
– Drive belt replacement: $90–$200 parts/labor
– Idler pulleys/spring: $60–$180
– Safety switch diagnostics: $75–$150
– Hydro purge/adjust: $100–$200
– Hydro transaxle replacement: $500–$1,200+ parts plus labor
Warranty considerations:
– Using non-OEM fluids or opening a sealed transaxle can void coverage.
– Keep receipts and service records; some hydros carry separate warranties.
FAQ
Q: Why does my Cub Cadet move slowly or only on flat ground?
A: Likely a slipping or glazed drive belt, weak idler spring, or aerated/overheated hydro fluid. Start with belt and idler inspection, then purge the hydro.
Q: The engine runs but the mower won’t move—what’s the first thing to check?
A: The freewheel/bypass lever. If it’s in push mode, the transmission is disengaged and the mower won’t drive.
Q: Can low hydrostatic fluid cause no movement?
A: Yes, on serviceable units. Low or aerated fluid prevents pressure buildup. Top up with the specified oil and purge. Many Cub Cadet hydros are sealed; consult your manual.
Q: My zero-turn moves on one side only. What’s wrong?
A: Check that side’s release valve, pump drive belt alignment, wheel hub key, and purge that hydro. If all checks out, the wheel motor or pump may be failing.
Q: The mower won’t move after belt replacement. Did I miss something?
A: Confirm the belt routing, idler spring attachment, and that the bypass lever is engaged. Purge the hydro—air introduced during service can prevent movement.
Q: Can a bad seat switch stop the mower from driving?
A: Yes. A faulty seat or brake switch can prevent drive engagement. Test or replace suspect switches and inspect connectors.
Q: Is it safe to tow my Cub Cadet?
A: Only short distances with the bypass lever in push mode. Towing with the bypass closed can damage the hydro pump.
Alternative Solutions
Sometimes, repeated hydro issues or a failing transaxle make repair uneconomical. Consider these alternatives:
| Solution | Pros | Cons | Best For |
|---|---|---|---|
| OEM transaxle replacement | Restores like-new drive, maintains mower | Highest cost, downtime | Newer machines worth investing in |
| Rebuilt/aftermarket transaxle | Lower cost than OEM, decent reliability | Availability varies, warranty limited | Mid-age units |
| Trade-in for new mower | New warranty, better performance | Highest upfront cost | Older units with multiple failures |
| Professional rebuild | Tailored to your unit, can be cost-effective | Requires skilled shop, variable timelines | Units with rare or premium hydros |
Get Your Cub Cadet Moving Again
Following this guide, you now have multiple ways to fix a Cub Cadet lawn mower that will not go forward or backwards:
– Quick checks: bypass lever, parking brake, and safety switches
– Belt, pulley, and linkage inspection and replacement
– Hydrostatic purge, cooling, and fluid checks
– Zero-turn specific adjustments and diagnostics
– Professional repair options when internal hydro failure is likely
Don’t let a no-drive issue sideline your mowing. Start with the simple steps and work methodically—you’ll often find a loose belt, engaged bypass, or minor adjustment is all it takes.
Have you fixed your Cub Cadet using these steps? Share your model and what worked in the comments to help other owners. Found this useful? Bookmark it for your next maintenance day. With these tips, you can solve your Cub Cadet mower not moving and keep your lawn looking great all season.


