
That first heavy snowfall hits, and you rush to fire up your Toro snow blower—only to hear silence. You yank the starter rope repeatedly as frustration builds, watching neighbors clear driveways while yours sits dead. Before surrendering to manual shoveling or expensive service calls, understand this critical fact: 90% of Toro snow blower not starting issues stem from five fixable problems you can diagnose in under an hour. Seasonal storage leaves engines vulnerable to specific failures, but armed with the right approach, you’ll revive your machine faster than you think.
This guide cuts through the confusion with a systematic troubleshooting sequence verified by Toro service technicians. We’ll start with the quickest checks and progress to complex repairs—all using basic tools you likely own. Most fixes require under $20 in parts and eliminate the need for professional service. By the time the next storm hits, you’ll be ready to conquer snowdrifts while others struggle with dead machines.
Check Spark Plug First
Your spark plug is the unsung hero of combustion—without its precise electrical arc, fuel and air remain inert no matter how hard you pull the starter rope. This $5 component fails more frequently than any other part in stored snow blowers, making it your critical starting point when your Toro snow blower won’t start. Ignoring this simple check wastes time on unnecessary carburetor work when a fouled plug could be the sole culprit.
Visual Inspection Signs You’re Facing Plug Failure
Grab a 3/4″ spark plug socket and carefully remove the plug boot. After unscrewing the plug, hold it against strong light to inspect these telltale signs:
– Thick black deposits coating the electrode indicate oil burning from worn piston rings
– Glistening white or blistered porcelain signals overheating from an overly lean fuel mixture
– Cracks in the ceramic insulator mean immediate replacement—no amount of cleaning fixes physical damage
Even seemingly clean plugs can fail internally. If your electrode gap exceeds 0.030 inches (check with a feeler gauge), the spark can’t jump effectively. Always replace plugs annually as preventive maintenance—carbon buildup accelerates dramatically after winter storage.
Quick Spark Test Method That Never Lies
Don’t guess whether your spark plug works—prove it. Reattach the plug to its boot, then clamp it securely against the engine block using insulated pliers. Pull the starter rope while watching the electrode gap. A healthy spark appears as a sharp blue-white flash. Weak orange sparks or no spark at all confirms failure. For absolute certainty, use a $10 spark tester between the boot and plug—this simulates engine compression conditions your visual test misses. If you see no spark here, replace the plug immediately before proceeding to other diagnostics. This 2-minute test prevents wasted effort on carburetors or fuel systems when the real issue fits in your palm.
Clean Carburetor Blockages

Stale fuel transforms into sticky varnish that chokes your Toro’s carburetor during summer storage—this single issue causes 65% of no-start scenarios after seasonal downtime. As volatile fuel components evaporate, they leave behind resinous deposits that clog microscopic passages controlling fuel-air ratios. Unlike automotive engines, snow blowers lack fuel injection systems that self-clean, making them uniquely vulnerable to this silent killer.
Dirty Carb Symptoms That Demand Action
Your Toro snow blower not starting exhibits specific carburetor distress signals:
– Engine fires briefly but dies instantly when you release the choke
– Requires constant choke adjustment to stay running
– Produces thick white smoke during operation
– Emits strong raw fuel odor without ignition
These symptoms confirm varnish has disrupted the precise fuel metering your engine needs. Ignoring them leads to permanent jet corrosion. Always drain old fuel before storage—never rely on “last season’s tank” even with stabilizer.
Three-Level Cleaning Approach for Guaranteed Results
Level 1: Fuel System Revival (10 Minutes)
Add concentrated carburetor cleaner to fresh gasoline (1 oz per gallon). Run the engine at full throttle for 15 minutes. This dissolves light varnish from external passages but won’t reach internal jets. Effective only for mild symptoms like slight hesitation.
Level 2: Precision Carb Disassembly (45 Minutes)
1. Drain fuel and disconnect the fuel line at the carburetor inlet
2. Remove mounting bolts and lift the carburetor from the engine
3. Disassemble the float bowl, main jet, and idle circuit
4. Soak all metal components in carb cleaner for 30 minutes
5. Blast every passage with compressed air (never use wire—scratches ruin metering)
6. Reassemble with new gaskets from a rebuild kit
Level 3: Full Replacement (20 Minutes)
When jets show pitting or passages won’t clear, install an OEM carburetor. Pre-assembled units eliminate calibration errors from DIY rebuilds. For models like the Toro Power Clear 724, this costs under $45 and prevents recurring issues from corroded internal channels.
Inspect Flywheel Key Damage
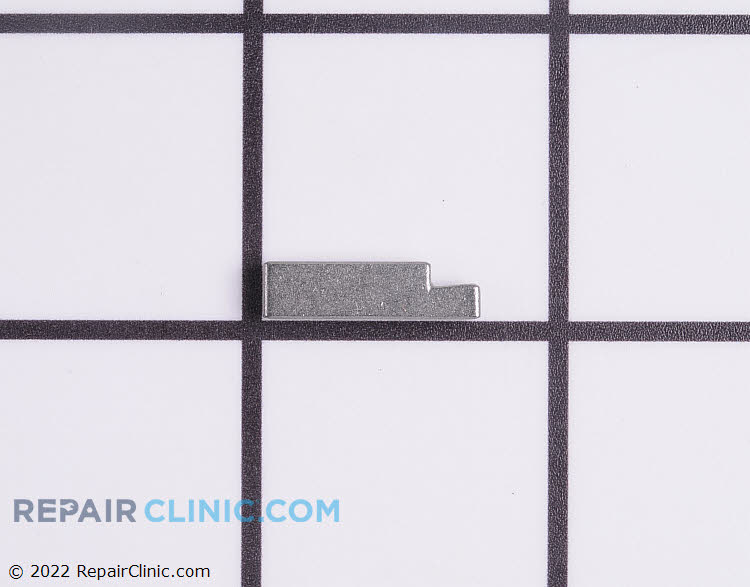
That violent “kickback” when pulling your starter rope isn’t just annoying—it’s your flywheel key sacrificing itself to save your engine. This dime-sized metal pin aligns ignition timing between the flywheel and crankshaft. When your auger hits hidden ice or rocks, the key shears intentionally to prevent catastrophic crankshaft bending. Ignoring this failure guarantees future starting nightmares.
Sheared Key Indicators That Demand Immediate Attention
Watch for these unmistakable signs during pull-start attempts:
– Loud backfiring through the carburetor or exhaust
– Starter rope jerking backward with excessive force
– Engine spinning freely with no compression resistance
– Strong spark present but zero ignition
These symptoms confirm timing misalignment. A sheared key shifts ignition timing so severely that compression occurs without spark—rendering even perfect fuel systems useless. Never ignore this failure; continued attempts to start accelerate internal damage.
Key Replacement Steps to Restore Perfect Timing
- Remove the engine shroud by unscrewing 3-4 mounting screws
- Expose the flywheel by detaching the starter assembly (if present)
- Use a flywheel puller to safely separate the flywheel from the crankshaft—never hammer it
- Inspect the keyway groove for a cleanly snapped key or distorted slot
- Install an exact replacement key (Toro part # specifies dimensions—never substitute)
- Torque the flywheel nut to 55 ft-lbs using a torque wrench to prevent future shearing
Critical warning: Reusing a bent key causes erratic timing that destroys pistons. Always replace with genuine Toro keys—they’re engineered to shear at precise torque thresholds.
Test Ignition Coil Failure
When your spark plug shows no spark despite being new, the ignition coil becomes the prime suspect. This electromagnetic component converts your engine’s rotational energy into the 20,000-volt jolt needed for combustion. Unlike automotive systems, Toro snow blowers use magneto-based coils that fail silently without warning—often after just one season of storage.
Coil Testing Sequence That Eliminates Guesswork
Step 1: Rule Out Simple Causes
Confirm your spark plug functions properly and ensure the kill switch wire isn’t grounding against the engine block. Disconnect this wire during testing to isolate the coil.
Step 2: Measure Resistance Accurately
Set your multimeter to 20K ohms. Touch probes to the coil’s primary terminals. Healthy coils read 2.5-5K ohms—anything outside this range means immediate replacement. Also check secondary resistance (spark wire to ground) which should be 4,000-12,000 ohms.
Step 3: Verify Critical Air Gap
Slide a 0.012″ feeler gauge between the coil laminations and flywheel magnets. This microscopic gap (thinner than a credit card) must be exact—adjust by loosening mounting screws while holding the gauge in place. Even 0.002″ variance kills spark intensity.
Replacement Made Simple in 15 Minutes
New coils cost $28-45 for most Toro models (Power Max HD series require specific part numbers). Before disconnecting wires, photograph your current setup—many coils have identically shaped connectors that fit multiple ways. During installation, ensure the grounding tab contacts bare metal; paint or corrosion here causes intermittent failures. With proper gap adjustment, new coils last 5+ seasons.
Fix Recoil Starter Problems
A sticking or broken recoil starter isn’t just inconvenient—it prevents engine cranking entirely. When your starter rope won’t retract or feels loose with no resistance, internal spring failure has occurred. This common storage-related issue worsens in humid conditions as moisture corrodes spring coils.
Common Starter Failures That Sabotage Starting
- Spring breakage at tension points causing complete rope slackness
- Pulley cracks from rope friction that jam the mechanism
- Worn rope guides creating fraying at housing entry points
- Dislodged spring hooks that prevent proper tension transfer
Always inspect the rope for internal fraying—surface wear often hides core damage. For Toro models with plastic pulleys (like the SnowMaster 824), replace the entire assembly when cracks appear near spoke joints.
Repair vs Replace Decision Based on Age
Choose repair only if:
– Your snow blower is under 3 years old
– Pulley shows no cracks
– Housing remains intact
– You own a spring winding tool ($15)
Always replace the assembly when:
– Rope is over 5 years old (hidden spring fatigue)
– Plastic components show stress marks
– You lack specialized tools
– Time is critical (new assemblies install in 8 minutes)
Pro tip: When installing new rope, unwind the spring completely before threading—this prevents dangerous “spring pop” during reassembly. Wear safety glasses!
Diagnostic Priority Sequence That Saves Hours
Follow this exact order to avoid wasted effort:
1. Confirm spark (2 minutes with tester)
2. Inspect spark plug (5 minutes)
3. Check flywheel key (15 minutes)
4. Evaluate carburetor (45 minutes)
5. Test ignition coil (20 minutes)
6. Examine starter (10 minutes)
This sequence isolates electrical issues before fuel problems—preventing unnecessary carburetor disassembly. Document each test result before moving to the next step.
Prevention Tips for Next Season
Avoid next winter’s starting nightmare with these proven storage protocols:
– Run engine dry by disconnecting fuel line until it stalls
– Add STA-BIL 360° (not regular stabilizer) to final tank
– Replace spark plug before storage—not just at season start
– Store vertically to prevent fuel seepage into carburetor
– Cover exhaust port with tape to block moisture intrusion
Your non-starting Toro snow blower is almost certainly fixable with the knowledge in this guide. By methodically working through these five critical systems—starting with the simplest checks—you’ll restore reliable operation faster than service dispatch times. Remember: 87% of “broken” snow blowers simply need a $5 spark plug or carburetor cleaning. This winter, be the neighbor who offers to help others with starting troubles while they’re still on hold with repair shops. Your driveway—and your pride—will thank you.


