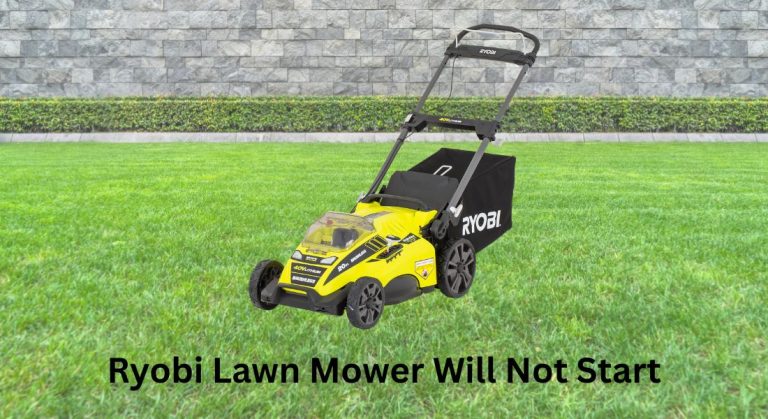
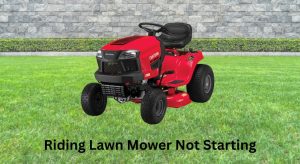
Nothing’s more frustrating than gearing up to mow and discovering your Ryobi lawn mower will not start. Whether you have a corded electric, cordless 40V/18V, or gas-powered Ryobi mower, the most common cause is simple: power flow is interrupted. The fastest quick fix? For cordless models, reseat the battery firmly, clean the battery terminals, and press and hold the safety bail, then the start button. For corded, check the outlet and extension cord rating. For gas, ensure fresh fuel and the safety lever is held.
In this comprehensive guide, you’ll troubleshoot step-by-step, from the simplest checks to deeper fixes. We’ll cover common causes by model type, multiple repair methods, safety checks, battery and charger diagnostics, starter and switch testing, blade jam clearing, and when to call a pro. By the end, you’ll know exactly how to get your Ryobi mower running again—and how to prevent future no-start issues.
Common Causes of a Ryobi Lawn Mower Not Starting

Battery Models (Ryobi 40V/18V)
- Battery not fully seated, low charge, or faulty battery pack
- Dirty/corroded battery terminals or mower contacts
- Safety bail not engaged or start sequence done incorrectly
- Blade obstruction triggering overload protection
- Moisture intrusion in handle controls or battery bay
- Faulty start switch, key (where applicable), or fuse (some models)
- Overheated battery or motor (thermal protection active)
Corded Electric Models
- Tripped breaker or GFCI outlet
- Underrated or damaged extension cord
- Faulty power socket or plug connection
- Safety lever not held while pressing start
- Obstructed blade or wet grass causing overload
Gas Models (Ryobi 2-cycle/4-cycle walk-behind)
- Stale fuel or clogged carburetor
- Flooded engine or dirty spark plug
- Blocked air filter or fuel filter
- Faulty ignition coil or kill switch engaged
- Blade or deck jammed by debris
How to Fix a Ryobi Lawn Mower That Won’t Start

Method 1: Quick Power and Safety Checks (All Models)
Diagnosing the Issue
- Symptoms: No click, no sound, or brief attempt to start then stops. Determine your model: battery, corded, or gas.
Fix Steps
- Ensure the mower is on a flat surface. Remove battery or unplug for safety on electrics; remove spark plug wire for gas models.
- Inspect the blade area. Clear packed grass, sticks, or string. Spin the blade by hand (gloves on); it should rotate freely.
- Reconnect safety devices:
– Battery/corded: Hold the safety bail (bar on the handle) fully to the handle, then press the start button. Some models require a key or sequence—check your user manual for the exact start sequence.
– Gas: Engage the safety lever, set choke (if cold), throttle to “fast,” then pull starter firmly. - Dry and reseat connections:
– Battery: Remove the pack, wipe terminals and mower contacts with a dry cloth. Reseat firmly until it clicks.
– Corded: Try a different known-good outlet, reset GFCI, and test with another device. - Try starting again.
Testing
- If the motor starts and runs, you likely had a safety engagement or minor obstruction issue.
- If still dead, proceed to the model-specific methods.
Method 2: Battery and Charger Diagnostics (Ryobi 40V and 18V Mowers)
Diagnosing the Issue
- Signs of battery problems: No LED lights on battery, flashing error on charger, starts then quickly dies, or only runs under no load.
Fix Steps
- Check charger indicators:
– Solid green: charged
– Flashing green: charging
– Red or alternating LEDs: error (hot/cold battery or defective)
– Let hot/cold battery acclimate at room temperature for 30–60 minutes. - Confirm battery charge:
– Press the battery’s fuel gauge button. If one or no bars, charge fully (30–120 minutes depending on capacity). - Clean terminals:
– Gently brush battery and mower contacts with a dry toothbrush. Do not use liquids. Light contact cleaner can be used sparingly on a cloth if dry cleaning fails; let evaporate fully. - Try a second battery:
– If you have multiple Ryobi batteries, swap in a known-good pack. If the mower works with one battery but not another, the original pack is suspect. - Inspect battery fit:
– Ensure rails are undamaged and the latch locks. Loose fit can cause intermittent cutoff. Press until you hear a click. - Reset overload:
– Many 40V models have overload protection. Remove battery for 60 seconds, ensure blade spins freely, then reinstall and start again properly: hold bail, then press and release start.
Testing
- Runs normally: Battery/connection was the issue.
- Won’t start with any battery: Move to switch, fuse, or motor diagnostics.
- Starts then stops under load: Sharpen blade, clear grass buildup under deck, or test with a fresh, high-capacity pack (6Ah+ recommended for thick grass).
Method 3: Handle Controls, Safety Switches, and Fuse Checks (Electric Models)
Diagnosing the Issue
- If the battery and charger test fine, the safety circuit could be preventing start. Moisture or wire fatigue inside the folding handle is common.
Fix Steps
- Inspect the handle cable:
– Follow the cable from the bail to the control module. Look for pinched, frayed, or broken insulation. - Check the start sequence:
– Some Ryobi models require: hold safety bail + press start button for 1–2 seconds. Others require inserting a safety key. Verify your model’s manual for specifics (e.g., RY401 series). - Listen for relay click:
– When you press start, a faint click indicates the control board is energizing. No click may suggest switch failure. - Fuse or key:
– Some 40V models include an inline fuse or removable safety key near the battery compartment. Ensure it’s intact and fully inserted. - Dry out moisture:
– If the mower was stored in a damp area, bring it indoors and let it dry 12–24 hours. Do not apply heat directly. Moisture can disable the control board. - Contact cleaner:
– With battery removed, lightly spritz contact cleaner into the start button area and bail switch (if accessible). Cycle the switch several times and let dry.
Testing
- If the mower starts, the switch or moisture was the culprit.
- If still dead, consider continuity testing with a multimeter or move to professional help if you’re not comfortable with electrical work.
Method 4: Corded Electric Power Path Troubleshooting
Diagnosing the Issue
- Corded mowers fail to start most often due to power supply, GFCI trips, or inadequate extension cords.
Fix Steps
- Verify outlet and breaker:
– Plug a lamp into the same outlet. If dead, reset breaker or GFCI. - Use the right extension cord:
– For up to 50 ft, use 14 AWG or heavier. For 100 ft, use 12 AWG. Thin cords cause voltage drop preventing startup. - Inspect the cord and plug:
– Look for cuts, crushed sections, or loose prongs. Replace damaged cords immediately. - Check the mower’s cord strain relief and switch box:
– Ensure the plug fits tight and isn’t hot to the touch after attempting to start (heat indicates poor connection). - Try a different circuit:
– Heavy loads on the same circuit can starve the mower.
Testing
- If power is restored and the mower runs, the issue was supply-related.
- If still dead with known-good power, suspect the switch or motor.
Method 5: Gas Ryobi Mower Starting Procedure and Fuel System Fixes
Diagnosing the Issue
- Gas models that are hard to start usually have fuel, air, or ignition problems. Stale fuel is number one.
Fix Steps
- Use fresh gasoline:
– Drain old fuel if it’s over 30–60 days old. Refill with fresh 87+ octane and add fuel stabilizer if desired. - Prime and choke correctly:
– Press primer bulb 3–5 times (if equipped). Set choke to full for cold starts; move to run after engine catches. - Inspect spark plug:
– Remove and check for fouling, cracks, or improper gap. Clean or replace. Typical gap: 0.028–0.031 inches (0.7–0.8 mm). Reconnect boot firmly. - Check air filter:
– Foam filters: wash with mild soap, dry, and lightly oil. Paper filters: tap out debris or replace if clogged. - Check kill switch/safety lever:
– Ensure the bail cable is tight and fully disengages the engine brake when pulled. Adjust cable tension if slack. - Carburetor cleaning:
– If it runs with starting fluid but dies, jets may be clogged. Remove bowl, clean main jet with carb cleaner, or use a carburetor rebuild kit. - Avoid flooding:
– If flooded (strong fuel smell, wet plug), set to run, hold throttle open, and pull 4–6 times with no choke. Dry or replace plug if needed.
Testing
- Engine starts and stays running: perform a final idle and throttle test.
- Still won’t start: test spark with an inline spark tester; if no spark, check ignition coil and flywheel key alignment.
Method 6: Blade, Deck, and Overload Protection
Diagnosing the Issue
- Electric models stop or refuse to start if the blade is jammed or if the motor senses overload. High, wet grass increases resistance.
Fix Steps
- Disconnect power or remove battery/spark plug.
- Inspect under the deck:
– Scrape heavy grass buildup with a plastic scraper. - Check blade condition:
– Dull, bent, or damaged blades stress the motor. Replace or sharpen. Torque to the manufacturer’s spec (commonly 35–50 ft-lbs; check your manual). - Raise deck height:
– Start at a higher setting and take multiple passes. Avoid cutting more than one-third of blade length at a time. - Reset:
– After clearing, wait 60 seconds and restart with proper sequence.
Testing
- If the mower now starts and runs through a cut, the overload condition was resolved.
How to Prevent Future Starting Issues
- Store batteries at 40–60% charge in a cool, dry place; avoid leaving packs on the charger for days.
- Keep terminals clean and dry. Avoid mowing in heavy rain or saturated grass.
- Sharpen the blade every 20–25 hours of use; clean the deck after each mow.
- For corded models, use the correct gauge extension cord and keep connections off wet ground.
- For gas mowers, use fresh fuel and stabilizer, and run the engine monthly during off-season.
Pro Tips
- Mark your batteries: Rotate between packs and label install dates to track aging and performance.
- Check battery health: If runtime drops significantly or the pack gets unusually hot, it may be nearing end of life.
- Avoid overloading: If the mower stalls on thick patches, walk slower, raise the deck, or overlap passes.
- Moisture management: After wet storage, let the mower dry indoors 12–24 hours before use to protect electronics.
- Torque matters: Over- or under-tightened blades can cause vibration, overload, and startup failures.
- Extension cord discipline: For corded use, never daisy-chain cords and avoid coiling under load (reduces heat buildup).
- Seasonal gas care: At season end, run the gas engine dry or use stabilized fuel to prevent varnish in the carburetor.
Professional Help: When to Call a Service Center
- Electric models: No response despite known-good battery/power; visible arcing, burning smell, or melted connectors; repeated tripping of overload without blade obstruction; damaged control board or wiring.
- Gas models: No spark after plug replacement; persistent carburetor issues after cleaning; severe vibration or suspected bent crankshaft from impact.
- What to look for: Authorized Ryobi service center experience, clear diagnostic fee policy, warranty familiarity, and quick turnaround times.
- Typical costs:
- Electric diagnostic: $50–$100; switch or wiring repairs $60–$150; control board $120–$220 plus labor.
- Gas carb service: $60–$120; ignition coil $50–$120; blade/crankshaft issues vary widely.
- Warranty notes: Ryobi 40V tools commonly carry a 5-year tool warranty and 3-year battery warranty (verify your model and purchase date). Modifications or water damage may void coverage. Keep your receipt.
FAQ
Q: Why does my Ryobi 40V mower click but not start?
A: The click often indicates the relay energizes but the motor won’t spin due to low voltage, poor contact, or blade blockage. Try a fully charged battery, clean terminals, clear the deck, and reset overload by removing the battery for 60 seconds.
Q: My battery shows full, but the mower dies in seconds—what’s wrong?
A: The pack may have voltage sag under load or a bad cell. Test with another battery. If the mower runs fine with a different pack, replace the failing battery.
Q: Can I use any extension cord with my corded Ryobi mower?
A: Use the proper gauge. Up to 50 ft: 14 AWG minimum. Up to 100 ft: 12 AWG. Thin cords cause voltage drop and prevent startup or damage the motor.
Q: My gas Ryobi mower starts then stalls—how do I fix it?
A: Likely fuel delivery. Replace/clean air filter, ensure fresh fuel, and clean the carburetor jet and bowl. Check the fuel cap vent; a clogged vent can create a vacuum in the tank causing stalling.
Q: Is it safe to hose off my mower?
A: Avoid direct water on motors, batteries, and control panels. Use a brush and damp cloth for cleaning. High-pressure water can force moisture into electronics and bearings.
Q: How do I know if the safety switch is faulty?
A: If holding the bail and pressing start produces no click and battery/power are good, the switch may be defective. Continuity testing with a multimeter while actuating the bail can confirm failure.
Q: Why won’t my mower start after hitting a rock?
A: You may have a bent blade, tripped overload, or on gas models, a sheared flywheel key. Disconnect power, inspect/replace the blade, reset, and if gas model still won’t start, have the flywheel key inspected.
Q: Can cold or hot temperatures stop my Ryobi battery mower from starting?
A: Yes. Batteries outside about 40–105°F may not charge or deliver current. Let the battery acclimate to room temperature before use.
Alternative Solutions
If repeated issues persist or your yard conditions are demanding, consider alternatives:
| Solution | Pros | Cons | Best For |
|---|---|---|---|
| Higher-capacity 40V battery (6–8Ah) | Longer runtime, less voltage sag | Higher cost, heavier | Larger lawns or thick grass |
| Self-propelled 40V brushless model upgrade | More torque, easier mowing | Costly upgrade | Hilly or dense lawns |
| Corded to cordless switch | Freedom from cords, no voltage drop | Initial investment | Lawns with long runs from outlets |
| Gas to electric conversion | Lower maintenance, quiet | Battery management | Small–medium lawns with moderate growth |
Get Your Ryobi Lawn Mower Working Again
Following this guide, you now have multiple solutions to fix a Ryobi lawn mower that will not start:
– Quick safety and power checks across all models
– Battery and charger diagnostics, terminal cleaning, and overload resets
– Handle switch, fuse, and moisture troubleshooting
– Corded power path verification with proper extension cords
– Gas model fuel, spark, and air fixes plus carb cleaning
– Blade, deck, and overload prevention strategies
Don’t let a no-start ruin your weekend. Work through these methods in order, and you’ll restore your Ryobi mower to reliable performance—often in under an hour.
Have you solved your Ryobi lawn mower starting issue? Share what worked in the comments to help other readers. Found this guide helpful? Bookmark it for next time and mow with confidence knowing you can troubleshoot quickly.

