
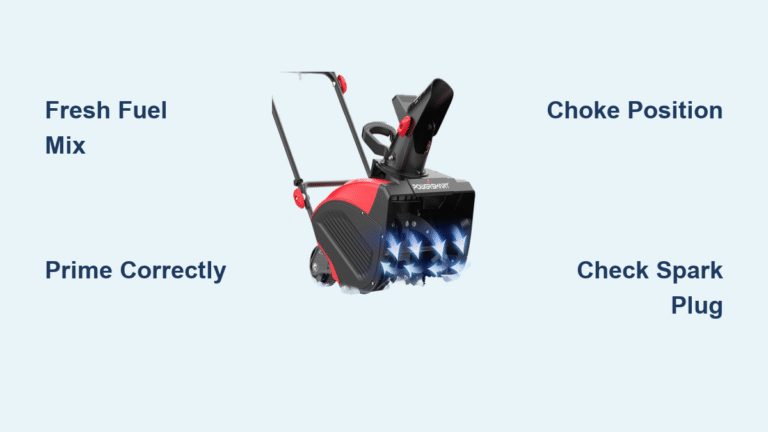
Snow piles up fast when temperatures plummet, and nothing derails your winter routine like a PowerSmart snow blower that refuses to start. Whether you’re battling your first major storm or prepping for seasonal maintenance, understanding the precise ignition requirements for your specific model makes all the difference between clearing your driveway in minutes versus wrestling with a stubborn engine. This guide cuts through the confusion with actionable steps verified for both gas-powered and electric PowerSmart units—no technical jargon, just proven methods that work when frost coats your handles and your muscles are ready to move snow.
You’ll master the exact fuel-to-oil ratios that prevent cold-weather failures, learn why priming techniques differ between 10°F and 30°F conditions, and discover emergency hacks for when your starter cord feels like pulling concrete. Most importantly, you’ll avoid the top three mistakes that destroy PowerSmart engines during startup attempts. Let’s transform frozen frustration into reliable ignition with techniques backed by service technicians who see hundreds of winter breakdowns.
PowerSmart Fuel & Oil Checks That Prevent Starting Failures

Gas Model Fuel Requirements
PowerSmart gas snow blowers demand fresh fuel chemistry to ignite in cold conditions. Use only 87-octane unleaded gasoline mixed with a fuel stabilizer within 30 days of purchase—never ethanol blends exceeding 10% as they attract moisture and degrade rubber components. Fill to the bottom of the filler neck (typically 1/2 inch below the cap threads) to avoid expansion-related spills when temperatures fluctuate. Critical note: Stale fuel older than 60 days creates varnish that clogs carburetor jets, causing 70% of hard-starting issues. If your gas smells sour or appears cloudy, drain the tank completely before attempting ignition.
Oil Level Inspection
Check oil when the engine is cold and level for accuracy. Remove the dipstick, wipe clean with a lint-free cloth, reinsert without screwing in, then pull out to read. The oil must sit between the upper and lower hash marks—never below minimum. For temperatures below 0°F, use 0W-30 synthetic oil; above 20°F, 5W-30 suffices. Red flag: Milky oil indicates coolant contamination requiring professional service—do not start the engine. Adding oil while the engine runs risks overfilling and hydrolocking.
Electric Model Power Verification
Confirm your extension cord meets PowerSmart’s electrical demands: 12-gauge for 15+ amp models, 14-gauge for 12-amp units. Test outlets with a voltage meter—below 110V causes slow starts. Inspect cord ends for melted prongs or frayed insulation that creates resistance. Never daisy-chain cords—this voltage drop prevents motor engagement. If the unit hums but won’t start, plug directly into the house outlet to rule out extension cord faults.
How to Prime Your PowerSmart Snow Blower Without Flooding

Primer Bulb Technique for Cold Starts
Locate the translucent rubber primer bulb near the carburetor (usually red or black). For temperatures below 40°F, press slowly until fuel becomes visible inside the bulb—typically 3-5 pumps. Key mistake: Pumping rapidly creates air bubbles that disrupt fuel flow. If the engine floods (indicated by gasoline smell and refusal to crank), wait 15 minutes for vapor dissipation before retrying. For warm engines (above 50°F), skip priming entirely to avoid hydrolock.
Choke Position Calibration
Move the choke lever fully to “FULL CHOKE” for sub-40°F starts. This enriches the air-fuel mixture critical for cold ignition. After the engine sputters to life, reduce choke to “HALF” after 10 seconds, then to “RUN” within 30 seconds. Warning: Leaving choke engaged beyond warm-up floods spark plugs and dumps unburned fuel into the oil—causing sludge buildup. In damp conditions, run with 1/4 choke for the first minute to prevent condensation-related stalling.
Throttle Position for Maximum Ignition Power
Set the throttle lever to the “FAST IDLE” or “START” position marked by a lightning bolt icon. This maintains 2,500+ RPM during cranking for optimal spark plug firing. For manual-start models, hold the throttle wide open while pulling the cord—reducing throttle mid-pull kills compression. Electric-start models automatically engage high RPM when the button is pressed, so no throttle adjustment is needed during ignition.
Gas PowerSmart Snow Blower Starting: Step-by-Step Guide
https://www.powersmart.com/manuals/540030000-PowerSmart-Gas-Snow-Blower-Manual-Start-Procedure.pdf
Manual Start Sequence
- Engage all safety interlocks: Squeeze the auger lever against the handlebar until it clicks
- Prepare the starter cord: Pull slowly until resistance is felt (engages compression brake), then yank decisively in a 18-inch arc
- Control cord recoil: Guide the cord back smoothly—never release abruptly to prevent housing damage
- Limit attempts: Allow 30 seconds between pulls to clear excess fuel from cylinders
Pro tip: Stand with your non-dominant foot braced against the scraper bar for stability during pulls—this prevents the unit from sliding on ice.
Electric Start Protocol
Plug the power cord into a GFCI-protected outlet first, then connect to the snow blower. Press the start button for exactly 3 seconds—any longer overheats the starter motor. If no ignition occurs, wait 20 seconds between tries to reset the thermal cutoff. Critical: After 3 failed attempts, check for fuel flow issues—continuing risks burning out the starter solenoid.
Sub-Zero Ignition Hacks
For temperatures below 20°F:
– Warm the carburetor with a hair dryer for 90 seconds (never use open flame)
– Place a 60-watt work light 12 inches from the engine block for 20 minutes pre-start
– Mix 1 oz of isopropyl alcohol per gallon of fuel to absorb condensation
Never use starting fluid on PowerSmart engines—it washes oil from cylinder walls causing permanent scoring.
Starting Your PowerSmart Electric Snow Blower Safely
Cord Management Protocol
Route the extension cord over your shoulder with the built-in cord keeper securing it to the handle. Maintain 6 inches of slack between your hand and the snow blower inlet to prevent accidental disconnection. Life-saving rule: If the cord gets pulled under the auger, immediately release the deadman switch—never attempt to retrieve it while running.
Power-Up Sequence for Instant Ignition
- Connect snow blower to extension cord outdoors (never indoors)
- Plug extension cord into GFCI outlet
- Hold start button for 2 seconds until motor reaches full RPM
- Release button immediately—prolonged pressing damages the capacitor
Troubleshooting: If the motor whines but doesn’t engage, check for frozen auger bearings by manually rotating the chute. Never force rotation—thaw with a heat gun first.
Fix These 5 PowerSmart Snow Blower Starting Problems Now
Engine Cranks But Won’t Fire
Check these in order:
– Spark plug condition: Remove and inspect—wet plug indicates flooding; white deposits mean lean mixture
– Fuel valve position: Must be fully “ON” (parallel to fuel line), not “PRIME”
– Air filter status: Snow-clogged filters starve engines—tap filter against palm to dislodge debris
– Shear pin integrity: Broken pins prevent auger rotation but allow engine cranking
Starts Then Dies Immediately
This points to fuel delivery failure:
1. Clean the carburetor’s main jet with a #56 drill bit (0.0465″ diameter)
2. Poke the fuel cap vent hole with a paperclip to release vacuum lock
3. Replace the in-line fuel filter (located between tank and carburetor)
4. Adjust idle speed screw clockwise by 1/8 turn increments
Zero Crank Attempts
Verify these critical circuits:
– Deadman switch activation: Must be fully depressed against handle
– Battery charge (for electric start): Below 12.4V requires replacement
– Fuse integrity: Check 15A fuse near the starter solenoid
– Ground wire connection: Clean corrosion from engine-to-frame bolt
Extreme Cold Starting Hacks for PowerSmart Snow Blowers
Pre-Start Engine Conditioning
Store your snow blower in a garage 15°F warmer than outside overnight. If impossible, drape an insulated blanket over the engine 30 minutes pre-start. Position the unit with the carburetor facing away from wind—crosswinds below 10°F cool critical components faster than fuel can vaporize.
Fuel System Winterization
Add STA-BIL 360° Protection to every tank fill (1 oz per 2.5 gallons). Rotate fuel monthly—mark containers with dates using freezer tape. Pro move: Keep a dedicated winter fuel can stored indoors; pour cold-weather mix directly into the snow blower to avoid condensation.
Emergency Ignition Aids
As last resorts:
– Spray 1-second burst of engine starting fluid into air intake (never directly into spark plug hole)
– Drip 3 drops of fresh fuel into spark plug cavity after removal
– Warm spark plug in your pocket for 5 minutes before reinstalling
Critical Checks After Your PowerSmart Snow Blower Starts
Warm-Up Protocol
Run at 1/2 throttle for 4 minutes minimum—this circulates oil to upper cylinder walls. Listen for consistent exhaust rhythm; popping indicates lean mixture. Stop immediately if you hear metallic knocking—that’s detonation from incorrect fuel.
Auger Engagement Test
With engine at operating temperature:
1. Slowly squeeze auger lever while watching for smooth rotation
2. Check for belt slippage (squealing = frozen pulley)
3. Verify reverse function engages without grinding
Never clear jams with engine running—use the included plastic scraper tool.
Stop PowerSmart Snow Blower Starting Issues Before Winter Returns
End-of-Season Fuel Protocol
Run the engine until it stalls from fuel starvation, then:
1. Add 1 oz fuel stabilizer per gallon of fresh gas
2. Restart and run for 3 minutes to coat carburetor
3. Remove spark plug, add 1 tsp oil into cylinder, pull cord slowly to distribute
4. Store with fuel cap slightly loose to prevent vacuum lock
Summer Storage Maintenance
Start the snow blower every 4 weeks for 8 minutes—even without load. This:
– Prevents carburetor varnish buildup
– Lubricates fuel pump seals
– Recharges electric start batteries
Store vertically on blocks to avoid tire flat spots, covering with a breathable cotton tarp (never plastic).
Mastering PowerSmart snow blower ignition boils down to three non-negotiables: fresh stabilized fuel, precise choke management, and respecting cold-weather physics. When temperatures drop, your starting success hinges on preparation—not brute force. By implementing these model-specific protocols, you’ll achieve first-pull starts even at -5°F while extending your machine’s lifespan. Remember: if your snow blower resists starting after three correct attempts, diagnose methodically rather than yanking the cord endlessly—most “dead” units simply need fuel system attention. Your reliable winter ally awaits one proper ignition sequence.


