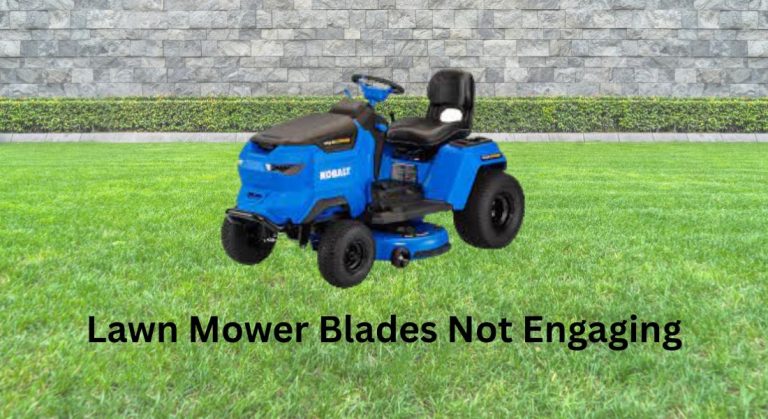
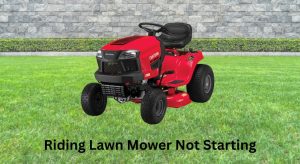
When your lawn mower blades are not engaging, it’s frustrating—especially when the grass is growing fast and you’ve set aside time to mow. The quick fix for many mowers is simple: check the safety interlocks (seat switch, parking brake, blade control lever/button) and verify that the belt is on the pulleys. If you hear the engine running but the blades won’t spin, start by confirming the deck/blade engagement mechanism is enabled and the belt hasn’t slipped off.
In this comprehensive guide, you’ll find all the common causes and step-by-step solutions for both push mowers and riding mowers—mechanical and electric (PTO) systems. We’ll cover quick checks, deeper diagnostics, how to confirm what’s broken, and prevention tips to keep your mower cutting reliably all season.
Common Causes of Mower Blades Not Engaging
- Dead or weak battery (for electric PTO clutches on riding mowers)
- Faulty blade/PTO switch or safety interlocks (seat switch, brake switch)
- Broken, stretched, or slipped deck belt
- Worn or damaged idler pulleys or springs
- PTO clutch failure (electric or manual cable-actuated)
- Sheared flywheel key (rare, but can affect engine power)
- Debris jammed around the blade or deck spindle
- Blown fuse or bad wiring connection (riding mowers)
- Low engine speed or stalled engine under load
- Manual clutch cable out of adjustment (walk-behind mowers)
How to Fix Lawn Mower Blades Not Engaging

Method 1: Do the Fast Checks (5–10 minutes)
Diagnosing the Issue
- Riding mower: Does the engine run smoothly at full throttle? When you engage the PTO switch, do you hear a click from the clutch? If not, it’s likely electrical (battery, fuse, switch, seat/brake switch).
- Push mower (self-propelled with blade control): When you pull the blade control lever, does the cable move freely? Any resistance or slack suggests a cable or clutch issue.
Fix Steps
- Verify safety interlocks:
– Sit firmly on the seat (riding mower).
– Disengage parking brake only when safe; most require it applied before starting.
– Ensure the blade/PTO switch is OFF before starting, then turn it ON to test. - Set throttle to full (fast) and allow 30–60 seconds of warm-up.
- Inspect the deck:
– Turn off engine and remove key. Disconnect spark plug wire (walk-behind) or negative battery terminal (riding).
– Check for packed grass, string, or wire binding the blades/spindles. - Belt check:
– Confirm the deck belt is routed correctly and seated on all pulleys.
– Look for cracks, glazing, and heavy wear. - Battery/voltage (riding mowers with electric PTO):
– Measure battery: should be ~12.6–12.8V engine off; 13.8–14.5V running.
– If below 12.2V, charge or replace battery before further tests.
Testing
- Reconnect power/spark.
- Engage blades. If they spin now, debris or a loose belt was the issue. If not, continue.
Method 2: Belt, Pulley, and Spring Inspection (20–40 minutes)
Diagnosing the Issue
- Symptoms of a failing belt system:
- Blades try to spin but stall or squeal.
- Belt jumps off or looks loose with engagement.
- Idler pulley doesn’t tension the belt or wobbles.
Fix Steps
- Safety first: Remove key, disconnect battery negative, and block wheels. For walk-behind, pull the spark plug wire.
- Deck belt routing:
– Check your owner’s manual or the deck routing sticker for the correct path. - Inspect pulleys:
– Spin each pulley by hand. It should spin smoothly with no grinding or wobble.
– Replace pulleys that are noisy, seized, or have play. Typical sizes range 3–6 inches. - Inspect idler arm and spring:
– Ensure the idler arm pivots freely; grease if required.
– The tension spring should be intact and tight. Replace stretched or broken springs. - Replace belt if worn:
– Use the exact OEM belt size (e.g., 1/2″ x 95″ or 5/8″ x 90″, model-dependent).
– Remove the deck shields, relieve tension, and route the new belt per diagram.
– Ensure belt sits in V-grooves correctly—no twists.
Testing
- Reassemble guards.
- Reconnect battery/spark.
- Start mower, set to full throttle, and engage blades. No squeal and full speed means success.
Method 3: Electrical PTO System Troubleshooting (Riding Mowers) (30–60 minutes)
Many riding mowers use an electric PTO clutch to engage blades. If you hear no click or blades won’t engage, check the following.
Diagnosing the Issue
- No click when PTO switch is activated: suspect battery, fuse, PTO switch, or seat/brake switch.
- Click but no engagement: suspect weak battery/charging system or faulty clutch.
Fix Steps
- Battery and charging:
– Battery at rest: ~12.6V. Running: 13.8–14.5V (alternator working).
– If running voltage is low, test voltage regulator or stator. - Fuses and wiring:
– Locate PTO fuse (often 10–20A). Replace if blown; investigate shorts if it blows again.
– Inspect wiring to PTO clutch for chafing, corrosion, or loose connectors. - Safety switches:
– Seat switch: With someone sitting, test continuity; it should close the circuit.
– Brake switch: Often must be engaged for starting but released for blades. Verify function.
– Use a multimeter to confirm switch operation; replace if inconsistent. - PTO switch test:
– Many are 6–8 pin switches. With key ON, test for 12V at output when switched to ON.
– Replace if no output and input has 12V. - PTO clutch test:
– With key ON and PTO switch ON (engine off), measure voltage at clutch leads: should be ~12V.
– Measure clutch coil resistance with power disconnected: typically 2–4 ohms (check manual). Infinite or near-zero ohms indicates a bad coil.
– Inspect air gap between clutch rotor and armature: typically 0.010″–0.020″; adjust via the three set screws if applicable.
Testing
- After repairing/replacing components, engage PTO at full throttle. Blades should engage firmly without slipping.
Method 4: Manual Clutch/Cable and Blade Brake Issues (Walk-Behind and Some Riders) (20–45 minutes)
Diagnosing the Issue
- Blade control lever feels loose or stiff.
- Cable doesn’t pull fully at the clutch arm.
- Blade brake engages constantly, stopping the blade.
Fix Steps
- Inspect blade control cable:
– Check for fraying, kinks, or broken casing.
– Lubricate with light oil if stiff; replace if damaged. - Adjust cable tension:
– Most have an adjuster near the handle. Tighten until the lever fully disengages the blade brake and engages the clutch when pulled. - Check blade brake/clutch assembly:
– Under deck, inspect brake pad and spring. The brake should release fully when the lever is pulled.
– Replace worn brake pad or springs; clean debris binding the linkage. - Verify engine brake/stop mechanism isn’t interfering (common on mower-with-blade-brake clutch systems).
Testing
- Start engine, pull lever to engage. If the blade spins freely and stops quickly when released, it’s working correctly.
Method 5: Spindle/Blade and Mechanical Obstructions (15–30 minutes)
Diagnosing the Issue
- Blades tried to engage and then stalled with a grinding sound.
- Blade spins by hand with resistance or wobble.
Fix Steps
- Remove spark plug wire/negative battery lead.
- Inspect blades:
– Ensure blade bolts are tight to spec (commonly 35–60 ft-lb; check your manual).
– Straighten is not recommended; replace bent blades immediately. - Spindle check:
– Rotate each spindle by hand. Grinding or wobble indicates bad bearings.
– Replace spindle assembly or bearings as required. - Clear debris:
– Remove wrapped line, wire, or rope. Check around blade guards and discharge chute.
Testing
- Reconnect power and test. Persistent grinding means spindle replacement is still needed.
How to Prevent Future Blade Engagement Issues
- Keep the deck clean: Scrape packed grass after each mow to prevent belt slip and brake interference.
- Replace belts proactively: Every 1–2 seasons depending on hours and conditions.
- Maintain battery health: Keep battery fully charged; replace at 3–5 years or when voltage sags.
- Inspect pulleys and springs each month during the season.
- Avoid wet grass mowing—it strains belts and clutches.
- Store indoors to protect electrical connectors and belts from moisture and UV.
Pro Tips
- Always engage blades at full throttle on riding mowers to reduce belt slip and heat buildup.
- Use OEM belts and clutches; off-size belts often slip or jump.
- Label belt routing with a photo before removal to save time during reinstallation.
- If your PTO clutch engages only when cold, it may have excessive air gap—measure and adjust.
- For intermittent engagement, wiggle the PTO switch harness while testing; if blades flicker, replace the switch or repair the connector.
- After replacing a belt, recheck tension and routing after the first mow—new belts can seat in and loosen slightly.
- Keep a spare fuse kit and an inline fuse tester in your garage for quick diagnostics.
When to Call a Professional
- You measure correct voltage at the clutch but blades still won’t engage—clutch likely needs replacement and gap setting.
- Repeated belt failures or belts jumping off suggest misaligned pulleys or bent deck brackets that require precise straightening.
- Spindle bearing replacement on certain models can require a press and specialty tools.
- Electrical troubleshooting beyond basics (charging system, harness shorts) may benefit from a technician’s experience.
Typical costs (varies by model and region):
– Deck belt: $25–$80
– Idler pulley: $15–$50 each
– PTO switch: $15–$40
– PTO clutch: $150–$350
– Spindle assembly: $40–$120
– Diagnostic labor: $60–$120 per hour
Warranty note: If your mower is under warranty, contact the manufacturer or dealer before attempting repairs that could void coverage, especially wiring or clutch replacements.
FAQ
Q: Why do my riding mower blades not engage even though the engine runs fine?
A: Most often it’s a belt issue, a dead/weak battery for the PTO clutch, a faulty PTO switch, or a safety switch (seat/brake). Start by checking battery voltage, fuses, belt condition/routing, and whether you hear the clutch click when engaging.
Q: My blades engage for a second, then stop. What’s wrong?
A: Likely belt slip from wear or contamination, a weak battery causing PTO drop-out, or an overheating clutch with excessive air gap. Check belt condition/tension, battery/charging voltage, and adjust the clutch air gap if adjustable.
Q: The belt keeps jumping off when I engage the blades. How can I fix this?
A: Inspect for bent pulley brackets, worn idler bushings, missing belt guides, and correct belt size. Replace damaged pulleys/springs and verify routing per the deck diagram. Engage at full throttle to reduce shock and slip.
Q: I don’t hear a click from the PTO when I flip the switch. What should I test?
A: Test battery voltage, the PTO fuse, the PTO switch output, and safety switches for continuity. If you have 12V at the clutch connector and still no click, the clutch coil may have failed.
Q: Can a bad spindle stop blades from engaging?
A: Yes. A seized or severely rough spindle can prevent the belt from turning the blades and may cause the belt to smoke or stall the engine when engaged.
Q: Do walk-behind mowers have a PTO clutch?
A: Many use a mechanical blade brake clutch (BBC) or a simple cable-actuated mechanism. If blades won’t engage, inspect the control cable, brake, and clutch linkage for adjustment and wear.
Q: Is it safe to mow if blades engage slowly?
A: No. Slow engagement indicates slipping that overheats belts and clutches, increasing the risk of failure. Resolve the underlying issue before mowing.
Alternative Solutions
Sometimes repair isn’t the best path, especially for older machines with multiple failing components.
| Solution | Pros | Cons | Best For |
|---|---|---|---|
| Replace PTO clutch | Restores reliable engagement; extends mower life | Moderate cost; requires adjustment | Mowers with solid decks but bad clutch |
| Deck belt/pulley refresh kit | Inexpensive, high-impact fix | Requires time and routing accuracy | Belts slipping or jumping off |
| Professional deck rebuild | Comprehensive, aligned components | Higher cost | Older mowers with repeated failures |
| New mower upgrade | Warranty, improved efficiency/safety | Highest cost | Very old units, cracked decks, or multiple electrical faults |
Get Your Lawn Mower Working Again
Following this guide, you now have multiple solutions to fix blades not engaging:
– Quick checks of safety interlocks, belt routing, and debris
– Belt, pulley, spring, and spindle inspections and replacements
– Electrical PTO diagnostics: battery, fuses, switches, wiring, and clutch
– Manual clutch and cable adjustments for walk-behind models
– Preventive maintenance to avoid repeat issues
Don’t let a “lawn mower blades not engaging” problem sideline your weekend. Work through these steps in order, and you’ll restore full cutting power quickly and safely.
Have you fixed your mower using this guide? Share your model and what solved it to help other readers. Found this helpful? Bookmark it for the season and check back for more mower maintenance tips.

