
Your snow blower sputters to life only to die minutes later, or maybe it won’t start at all after sitting all summer. These frustrating symptoms often point to one culprit: a clogged carburetor from old, varnished fuel. Instead of paying $100+ for professional service, you can fix this common winter headache yourself with basic tools and this comprehensive guide to how to clean snow blower carburetor systems properly.
Most snow blower starting issues stem from fuel system problems, and carburetor cleaning solves 90% of these cases. The entire process takes 2-3 hours and costs under $30 in supplies—significantly less than repair shop fees. By following this guide, you’ll restore reliable cold-weather performance and extend your machine’s lifespan for many winters to come.
Safety First: Essential Carburetor Cleaning Precautions
Power Down Completely Before Starting
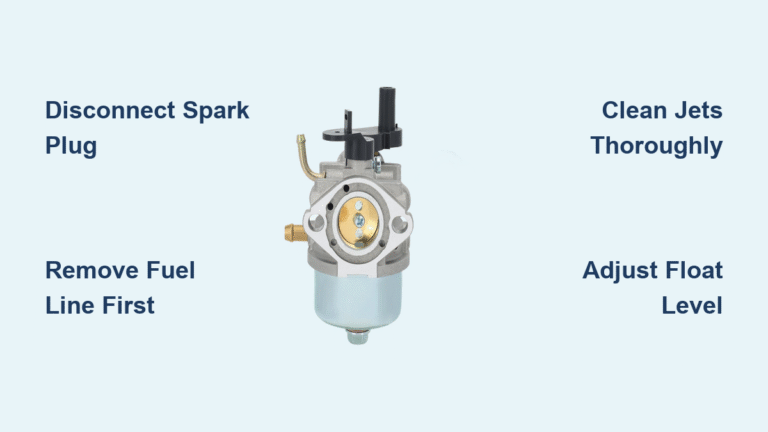
Never skip this critical step. Begin by disconnecting the spark plug wire and letting your snow blower engine cool for at least 30 minutes. Work in a well-ventilated garage with doors open or outdoors—gasoline vapors are highly flammable. Keep a Class B fire extinguisher within arm’s reach and wear safety goggles plus nitrile gloves to protect against chemical splashes and sharp edges.
Gather Required Tools for Successful Cleaning
- 8mm, 10mm, and 12mm socket wrench set
- Flathead and Phillips screwdrivers
- Needle-nose pliers for linkage removal
- Carburetor cleaner spray (small engine formula)
- Compressed air can or air compressor
- Clean shop towels or rags
- Small wire brush for stubborn deposits
- Fuel-safe container for draining residual gas
- Replacement gasket set (highly recommended)
- Magnetic parts tray to prevent lost components
Pro tip: Take multiple photos with your smartphone before disconnecting anything. These visual references prevent costly mistakes during reassembly when you’re unsure where each linkage connects.
Locate Your Snow Blower Carburetor Quickly
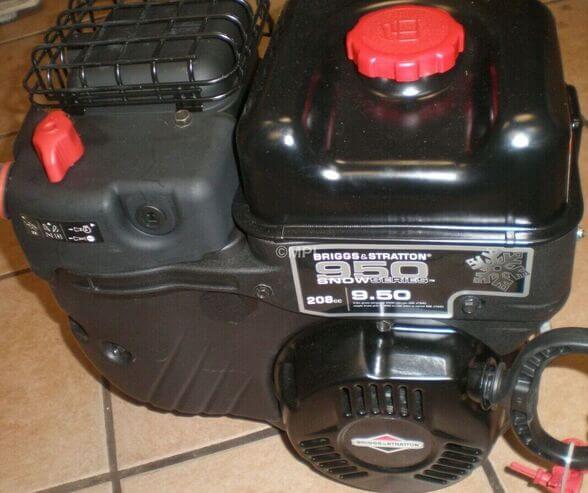
Visual Identification Without Guesswork
Find the rectangular metal component on your engine’s side, opposite the muffler. It connects directly to the air filter housing and features a distinctive fuel bowl underneath. Throttle and choke linkages attach to its side with small pins or clips. The carburetor typically sits behind the fuel tank on most two-stage snow blowers.
Access in Under 10 Minutes
Remove 3-4 engine cover bolts with your socket wrench to expose the engine. Place a fuel container beneath the carburetor before proceeding—you’ll catch residual fuel when disconnecting lines. This area often accumulates snow and debris, so wipe clean with a dry rag before starting disassembly.
Remove Carburetor Safely Without Damage
Fuel System Shutdown Procedure
Turn the fuel valve to “OFF” if your model has one, or completely drain the tank using a siphon pump. Remove the air filter cover and element to expose the carburetor throat. Critical step: Take photos of all linkage connections before disconnecting them—this saves hours of frustration during reassembly.
Disconnect Components in Proper Order
- Fuel line: Pinch the spring clamp with pliers and slide it back 1/2 inch before pulling the line off
- Throttle linkage: Remove the retaining clip or cotter pin while noting spring position
- Choke linkage: Mark its position with tape before disconnecting
- Mounting bolts: Remove 2-3 bolts with your socket wrench, keeping them separate
Warning: Expect 1-2 tablespoons of residual fuel when removing the fuel line. Keep rags ready and work slowly to avoid spills.
Complete Disassembly Guide for Thorough Cleaning
Fuel Bowl Removal Without Losing Parts
Support the bowl with one hand while loosening the 10mm retaining bolt at the bottom. This bolt doubles as the main jet—place it carefully in your parts tray. Drain any remaining fuel into your container before proceeding.
Component Breakdown and Organization
Inside you’ll find critical components that need inspection:
– Float assembly (plastic or brass)
– Float needle valve (rubber-tipped component)
– Main jet (attached to bowl bolt)
– Idle jet (small brass piece near throat)
– Emulsion tube (inside carburetor tower)
Remove the float pin using needle-nose pliers and lift out the float assembly. Note exactly how the needle valve seats—it must align perfectly for proper fuel flow. Label each component as you remove it to avoid confusion later.
Deep Cleaning Process for Maximum Effectiveness
External Degreasing That Actually Works
Spray carburetor cleaner liberally on all external surfaces. Use a wire brush on stubborn deposits around linkage points, then wipe clean with shop towels. Pay special attention to the throttle butterfly valve—this rotating plate must move freely for proper operation.
Internal Passage Cleaning Techniques That Fix Clogs
Critical areas requiring thorough cleaning:
– Main jet passage from bowl side (most common clog point)
– Idle jet and air bleed holes (prone to varnish buildup)
– Emulsion tube cross-drilled holes (tiny passages easily blocked)
– Venturi and throttle bore surfaces
– All visible fuel/air passages
Use the cleaner’s straw attachment to target deep passages. Hold components to light—clear passages show bright light through them. For stubborn varnish, soak parts in cleaner for 30 minutes before scrubbing with a soft brush.
Compressed Air Technique for Guaranteed Clearance
Blow out all passages starting with low air pressure (20 PSI). Increase gradually to 60 PSI while checking for obstructions. Any remaining debris appears as dark spots when held to light. Never use metal wires—they can enlarge critical passages and ruin your carburetor.
Fix Common Problem Areas That Cause Starting Issues

Varnish Removal Method for Old Fuel Deposits
Old gasoline leaves amber varnish deposits that restrict fuel flow. Soak affected parts in carburetor cleaner for 30 minutes, then scrub gently with a soft brush. For severe cases, repeat the process or use an overnight soak in dedicated carburetor solution.
Unclog Jets Properly Without Damaging Components
Never use metal tools on jets. Clean jets with:
– Thin wire from bread ties
– Compressed air blasts
– Carburetor cleaner spray
– Soft-bristled brush
Hold jets to light—you should see a perfect round hole without any obstructions. A clogged main jet typically causes poor performance under load, while idle jet clogs create rough idling.
Float Valve Inspection That Prevents Flooding
Check the needle valve’s rubber tip for grooves or hardening. Replace if damaged—this small $5 part prevents costly flooding issues. Clean the valve seat with cleaner and compressed air until fuel flows smoothly through it.
Reassemble Like a Professional Mechanic
Installation Sequence That Ensures Proper Operation
- Install new gaskets if old ones show compression damage
- Insert main jet into bowl bolt, ensuring proper seating
- Install idle jet in its designated port
- Attach needle valve to float assembly
- Insert float pin through brackets
- Verify float moves freely without binding
Critical Float Adjustment for Reliable Performance
Invert the carburetor—the float should sit parallel to the body. Bend the metal tab carefully if adjustment is needed. Incorrect float level causes either flooding (level too high) or starvation (level too low), both preventing proper operation.
Bowl Reinstallation Without Cross-Threaded Damage
Use a new bowl gasket for proper sealing. Thread the bowl bolt in by hand first to avoid cross-threading, then tighten to 40-60 inch-pounds. Overtightening cracks the bowl or strips threads—use a torque wrench if possible.
Reinstall and Test for Immediate Results
Mounting Procedure That Prevents Vacuum Leaks
Position the carburetor with gasket aligned. Thread mounting bolts finger-tight first, then torque to 7-10 foot-pounds. Uneven tightening causes warping and vacuum leaks that create running problems.
System Reconnection That Works First Time
Reconnect fuel line with a new spring clamp if the old one is stretched. Attach all linkages using your reference photos. Test throttle and choke movement—both should operate smoothly without binding before attempting startup.
First Start After Cleaning: What to Expect
Startup Sequence for Successful Ignition
- Reconnect spark plug wire securely
- Turn fuel valve “ON” if equipped
- Prime engine 3-5 times using primer bulb
- Set full choke position
- Pull starter cord firmly
The engine may take 5-6 pulls to start as the carburetor fills with fuel. Don’t panic if it doesn’t start immediately—this is normal with a freshly cleaned carburetor.
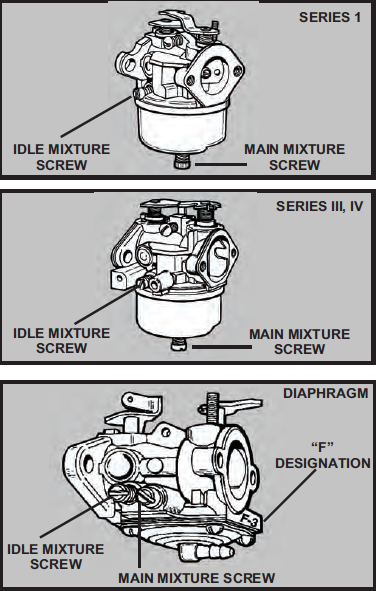
Performance Tuning for Smooth Operation
Let the engine warm for 5 minutes. Adjust idle speed to 1400-1800 RPM as specified in your manual. If equipped, turn the main mixture screw clockwise until the engine stumbles, then back out 1.5 turns for optimal performance.
Test under load: Engage auger and drive system. Smooth response without hesitation indicates successful cleaning. If problems persist, check for vacuum leaks at mounting gasket.
Prevent Future Carburetor Problems With Simple Habits
Fuel System Maintenance That Actually Works
- Add fuel stabilizer at every fill-up during snow season
- Run engine dry before seasonal storage (or use stabilizer)
- Use fresh gasoline (never older than 30 days)
- Replace fuel filter annually
- Store with carburetor side up to prevent oil drainage
Annual Cleaning Schedule for Reliable Starts
Clean the carburetor every 25 hours of operation or once per season. This simple maintenance prevents 90% of snow blower starting issues and ensures reliable winter performance. Keep your cleaning supplies organized for quick access next season.
Key takeaway: Proper carburetor maintenance transforms your snow blower from a frustrating headache into a reliable winter workhorse. By mastering how to clean snow blower carburetor systems yourself, you’ll save money, extend your machine’s lifespan, and enjoy stress-free snow removal for years to come. The next time that cold snap hits, you’ll be ready to tackle the driveway without a single starting issue.


