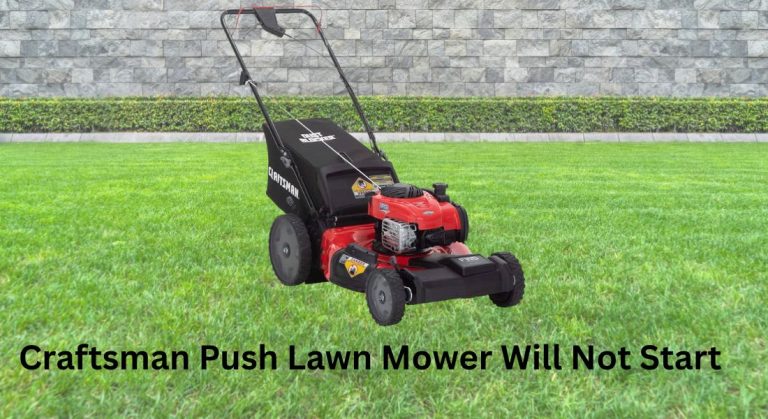
Nothing derails a weekend like a Craftsman push lawn mower that will not start. Whether it cranks but won’t fire, sputters and dies, or sits completely silent, it’s frustrating—especially when the grass is growing fast. Good news: the most common no-start issues have simple fixes. Start with a quick reset: check fresh fuel, reconnect the spark plug wire, prime the carb (if equipped), set the choke to Start/Full, then pull the cord firmly 3–5 times.
In this guide, you’ll learn exactly how to diagnose and fix a Craftsman push mower that won’t start. We’ll cover the most common causes, step-by-step methods from basic to advanced, specific checks for Briggs & Stratton, Honda, and Kohler engines commonly used on Craftsman mowers, and practical maintenance tips to prevent future headaches. By the end, you’ll have your mower running smoothly again.
Common Causes of a Craftsman Push Lawn Mower Not Starting

- Stale or contaminated gasoline (over 30–60 days old)
- Flooded engine from over-priming or repeated pulls
- Spark plug fouled, loose, damaged, or disconnected
- Clogged carburetor jet or stuck float from varnish/debris
- Dirty or oil-soaked air filter restricting airflow
- Fuel line, filter, or tank vent clogged
- Faulty or stuck safety bail/kill switch (Operator Presence Control)
- Sheared flywheel key (after blade hits an object)
- Low engine oil level triggering low-oil shutdown (some engines)
- Choke not engaging or automatic choke linkage stuck
- Water in fuel from ethanol phase separation
- Bad ignition coil (rare but possible)
How to Fix a Craftsman Lawn Mower That Won’t Start

Work from simplest to more advanced. Expect 10–90 minutes depending on the issue.
Method 1: Quick Start Checks (5–10 minutes)
Diagnosing the Issue
If the mower was running fine last time and now won’t start, a loose plug wire, stale fuel, or flooding is most likely.
Fix Steps
1) Safety first
– Remove the spark plug wire when inspecting the blade area or carburetor.
– Work outdoors. Keep away from open flame.
2) Verify fresh fuel
– Gas older than 60 days (30 days in hot climates) can cause hard starts.
– If unsure, drain the tank and refill with fresh, ethanol-free fuel if available (E0 or E10, 87–89 octane).
3) Check the spark plug wire
– Ensure the boot is firmly snapped onto the plug.
– Inspect the wire for cracks.
4) Set starting controls
– For manual choke: Move lever to Choke/Start. Prime 2–3 pushes if primer bulb is present (don’t over-prime).
– For auto-choke models: No priming needed; just pull.
– Hold the bail/handle bar (Operator Presence Control) fully against the handle.
5) Attempt start
– Pull the recoil starter 3–5 times. If it sputters and dies, try half-choke and pull again.
– If the engine smells like fuel and won’t fire, it may be flooded.
6) Clear a flooded engine
– Move choke to Run (open), hold bail, and pull 5–7 times with throttle open. Or remove the plug, pull 3–4 times to clear, let air out for 10 minutes, reinstall, and retry.
Testing
- If the mower starts and stays running, you’re done.
- If it starts and dies when the choke opens, go to Method 3 (carburetor/air).
Method 2: Spark Plug Inspection and Spark Test (10–15 minutes)
Diagnosing the Issue
No spark or a weak spark prevents ignition.
Fix Steps
1) Remove the spark plug
– Use a 13/16″ or 5/8″ spark plug socket.
– Inspect tip: dry black soot = rich/fouled; oily = oil fouling; white = lean; wet gas = flooding.
2) Clean or replace
– Clean light soot with a wire brush and brake cleaner.
– Gap to spec: common specs are 0.020″–0.030″ (check engine decal/manual). Briggs & Stratton often 0.030″, Honda GCV 0.028″–0.031″.
– If electrode is worn/rounded or cracked insulator, replace. Typical plugs: RJ19LM/J19LM (Briggs flathead), BPR6ES (Honda GCV), consult model.
3) Spark test
– Reattach the plug wire to the removed plug. Ground plug threads to bare metal on the engine. Pull starter and look for a strong blue spark.
– No spark? Try a known-good plug. Still no spark? The bail/kill switch or ignition coil may be at fault (see Method 5).
4) Reinstall and tighten snugly (about 12–15 ft-lb if torquing) and refit the boot.
Testing
- Try starting again. If no-go but you have spark, fuel/air is likely the issue.
Method 3: Air Filter and Choke Check (5–10 minutes)
Diagnosing the Issue
Dirty or soaked filters starve the engine of air; a stuck choke can over/under-enrich the mix.
Fix Steps
1) Inspect the air filter
– Remove the cover. Paper filter: tap gently to remove dust; replace if clogged or wet. Foam pre-filter: wash with warm soapy water, dry completely, lightly oil and squeeze out excess, or replace.
– Craftsman often uses Briggs/Honda style filters—match part number for replacement.
2) Check choke operation
– Move choke lever (or move throttle to start position) and watch the choke plate at the carb mouth. It should close for starting and open after a few seconds of running. Auto-choke linkages should move freely.
– Free sticky linkages with carb-safe cleaner; ensure the thermostatic spring (auto-choke) is connected.
3) Reassemble and ensure the air box seals properly.
Testing
- Attempt start. If it starts only on choke and dies off-choke, the carb main jet is likely clogged—go to Method 4.
Method 4: Fuel Delivery and Carburetor Cleaning (20–60 minutes)
Diagnosing the Issue
Ethanol fuel can leave varnish that clogs jets and sticks the float/needle. Symptoms: starts on starting fluid or prime, then dies; needs full choke to run; surging.
Fix Steps
1) Confirm fuel flow
– With the fuel cap loosened, pull the fuel line off the carb inlet (use pliers on spring clamp). Fuel should flow steadily. If not:
– Check for clogged fuel filter (inline on some models) and replace if restricted.
– Ensure the fuel cap vent isn’t blocked (try with cap loosened).
– Inspect fuel line for kinks or collapse; replace if soft/cracked.
2) Clean the carb without removal (quick try)
– Spray carb cleaner into the carb throat and through the main jet access (on some bowl carbs the jet is in the bolt). Prime and try to start. If it runs better briefly, the carb is dirty—proceed to bowl cleaning.
3) Bowl carb disassembly (common on Briggs & Stratton, Kohler)
– Turn fuel valve off or clamp the fuel line. Remove the bowl nut (often 1/2″). Catch fuel. Remove bowl and float pin. Inspect needle and seat.
– Clean the bowl, nut, and especially the tiny orifice in the bowl nut (this is often the main jet). Use carb cleaner and a soft wire (not a drill bit) to clear passages.
– Spray carb cleaner through the main nozzle and idle circuit; follow with compressed air if available.
– Reassemble with new bowl gasket/O-ring if swollen. Open fuel, check for leaks.
4) Honda GCV/GXV style carbs
– Remove the float bowl and emulsion tube (push down and out through venturi or from bottom depending on model). Clean all holes in the emulsion tube. Ensure the pilot jet (accessed via a small plastic cap on some models) is clear.
5) Prime bulb carbs (Briggs Pulsa-Jet/Quantum)
– Remove the jet behind the primer bulb or the welch plug as needed; clean ports carefully. Replace primer bulb if cracked.
6) Optional: Use a fuel system cleaner
– Add a measured dose of carburetor cleaner (e.g., Gumout Regane, Sea Foam) to fresh fuel. This can help dissolve minor varnish.
Testing
- Reconnect fuel line, prime per instructions, start. It may take a few pulls to refill the bowl. If it runs steady off-choke, you’ve fixed it.
Method 5: Safety Bail/Kill Switch and Ignition Coil Check (10–30 minutes)
Diagnosing the Issue
If you have no spark and the plug is good, the kill circuit or coil may be grounding the spark.
Fix Steps
1) Verify bail cable travel
– The bail/Operator Presence Control must fully release the brake/kill switch. If the cable is stretched, adjust at the handle bracket so the lever pulls the cable completely.
2) Inspect the kill wire
– Trace the thin wire from the coil to the brake/kill switch. If it’s pinched or shorted to ground, you’ll have no spark. Repair insulation as needed.
3) Coil test
– Remove the blower shroud to access the coil (two bolts usually). Set coil air gap to 0.010″–0.014″ with a business card against the flywheel magnets.
– If still no spark with the kill wire disconnected from the coil (isolating it), replace the coil/armature with a compatible part.
Testing
- Reassemble, check spark again, and attempt start.
Method 6: Mechanical Checks: Blade, Flywheel Key, Compression, Oil (15–45 minutes)
Diagnosing the Issue
After hitting a rock or root, the engine may lose timing due to a sheared flywheel key. Low oil can trigger shutdown on some models.
Fix Steps
1) Blade and brake
– Ensure the blade isn’t jammed with debris. A stuck blade prevents starting. Disconnect spark plug first.
2) Oil level
– Check dipstick. Fill to the proper mark with SAE 30 (warm weather) or 10W-30 per engine manual. Some engines won’t start or will stall with low oil.
3) Flywheel key inspection
– Remove the recoil shroud and flywheel nut. Use a puller or careful upward pressure to free the flywheel. Inspect the soft metal key that aligns the flywheel. If it’s sheared/offset, replace with the correct key and torque the flywheel nut to spec (often 55–65 ft-lb for small engines; check your engine manual).
4) Compression feel
– With plug removed, pull the cord. You should feel strong resistance. If it spins too easily, suspect valve issues or cylinder wear; professional service may be needed.
Testing
- Reassemble and try starting. Correct timing from a new key typically restores normal starting.
Prevention and Maintenance Tips
- Use fresh fuel and stabilize: Add fuel stabilizer at purchase; don’t store ethanol gas longer than 30–60 days.
- Run dry for storage: At season end, run the carb dry or drain the bowl.
- Replace air filter annually or every 25 hours; spark plug every 1–2 seasons.
- Change oil every 25 hours or annually; more often in dusty conditions.
- Keep blade sharp and balanced to reduce vibration and starter strain.
- Clean debris from the deck and cooling fins to prevent overheating.
- Store indoors and keep the fuel cap vent clean.
Pro Tips
- Prime smartly: Over-priming floods the engine. Two to three presses are enough on warm days; one or none on hot starts.
- Test with starting fluid: A short spray into the carb throat can help isolate fuel vs. spark problems. If it fires briefly, fuel delivery/carb is the issue.
- Vent check: If it stalls after a minute and the fuel cap “hisses” when opened, the cap vent is blocked. Replace the cap.
- Inline fuel shutoff: Add a small shutoff valve to make storage and service cleaner and reduce varnish in the carb.
- Ethanol caution: If using E10, pick Top Tier fuel and rotate stock quickly. Consider ethanol-free (E0) for small engines where available.
- Keep a tune-up kit: Air filter, spark plug, carb bowl gasket, and pull-cord—cheap insurance that saves a trip.
- Cable lubrication: A few drops of light oil on throttle/choke/bail cables keeps linkages moving and starting consistent.
When to Call a Professional
- Repeated no-spark after coil and switch checks
- Severe carburetor corrosion or stripped screws/jets
- Sheared/broken flywheel or crankshaft damage after a blade impact
- Low compression or suspected valve issues (burnt valve, stuck valve)
- Fuel contamination throughout the system (water/gelled varnish)
What to look for in a service provider:
– Small engine certification or strong reviews for Craftsman/Briggs/Honda service
– Upfront diagnostic fee and written estimate
– Warranty on parts and labor (30–90 days is common)
Typical costs (varies by region):
– Tune-up (plug, filter, oil, sharpening): $70–$140
– Carburetor clean/rebuild: $80–$150
– Carburetor replacement: $60–$180 parts + labor
– Ignition coil: $30–$80 parts + labor
– Flywheel key/timing repair: $60–$120
Warranty considerations:
– Craftsman mowers often carry a limited warranty; using non-approved parts or neglect (dirty air filter, old fuel) may void coverage. Keep receipts and maintenance records.
FAQs
Q: My Craftsman mower only runs on choke. What does that mean?
A: This usually indicates a lean condition from a clogged main jet or emulsion tube. Clean the carburetor bowl, jet, and passages, or replace the carb if corrosion is severe.
Q: It started, then died after 30 seconds. Why?
A: Commonly a blocked fuel cap vent or restricted fuel flow. Loosen the cap and try again. If it keeps running with the cap loose, replace the cap. Also check the fuel line and filter.
Q: The pull cord is hard to pull. What should I check?
A: Disconnect the spark plug and inspect for a jammed blade or debris. Also check for hydro-lock from a flooded cylinder; remove the plug and pull to clear. A stuck brake or misadjusted bail cable can also cause drag.
Q: I have spark and fuel, but it still won’t start. Could timing be off?
A: Yes. If the blade hit something, the flywheel key may have sheared. Inspect and replace the key to restore ignition timing.
Q: Which spark plug does my Craftsman mower use?
A: It depends on the engine. Many Briggs use RJ19LM/J19LM or equivalent; Honda GCV160 commonly uses NGK BPR6ES. Verify by engine model number on the shroud.
Q: Can I use starting fluid?
A: Yes, sparingly. Spray a 1–2 second burst into the carb throat and pull. If it fires then dies, focus on the carb and fuel delivery. Avoid heavy use to protect cylinder walls.
Q: How often should I change the oil?
A: After the first 5 hours on a new engine, then every 25 hours or annually. Use SAE 30 in warm weather or 10W-30 for wider temperature ranges, per your engine manual.
Alternative Solutions
If repeated carburetor issues persist due to ethanol and storage, consider:
– Switching to ethanol-free pre-mixed small engine fuel (alkylate fuel). It stores longer, runs cleaner.
– Replacing the carburetor rather than rebuilding when corrosion is advanced.
| Solution | Pros | Cons | Best For |
|---|---|---|---|
| Rebuild/Clean Carb | Low cost, reuse existing parts | Time-consuming; may recur with corrosion | Light varnish, DIYers |
| Replace Carb | Quick, reliable fix | Higher parts cost | Heavily corroded carbs |
| Ethanol-Free Fuel | Long shelf life, smoother starts | Higher price, availability varies | Seasonal users |
| Inline Shutoff + Stabilizer | Prevents varnish, easy storage | Minor install effort | Anyone storing >30 days |
Get Your Craftsman Mower Working Again
By following this guide, you now have multiple proven ways to fix a Craftsman push lawn mower that will not start:
– Quick-start basics: fresh fuel, correct choke, and spark plug checks
– Air and fuel fixes: filter replacement, carb cleaning, and fuel flow diagnosis
– Electrical and safety checks: bail/kill switch, coil, and spark testing
– Mechanical solutions: blade jams, oil level, and flywheel key timing
Start with the quick checks—they solve most no-start issues in minutes. If needed, step through the carb and ignition methods to restore reliable starting. With fresh fuel, a clean carb, and a healthy spark, your Craftsman will be back to cutting like it should.
Have you fixed your Craftsman mower with one of these methods? Share what worked in the comments to help other readers. Found this helpful? Bookmark it for your next tune-up. Don’t let a stubborn start ruin your weekend—get that lawn back in shape today.


