Your lawn mower sputters to life in spring only to die mid-job, leaving you stranded with half-cut grass under the blazing sun. This frustrating scene plays out in millions of yards every year—all because of neglected maintenance. A comprehensive lawn mower maintenance checklist isn’t just a chore list; it’s your insurance against breakdowns, poor cutting performance, and premature mower death. By dedicating 20 minutes monthly to these critical tasks, you’ll extend your mower’s lifespan by decades while achieving that coveted clean, healthy cut. This actionable guide delivers the exact maintenance steps professionals use, tailored for both walk-behind and riding models. You’ll discover precisely when to sharpen blades, how to prevent ethanol fuel damage, and the safety checks that could save your fingers.
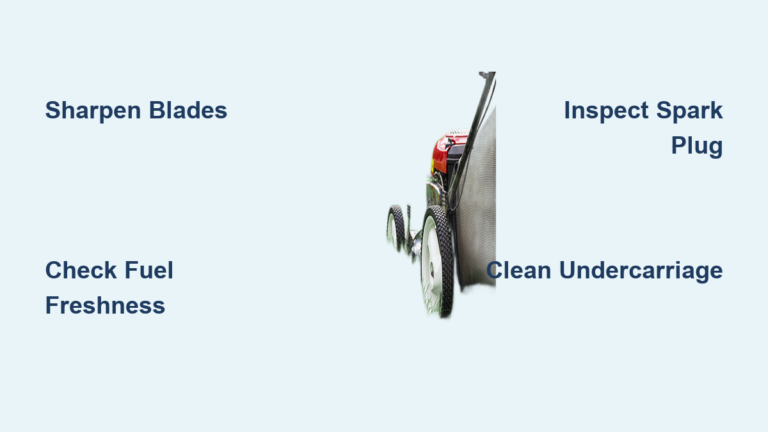
Pre-Mow Routine: The 30-Second Checklist That Prevents Disasters
Never fire up your mower without completing this lightning-fast safety and performance scan. These checks take less than half a minute but prevent the most common mid-mow failures that leave homeowners stranded with half-cut lawns.
How to Spot Critical Issues Before Starting Your Engine
Walk around your mower and inspect these three vital areas while the machine sits level on the ground. First, examine the undercarriage for grass clippings caked thicker than a quarter—this restricts airflow and causes overheating. Use a putty knife to scrape buildup while wearing cut-resistant gloves. Second, verify fuel freshness by sniffing for sour odors; ethanol-blended gasoline degrades in 30 days, causing hard starts. Third, check oil levels with the dipstick—low oil starves the engine while overfilling causes smoking. If you spot debris, stale fuel, or low oil, address it immediately before starting. Skipping this step risks hydraulic leaks, fuel system clogs, and catastrophic engine seizure.
Why Your Spark Plug Wire Must Disconnect First
Always disconnect the spark plug wire before any inspection—this simple action prevents accidental startups that cause 70% of blade-related injuries. Grip the rubber boot firmly and pull straight off (never yank the wire). For electric mowers, remove the battery pack first. This step is non-negotiable even for quick under-deck scrapes. I’ve seen too many DIYers lose fingertips because they “just wanted to knock off one piece of grass.” Treat this like buckling your seatbelt—no exceptions.
Blade Maintenance: Stop Tearing Grass With These Critical Steps

Dull blades don’t cut—they rip grass fibers, creating brown, disease-prone tips that invite fungal infections. Your blade needs sharpening every 20-25 mowing hours, but most homeowners wait until performance visibly declines. Don’t gamble with your lawn’s health.
Exact Blade Sharpening Protocol for Perfect Cuts
Follow this sequence to maintain factory-sharp edges: First, tilt your mower with the air filter pointing skyward to prevent oil leaks. Secure the blade with a 2×4 block against the deck, then remove the mounting bolt (typically 15/16″ or 1-1/8″). Maintain the original 30-40 degree bevel using a file—never grind from both sides. Test sharpness by slicing newspaper; clean cuts mean success. Crucially, balance the blade using a $5 balancer tool. An unbalanced blade causes violent shaking that damages bearings and spindles. Reinstall with the “This Side Down” marking facing the deck, torquing to 40-60 ft-lbs. Under-tightening risks blade detachment; over-tightening strips threads.
When Replacement Beats Sharpening: 3 Non-Negotiable Triggers
Stop sharpening immediately if you spot cracks, nicks deeper than 1/8 inch, or uncorrectable imbalance. Blades with stress fractures can shatter at 3,000 RPM, sending metal shards through your garage wall. Replace blades showing uneven wear patterns—even slight bends cause vibration that destroys spindle bearings. Pro tip: Mark sharpening dates on your blade with a permanent marker to track usage.
Fuel System Fixes That Prevent 80% of Starting Failures
Ethanol-blended gasoline is public enemy number one for small engines. It absorbs moisture, varnishes carburetors, and clogs fuel lines—causing 4 of 5 “hard start” complaints I see in repair shops. Don’t become another statistic.
Ethanol Damage Prevention Tactics That Actually Work
Use ethanol-free fuel whenever possible, or add stabilizer to every tank (not just storage). For active-season use, never let fuel sit longer than 30 days—stale gas gums up carburetor jets. If you must store ethanol fuel, fill the tank completely to minimize condensation, then run the engine for 5 minutes to circulate stabilizer. Monthly, inspect fuel lines for cracks showing white “stress fractures”—these leak vapors and invite fires. Replace rubber lines every two years; ethanol eats through standard hoses. For winter storage, drain the carburetor bowl using its drain screw—this prevents varnish buildup better than tank draining alone.
Spring Tune-Up: 7 Steps to Guaranteed First-Pull Starts

Spring maintenance determines your entire season’s reliability. Skip these steps and you’ll battle hard starts, poor cuts, and mid-job failures all summer. This sequence takes 45 minutes but pays massive dividends.
Oil Change Protocol for Maximum Engine Protection
Run your mower for 2 minutes to warm the oil—this carries suspended particles out during draining. Position a pan under the drain plug, remove it, and let oil flow completely (typically 20-24 oz). Replace with SAE 30 for warm climates or 5W-30 for variable temperatures. Overfilling causes smoking; underfilling risks seizure. Check levels with the dipstick on level ground. Pro tip: Save old oil in marked containers for proper disposal—never dump it.
Air Filter and Spark Plug Critical Checks
Tap paper air filters against a workbench to dislodge debris—replace if dark gray. For foam filters, wash in soapy water, dry thoroughly, and apply light filter oil. A clogged filter chokes engine performance. Remove the spark plug and verify the gap is 0.024-0.030 inches using a feeler gauge. Replace annually if the insulator shows black carbon or white deposits. A fouled plug causes misfires that strain the entire system.
Winterization: 6 Steps to Store Your Mower Safely
Improper storage causes 90% of next-season failures. Follow this protocol before storing your mower for winter to ensure reliable starts come spring.
Fuel System Winter Prep That Prevents Carburetor Nightmares
Add fuel stabilizer to a full tank and run the engine for 5 minutes to circulate treated fuel through the carburetor. Alternatively, completely drain the tank AND carburetor bowl—partial draining leaves varnish-causing residues. Never store with stale fuel; ethanol separates and corrodes metal components. For riding mowers, remove the battery, charge to 80%, and store in a climate-controlled space. Check voltage monthly and recharge if below 12.4V.
Undercarriage Deep Clean to Stop Rust and Clogs
Remove all grass buildup from the deck using a putty knife—caked-on debris traps moisture that rusts metal. Spray the underside with silicone lubricant to repel moisture. For belt-driven mowers, release tension to prevent cracking. Store in a dry, rodent-free area; mice nest in warm engines and chew wiring. Cover only after the mower cools completely—trapped heat creates condensation.
Critical Safety Checks Before Every Single Mow
Your life depends on these three tests. Skipping them risks severe injury or death from runaway mowers and blade contact.
Blade Stop Test: The 3-Second Lifesaver
With the engine running, release the blade control lever. The blade must stop within 3 seconds. If it spins longer, worn brakes or frayed cables are failing you. Never mow with delayed stopping—this is the #1 cause of foot injuries. For riding mowers, verify the seat sensor kills the engine when you stand up.
Belt and Hardware Inspection Points
Check drive belts for glazing (shiny spots) or cracks longer than 1/4 inch—these can snap mid-mow. Tighten all deck and wheel bolts to spec; vibration loosens them over time. Inspect tires for embedded debris like nails that cause slow leaks. Pro tip: Keep a torque wrench in your shed—overtightened bolts shear off during operation.
Troubleshooting Emergency Fixes for Mid-Mow Failures
When your mower dies mid-job, these quick diagnostics get you back on track without a service call.
Hard Starting? Check These 3 Components First
If your mower won’t start, immediately inspect the spark plug for wetness (flooded engine) or carbon buildup. Tap the air filter to dislodge debris—if it starts, replace the filter. Verify fresh fuel by smelling for sourness; old gas won’t ignite. For electric mowers, check battery terminals for corrosion and ensure full charge.
Poor Cutting? Blade Balance Is Usually the Culprit
Uneven grass heights signal blade imbalance. Remove the blade and test on a balancer—weight must distribute evenly. Bent blades cause scalping on one side; replace immediately. Also check tire pressure (12-15 PSI); low tires tilt the deck and create uneven cuts.
Final Note: Your Mower’s Lifespan Starts With This Checklist
Consistent lawn mower maintenance checklist adherence transforms your machine from a seasonal headache into a decades-long workhorse. By sharpening blades every 20 hours, using ethanol-free fuel, and completing seasonal tune-ups, you’ll avoid 95% of common failures. Start a maintenance log tracking oil changes, blade sharpenings, and fuel treatments—this simple habit doubles mower longevity. Remember: safety checks prevent tragedies, while fuel discipline stops 80% of engine failures. Your perfect-cut lawn begins with a perfectly maintained mower. Store your completed checklist where you’ll see it—on the garage wall or mower handle—and make these rituals as automatic as mowing itself. In just minutes per month, you’ve secured reliable performance that keeps your lawn championship-ready year after year.