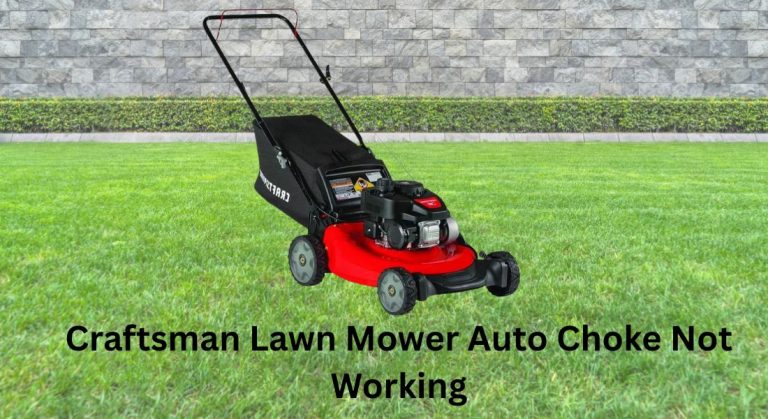
Is your Craftsman lawn mower hard to start, surging, or stalling unless you feather the throttle? If your Craftsman lawn mower auto choke is not working, the quickest fix is often cleaning or replacing the choke linkage spring and verifying the choke plate closes fully when cold. A 10-minute inspection of the choke plate, linkages, and thermostat/bi-metal spring can get many mowers roaring back to life.
In this complete guide, you’ll learn every common cause of auto choke problems on Craftsman walk-behind and riding mowers (Briggs & Stratton, Kohler, or Craftsman-branded engines), how to diagnose each one, and step-by-step fixes from simple cleaning to replacing the auto choke thermostat. By the end, you’ll know exactly how to get consistent cold starts, smooth idle, and full power—without guessing.
Common Causes of Craftsman Lawn Mower Auto Choke Not Working

- Sticking choke plate due to carbon or varnish deposits
- Bent, disconnected, or corroded choke linkage
- Broken or weak choke return spring
- Faulty auto choke thermostat/bi-metal spring (doesn’t move with heat)
- Malfunctioning intake heat source or heat shield missing (for heat-assisted chokes)
- Carburetor contamination causing air/fuel imbalance
- Air leaks at carburetor or intake gasket
- Choke pull-off diaphragm damaged (on models with vacuum choke pull-off)
- Damaged primer bulb assembly on hybrid systems (primer + auto choke)
- Incorrect storage leading to varnish and gummed components
How to Fix a Craftsman Auto Choke That’s Not Working

Before you start: Work with a cool engine. Turn the fuel valve off (if equipped), disconnect the spark plug boot, and work in a ventilated area. Keep a fire extinguisher nearby.
Method 1: Quick Inspection and Cleaning (Fastest Fix)
Diagnosing the Issue
- Symptoms:
- Hard cold start, but starts when warm: choke not closing fully.
- Starts, then stalls or surges: choke not opening after start.
- Requires manual choking (blocking air intake) to start: choke plate stuck open.
- Quick test:
1. With the engine cold, remove the air filter cover and filter.
2. Look into the carburetor throat. The choke plate should be fully closed when cold.
3. Gently nudge the choke plate. It should move freely and spring back.
Fix Steps
- Clean choke plate and shaft:
– Spray carburetor cleaner at the choke plate edges and the shaft pivot.
– Operate the choke by hand while spraying to dissolve varnish.
– Use a soft brush or cotton swab to remove residue. Avoid bending the plate. - Inspect linkage and springs:
– Verify the thin metal link between thermostat and choke lever is connected.
– Ensure the return spring has tension and isn’t stretched or broken.
– Lightly lube pivot points with a dry PTFE spray (not oil that collects dirt). - Reinstall the air filter temporarily for testing.
Testing
- With the engine still cold, confirm the choke plate is fully closed.
- Start the engine:
- Within 30–90 seconds, the choke should gradually open as the engine warms.
- If it starts and then stalls, slightly open the choke by hand. If it recovers, the auto-open function is failing—move to Method 3.
Time: 10–20 minutes
Method 2: Verify Choke Plate Operation Cold vs. Warm
Diagnosing the Issue
- You need to confirm if the thermostat/bi-metal spring is moving the choke.
Fix Steps
- Cold position check:
– With the engine overnight cold, the choke plate should be closed. If partially open, adjust the linkage or spring tension (if adjustable). - Warm position check:
– Start the engine and let it run 2–5 minutes.
– Watch the choke plate: it should gradually open fully.
– If it doesn’t open, lightly touch the thermostat housing—it should feel warm. If warm but no movement, the thermostat/bi-metal spring likely failed.
Testing
- After shutdown and cool down, the choke should return to closed. If not, linkage/spring is sticking or misrouted.
Time: 10 minutes
Method 3: Replace Auto Choke Thermostat/Bi-Metal Spring (Heat Choke)
Many Craftsman mowers with Briggs & Stratton or Kohler engines use a thermostat/bi-metal spring assembly that pushes/pulls the choke based on heat from the engine block or muffler.
Diagnosing the Issue
- Cold choke closes fine, but never opens while running.
- Thermostat housing warms up, but the choke lever doesn’t move.
- The spring feels loose, deformed, or broken.
Fix Steps
- Identify your engine model:
– Locate the engine code sticker on the blower housing or valve cover (e.g., Briggs & Stratton 128M02, 09P702, or Kohler XT675).
– Search for “auto choke thermostat kit” or “choke thermostat” using your engine model to get the correct part. - Access the thermostat:
– Remove air filter cover and filter.
– Remove the air filter base (typically 3–5 screws).
– Locate the thermostat housing near the muffler or intake—usually a small round or rectangular module connected to a choke lever by a thin link. - Remove linkage:
– Take a photo for reference.
– Carefully unhook the linkage rod and spring from the choke lever. - Replace the thermostat:
– Remove mounting screws and thermostat.
– Install the new thermostat in the same orientation. Use the supplied gasket if included.
– Reconnect linkage and spring exactly as before. Ensure free movement. - Reassemble:
– Reinstall air filter base, filter, and cover.
Testing
- Confirm choke is closed when cold.
- Start cold and watch for gradual opening in 1–3 minutes.
- Fine-tune linkage (if adjustable) to ensure full close at cold and full open when warm.
Time: 30–60 minutes
Method 4: Fix Linkage, Springs, and Choke Pull-Off (Vacuum-Assisted Systems)
Some engines use a vacuum choke pull-off diaphragm to open the choke slightly after startup to prevent flooding.
Diagnosing the Issue
- Engine starts, then floods or stalls rich (black smoke) soon after start.
- Choke plate remains fully closed even after engine fires.
- You find a small vacuum hose from carb/intake to a round diaphragm near the choke.
Fix Steps
- Inspect vacuum hose:
– Look for cracks, splits, loose fits. Replace with the same diameter fuel/vacuum line. - Test diaphragm:
– Remove the hose and apply gentle suction with a handheld vacuum pump or by mouth (avoid fuel ingestion).
– The diaphragm rod should move and hold. If it won’t hold vacuum, replace the pull-off unit. - Replace damaged springs:
– If the choke return or pull-off spring is weak/broken, replace with the correct part number.
Testing
- Cold start: choke should close, then crack open slightly a second after ignition to stabilize idle.
Time: 20–40 minutes
Method 5: Address Fuel System and Air Leaks
A misbehaving choke can be a symptom of fuel delivery or air leaks.
Diagnosing the Issue
- Surging at idle, hunting, or only runs on partial choke: often a lean condition from clogged jets or air leaks.
- Backfiring or white spark plug: lean mixture.
- Wet or black spark plug: rich mixture (stuck closed choke).
Fix Steps
- Clean carburetor main jet and idle circuit:
– Shut fuel off, remove carburetor bowl (10mm or 1/2″ bolt).
– Remove the main jet/emulsion tube and clean with carb cleaner and a soft wire or bristle.
– Clean the idle jet (tiny passage usually on the carb body).
– Replace bowl gasket if swollen or cracked. - Check carburetor mounting gasket:
– Spray carb cleaner around carb base and intake while running.
– If RPM changes, replace the intake or carburetor gasket to stop leaks. - Replace air filter:
– A clogged air filter enriches the mixture and confuses choke behavior. Install a new OEM or equivalent filter.
Testing
- Engine should idle smoothly with the choke fully open after warm-up. No surging under load.
Time: 30–60 minutes
Method 6: Seasonal and Storage Reset
Diagnosing the Issue
- After winter storage, mower won’t start without manual choking or sputters for minutes.
Fix Steps
- Drain old fuel and refill with fresh, top-tier gasoline (up to E10), and add fuel stabilizer.
- Clean or replace spark plug (gap typically 0.020–0.030 in; check engine manual).
- Inspect and clean the muffler heat shield and thermostat area for debris—auto choke relies on heat transfer.
- Verify governor and throttle linkages aren’t bound by dried grass or mouse nests.
Testing
- Cold start should be quick; choke opens within a few minutes of running.
Time: 20–30 minutes
Prevention Tips and Maintenance Advice
- Use fresh fuel and stabilizer for off-season storage to prevent varnish.
- Clean the air filter every 10 hours; replace every season or as needed.
- Annually remove the air filter base and clean choke pivots and thermostat area.
- Keep the muffler heat shield intact and debris-free—missing shields reduce heat transfer to the thermostat.
- Avoid heavy oiling of choke pivots; use dry lube to prevent dust buildup.
- Inspect linkage and springs every 25 hours; replace stretched or rusty parts.
- Store the mower indoors and cover the engine to minimize moisture and corrosion.
Pro Tips
- Photograph linkage routing before disassembly; small bends matter.
- If the choke plate flops loosely, the shaft bore may be worn—replace the carburetor assembly.
- A quick diagnostic: briefly cover the intake with your hand. If the engine improves, it’s lean—look for carb clogs or air leaks.
- On Briggs “ReadyStart” engines, the choke should be fully closed below roughly 50–60°F at first pull. If not, adjust linkage or replace thermostat.
- Don’t bend the choke plate. It can cause binding and uneven sealing, leading to rich starts or no-start.
- Replace the spark plug if you see persistent black soot; a fouled plug can mimic choke issues.
- If surging remains after choke fixes, install a new carburetor—many are inexpensive and faster than deep rebuilds.
When to Call a Professional
- You’ve cleaned, adjusted, and replaced basic parts, but the choke still won’t open/close properly.
- The engine only runs on half choke even with a clean carb and no air leaks.
- You suspect internal governor issues or need carburetor rebushing.
- There’s visible fuel leaking from the carb or strong fuel smell in the oil (fuel dilution).
What to look for in a service provider:
– Small engine certification or factory-authorized service for Briggs & Stratton/Kohler.
– Clear labor rates and parts estimate upfront.
– Warranty on work (30–90 days common).
Typical costs:
– Carb clean/adjust: $60–$120
– Thermostat/auto choke assembly replacement: $40–$90 parts + $60–$120 labor
– New carburetor install and tune: $90–$180 total
Warranty considerations:
– If your mower is under manufacturer warranty, do not modify linkages or drill jets. Document issues and use an authorized shop to avoid voiding coverage.
FAQ
Q: How do I know if my Craftsman auto choke is stuck closed?
A: With the engine cold, remove the air filter and look at the choke plate—it should be closed. Start the engine and watch: if it remains closed after 1–3 minutes, or you see black smoke and rich running, it’s stuck closed. Clean the plate/shaft and check the pull-off diaphragm or thermostat.
Q: Can I disable the auto choke and install a manual choke?
A: It’s technically possible but not recommended. It can affect emissions compliance, starting reliability, and warranty. Fixing the auto choke (thermostat, linkage, springs) is usually cheaper and more reliable.
Q: My mower only runs on choke—what’s wrong?
A: That’s typically a lean condition from a clogged main jet, fouled emulsion tube, or intake air leak. Clean the carb, replace gaskets, and ensure the choke fully opens after warm-up.
Q: What’s the difference between ReadyStart and auto choke?
A: Briggs & Stratton ReadyStart is a brand name for an automatic choke and fuel-enrichment system that adjusts for temperature without a primer or throttle control. It’s essentially an auto choke with additional sensors/logic on some models.
Q: Does temperature affect auto choke performance?
A: Yes. In colder weather, the choke should stay closed longer to enrich the mixture. If it opens too soon in cold conditions, the thermostat may be weak or misadjusted.
Q: How often should I replace the auto choke thermostat?
A: There’s no fixed interval, but they often last several seasons. Replace when it fails to move with heat despite clean linkage and proper heat source.
Q: Is carb cleaner safe for the choke and thermostat?
A: Yes, for metal parts. Avoid soaking rubber diaphragms and plastic housings. Wipe excess and use a dry PTFE lubricant on pivots after cleaning.
Alternative Solutions
If repeated cleaning and part replacement don’t resolve issues, consider these alternatives:
| Solution | Pros | Cons | Best For |
|---|---|---|---|
| Replace complete carburetor assembly | Fast, restores like-new performance | Slightly higher cost than rebuild | Persistent surging/lean issues |
| OEM thermostat and linkage kit | Exact fit, correct calibration | Requires disassembly | Choke movement failure |
| Professional tune-up | Thorough diagnostics | Labor cost | Time-poor users or complex issues |
Get Your Craftsman Mower Starting Smoothly Again
To fix a Craftsman lawn mower auto choke not working, start with the basics:
– Clean the choke plate, shaft, and linkage
– Verify spring tension and proper routing
– Test cold-close and warm-open operation
– Replace the auto choke thermostat or pull-off diaphragm if there’s no movement with heat
– Eliminate carb clogs and intake air leaks
Follow these steps in order and you’ll restore reliable cold starts, stable idle, and full power in under an hour. Still stuck? Share your model number and symptoms in the comments for tailored advice, and bookmark this guide for your next tune-up. With a clean and correctly working auto choke, your Craftsman mower will be ready for the season every time.


