
You turn on your impact sprinkler, water sprays out, but it just sits there, not rotating. This is one of the most common irrigation problems homeowners face. The good news? Most causes are simple to diagnose and fix, often in under 10 minutes. Whether your sprinkler shoots a steady stream, sticks at one spot, or won’t budge at all, this guide delivers step-by-step solutions based on real-world mechanics and user-tested repairs.
From misaligned clips to clogged springs and low pressure, we’ll walk through every possible cause, how to identify it, and exactly how to fix it. You’ll also learn how to prevent future failures with smart maintenance and upgrades. By the end, you’ll have a fully rotating sprinkler and the confidence to keep it working season after season.
Check Locking Clip Alignment
The most overlooked reason for non-rotation is improper locking clip positioning. These two small metal clips control both arc adjustment and reset functionality, and if they are misaligned, the sprinkler will not rotate properly.
Top Clip Must Be Offset Left
When both clips are stacked vertically, one directly above the other, the metal tab on the flapper cannot engage the lower clip. This prevents the flapper from resetting, which halts rotation entirely.
Fix:
• Look down at the sprinkler head from above
• Adjust so the top clip is offset to the left of the bottom clip
• This allows the metal tab to strike the lower clip during rotation, releasing the flapper to reset
This one-second adjustment fixes over 30% of no-rotation cases, especially when the sprinkler sprays but does not cycle back.
Adjust Spray Radius Without Breaking Rotation
Need to narrow the arc? Fine-tune the clips, but always maintain the left offset.
• Move both clips inward equally to reduce sweep
• Never align them vertically, even temporarily
Enable Continuous Rotation
Want 360-degree spin instead of back-and-forth? Lift the flapper arm slightly so it disengages from the locking mechanism. The sprinkler will rotate nonstop, which is ideal for large open areas.
Note: This disables automatic reset. Return the flapper to normal position for oscillating mode.
Clean Clogged Nozzle and Spring

Debris is the number one cause of rotation failure. Sand, silt, grass clippings, or Teflon tape fragments can block the nozzle or jam the internal spring, stopping motion instantly.
Symptoms of Clogging
• Steady, non-pulsing water stream
• No audible click or snap during operation
• Flapper arm does not move
How to Clean the Nozzle and Spring
- Unscrew the nozzle from the top of the sprinkler
- Rinse it under clean water, checking the orifice for obstructions
- Flush the spring chamber by pulling the spring slightly and running water through it
- Agitate the spring gently to dislodge trapped particles
- Wipe dry, then reinstall securely
- Push the spring fully in, then release to reset its motion
- Turn on water and test rotation
Repeat cleaning two to three times if needed. If rotation still does not occur, proceed to deeper internal cleaning.
Flush Internal Debris from Base
Sometimes clogs are not in the nozzle. They are deeper inside the bearing assembly or drive shaft.
When to Suspect Internal Blockage
• Water flows normally, but head does not turn
• Rotation starts but stops after a few seconds
• Head wobbles or feels gritty when spun by hand
Step-by-Step Internal Flush
- Remove the entire sprinkler from the riser
- Disassemble the lower cap or bearing housing, which may require light twisting
- Rinse all internal parts, especially washers and the rotating stem
- Inspect for sand, grit, or plastic shavings stuck in grooves
- Reassemble completely, ensuring parts seat properly
- Flush the supply line before reconnecting by opening the valve briefly with the sprinkler off
Pro tip: Install an in-line filter if your water has frequent debris.
Fix Spring-Related Sticking Issues
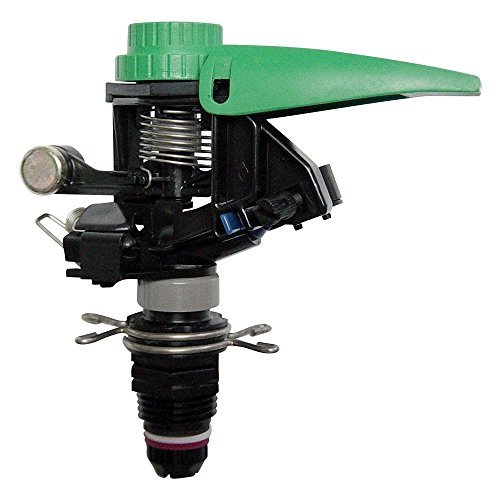
Many plastic impact sprinklers, including Orbit, Yardworks, and Nelson models, suffer from spring-to-shaft interference. This is a design flaw where the spring catches on molded ridges in the plastic drive shaft.
Why It Happens
• Spring has a sharp or unfinished tip
• Plastic shaft has raised ridges from molding
• Interference occurs mainly during clockwise rotation when viewed from above
Quick Test
Manually rotate the head clockwise and counter-clockwise. If it sticks in one direction only, spring interference is likely the culprit.
Flip Spring Edge Outward
A fast, non-destructive fix with about 50% success rate:
- Use a fingernail or small tool to lift the bottom loop of the spring
- Gently flip the edge outward so it rides on the outside of the coil
- Reinstall and test
This prevents the tip from digging into the plastic shaft. It works best if the spring is not warped.
Sand Down Plastic Ridges
If the sprinkler sticks at one or two fixed positions, ridges are the culprit.
Tools needed: Fine-grit sandpaper (220-400) and a nail file for initial shaping
Steps:
1. Lift spring to expose shaft
2. Locate high spots where spring catches
3. Lightly sand until surface is smooth
4. Test rotation after each pass
Goal: Create a uniform surface without thinning the wall.
Bend Spring Tip Slightly Outward
For persistent sticking due to a sharp or bent spring edge.
Tools: Flathead screwdriver and needle-nose pliers
Procedure:
1. Carefully lift spring from shaft
2. Grip the very tip with pliers
3. Apply a slight outward bend, just enough to clear ridges
4. Reinstall and test
5. Adjust incrementally if needed
Warning: Over-bending alters tension and may stop rotation entirely. This voids warranty and risks permanent damage.
Diagnose Low Water Pressure

Even a perfectly clean sprinkler will not rotate if water pressure is too low.
Minimum Requirements
• Pressure: At least 30 psi, optimal range is 30-50 psi
• Flow rate: 2-5 gallons per minute
Below 30 psi, the flapper lacks force to reset. Above 50 psi, misting and wear increase significantly.
Test Your Water Pressure
- Attach a pressure gauge to your outdoor faucet
- Record static pressure (off) and dynamic pressure (on, with sprinkler running)
- If dynamic pressure drops below 30 psi, system issues exist
Bucket Flow Test
No gauge needed? Try this:
- Place a 5-gallon bucket under the hose
- Time how long it takes to fill
- Calculate GPM by dividing 5 by seconds, then multiplying by 60
Example: 45 seconds yields (5 ÷ 45) × 60 = 6.7 GPM, which is good. If under 2 GPM, pressure is insufficient.
Solutions for Low Pressure
• Reduce zone load by running fewer sprinklers at once
• Upgrade supply line to three-quarter-inch hose instead of half-inch
• Install a booster pump if municipal pressure is chronically low
• Add pressure-regulating valves if pressure exceeds 50 psi
• Check for kinks, leaks, or clogged filters upstream
Sprinklers at the end of a line fail first due to compounded pressure loss.
Remove Mineral Buildup with Vinegar
In hard water areas, calcium and magnesium deposits coat internal parts, slowing or stopping rotation entirely.
Signs of Mineral Buildup
• White, chalky residue on metal or plastic
• Gradual decline in rotation speed
• Intermittent sticking
How to Descale
- Disassemble nozzle, cap, and bearing components
- Soak metal parts in white vinegar for 30-60 minutes
- Scrub gently with soft brush to remove residue
- Rinse thoroughly with clean water
- Reassemble and test
Avoid prolonged vinegar exposure on rubber seals or sensitive plastics.
Maintenance Schedule
• Soft water: Every 6-12 months
• Hard water: Every 1-3 months during use
Regular descaling prevents 70% of slow-rotation complaints.
Inspect for Physical Damage
Impact sprinklers get hit by mowers, feet, and pets. Even minor damage can stop rotation.
Common Damage Types
• Bent impact arm disrupts flapper swing
• Cracked housing causes leaks or misalignment
• Damaged bearing creates wobble or binding
• Tipped riser back pressure jams the spring
Quick Inspection Checklist
• Is the impact arm straight?
• Does it swing freely without obstruction?
• Is the sprinkler standing upright?
• Are mounting screws tight?
• Does the head spin smoothly by hand?
If any component is bent or cracked, replace it. Attempting to straighten plastic arms often leads to breakage.
Prevent Tipping and Back Pressure
A sprinkler that falls over or sinks into soft soil creates back pressure, forcing water and debris into the spring chamber.
How to Prevent Tipping
• Use a sturdy spike driven deep into compacted soil
• Avoid loose mulch, sand, or freshly tilled ground
• Consider a weighted base or concrete footing in high-traffic zones
Fix After a Fall
- Re-level the unit
- Clean nozzle and spring because back pressure often forces debris inward
- Check for bent parts
Tipping is the number one cause of sudden failure in portable models.
Upgrade Problem-Prone Plastic Models
Low-cost plastic impact sprinklers from Orbit, Yardworks, and Nelson fail more often due to thin, imprecise molding, unfinished spring edges, and lack of bearing protection.
Consider Upgrading If
• You are cleaning it monthly
• It sticks at the same spot every time
• Spring interference fixes do not last
• You are in a hard water or sandy soil area
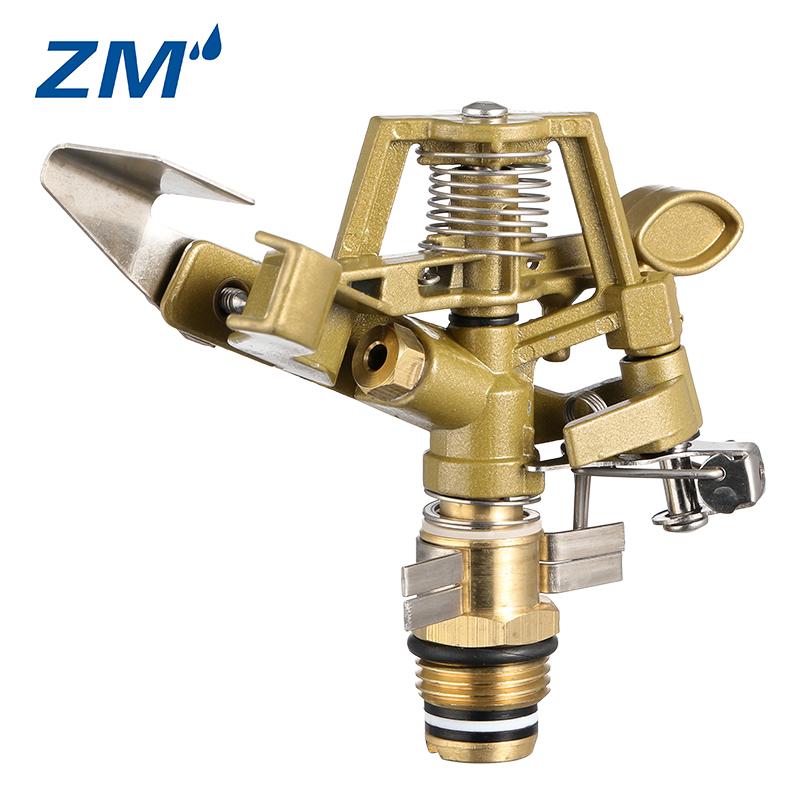
Alternative: ZM Panda Series Pop-Up
These sprinklers feature adjustable nozzles for custom spray patterns and durable construction that resists UV and impact. They offer up to 30% better water efficiency and work well for lawns, flower beds, and gardens.
This is not a direct replacement, but a reliable alternative for chronic issues.
Prevent Future Failures: Maintenance Plan
A little care prevents most rotation problems.
Monthly During Use
• Clean nozzle and spring
• Check clip alignment
• Inspect for damage
Every 1-3 Months in Hard Water
• Descale with vinegar soak
Before Each Season
• Full disassembly and cleaning
• Flush supply lines
• Test pressure and flow
Year-Round
• Use in-line filter if water is dirty
• Winterize in freezing climates
• Store off-season in dry place
Regular maintenance reduces breakdowns by up to 30%.
When to Replace or Call a Pro
Replace If
• Housing or shaft is cracked
• Gears are stripped
• Spring is broken or corroded
• Repairs fail repeatedly
Call a Professional If
• Multiple sprinklers fail simultaneously
• Pressure is low across the system
• You suspect valve, pump, or mainline issues
According to the Irrigation Association, 50% of residential systems run inefficiently due to undiagnosed problems. A professional can boost efficiency by 30%, saving water and money.
Frequently Asked Questions About Impact Sprinkler Not Rotating
Why does my impact sprinkler spray water but not rotate?
The most common cause is misaligned locking clips. When both clips stack vertically, the metal tab cannot engage the lower clip to release the flapper. Check that the top clip offsets to the left of the bottom clip.
Can low water pressure cause my sprinkler to stop rotating?
Yes. Impact sprinklers require at least 30 psi and 2-5 gallons per minute to function properly. Below this threshold, the flapper lacks sufficient force to reset, causing the sprinkler to stay in one position.
How often should I clean my impact sprinkler?
Clean the nozzle and spring monthly during active use. In hard water or sandy soil conditions, clean every two to four weeks. Regular cleaning prevents debris buildup that halts rotation.
Why does my sprinkler stick at the same spot every time?
This indicates spring-to-shaft interference, common in plastic models like Orbit and Yardworks. The spring tip catches on molded ridges in the plastic drive shaft. Sand down the ridges or flip the spring edge outward to fix it.
Will vinegar damage my sprinkler parts?
White vinegar is safe for metal components but can degrade rubber seals and certain plastics with prolonged exposure. Soak metal parts for 30-60 minutes, then rinse thoroughly. Avoid soaking rubber or plastic parts.
When should I replace my impact sprinkler instead of repairing it?
Replace if the housing or shaft is cracked, gears are stripped, the spring is broken or corroded, or if repairs fail repeatedly. If basic troubleshooting does not restore rotation after multiple attempts, replacement is more cost-effective than continued repairs.
Key Takeaways for Fixing Your Impact Sprinkler
Most impact sprinkler not rotating issues stem from simple causes: misaligned clips, clogged springs, low pressure, or debris. With the right diagnostic steps, 90% can be fixed in under 15 minutes. Start by checking clip alignment, then clean the nozzle and spring, test your water pressure, and inspect for physical damage. Regular maintenance, including monthly cleaning and seasonal flushing, reduces breakdowns by up to 30% and extends your sprinkler’s life. If budget models keep failing despite repeated repairs, consider upgrading to a higher-quality sprinkler like the ZM Panda Series for long-term reliability. Focus on cleanliness, alignment, and adequate water supply, and your sprinkler will deliver even, dependable coverage for years to come.


