
Your PowerSmart snow blower sits silent while snow piles up on your driveway. You pull the cord repeatedly, but the engine won’t catch. Before you waste money on service calls or face shoveling your entire driveway by hand, understand this: most PowerSmart snow blower won’t start issues stem from just five easily fixable problems that take less than 15 minutes to diagnose. This guide cuts through the frustration with specific, model-tested solutions that get your machine running before the next snowfall.
When your PowerSmart snow blower won’t start, panic sets in—especially when temperatures drop and snow continues accumulating. The good news? Nearly 80% of no-start conditions come from fuel system failures, ignition problems, or simple operational mistakes you can fix yourself. In this guide, you’ll discover exactly which components to check first, in the precise order that saves you time and prevents unnecessary part replacements.
Safety Prep: Critical Steps Before Troubleshooting
Never skip these safety steps—they prevent serious injury while diagnosing your PowerSmart snow blower won’t start issue. Park your machine on level ground, turn off the engine (if running), and immediately disconnect the spark plug wire. Allow the engine to cool completely if you’ve been repeatedly attempting to start it. Put on safety glasses and work gloves before handling fuel components or engine parts.
Fuel System Failures: The #1 Cause of PowerSmart Snow Blower Won’t Start
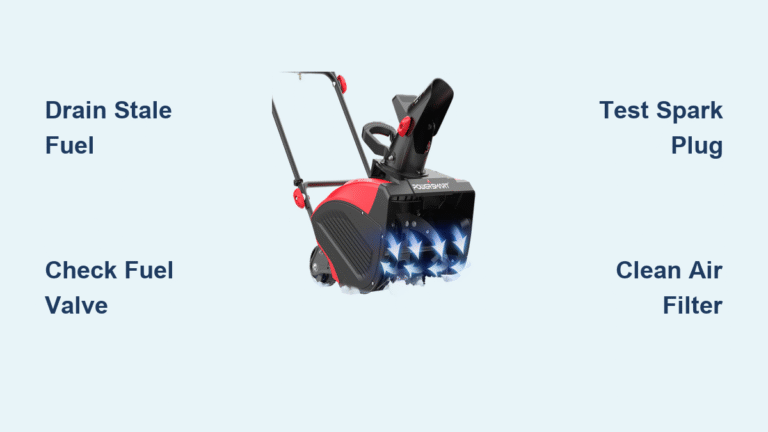
Drain Bad Fuel Immediately
Stale fuel is the top reason your PowerSmart snow blower won’t start. PowerSmart engines require fresh 87-octane gasoline with no more than 10% ethanol. Fuel older than 30 days breaks down into varnish that clogs carburetor jets within hours of operation. Quick test: Smell your fuel—if it smells like paint thinner instead of fresh gasoline, drain it completely using the fuel shut-off valve and carburetor drain bolt. Refill with fresh fuel treated with stabilizer.
Verify Fuel Valve Position
That small lever beneath your fuel tank controls everything. Many “PowerSmart snow blower won’t start” calls trace back to this simple oversight. The valve must align parallel with the fuel line direction for “OPEN” position. Perpendicular means “CLOSED”—a common mistake after winter storage. Follow the fuel line from tank to carburetor to confirm proper positioning.
Replace Clogged Fuel Filter
Your in-line fuel filter should appear clean and white. Brown, black, or debris-filled filters choke fuel flow like a blocked artery. Replace annually or whenever contamination appears. Cracked or kinked fuel lines need immediate replacement with fuel-resistant tubing—standard garden hose material will disintegrate in gasoline.
Ignition System Problems: Why Your PowerSmart Has No Spark
Test Your Spark Plug First
Remove the spark plug with your 5/8″ wrench. A healthy plug shows light brown deposits on the electrode. Replace immediately if: electrodes are black/sooty (rich mixture), white/blistered (lean mixture), or heavily worn. Use a feeler gauge to set the precise 0.030 inch gap required for PowerSmart engines. Install hand-tight plus 1/2-3/4 turn with your wrench—overtightening cracks the ceramic insulator.
Perform the Critical Spark Test
With the plug removed, ground it against the engine block. Pull the starter cord while watching the electrode. Strong blue spark = good ignition system. Weak yellow or no spark points to ignition coil failure. Test with a known-good plug to isolate whether it’s the plug or coil causing your PowerSmart snow blower won’t start condition.
Check Ignition Switch Connections
PowerSmart electric start models need the key turned fully clockwise—partial engagement prevents starting. Inspect all visible wiring for corrosion, especially at the ignition coil and kill switch terminals. Clean connections with electrical contact cleaner and ensure tight terminal fits. Loose connections create intermittent “won’t start” issues that disappear when jiggled.
Carburetor and Air Flow Blockages: Hidden Starting Killers
Choke Position Critical for Cold Starts
PowerSmart uses manual choke systems with specific cold-start sequences. Full choke (lever up/closed) for initial starting attempts. After 3-5 pulls, move to 1/2 position. Once running, gradually open choke completely. Wrong positioning causes flooding (too much fuel) or lean starting (too little fuel)—both prevent your PowerSmart snow blower from starting.
Clean Your Air Filter Properly
Remove the air filter cover and inspect the foam element. Washable filters need warm soapy water, thorough rinsing, and fresh oil saturation before reinstalling. Replace paper filters showing excessive dirt. Severe blockage creates overly rich mixtures that prevent starting—this happens more often than users realize.
Carburetor Cleaning Basics That Work
Remove the carburetor bowl nut (usually 1/2 inch) and drain fuel. Clean the main jet with carburetor cleaner and thin wire, focusing on emulsion tube holes. Reassemble with new bowl gasket if damaged. Start with idle mixture screw 1.5 turns out from seated position as your baseline adjustment.
Model-Specific Starting Procedures That Actually Work
PowerSmart DB2401 Quick Start Sequence
- Turn fuel valve ON
- Set choke to FULL position
- Push primer bulb 3 times (cold engine only)
- Pull starter cord briskly
- Gradually open choke as engine warms
PSS2240-X Starting Sequence
- Confirm auger lever in DISENGAGE position
- Set throttle to FAST
- Pull slowly until resistance, then pull briskly
- After 5 failed pulls, wait 10 minutes to prevent flooding
DB7126 Electric Start Priority
- Connect heavy-duty extension cord to starter
- Hold key in START maximum 5 seconds
- Wait 15 seconds between attempts
- After 3 tries, switch to recoil start
Symptom-Based Quick Fixes for Common Problems
Engine Turns Over But Won’t Start
- Bad fuel or low fuel → Drain and refill immediately
- Fouled spark plug → Replace with correct NGK BPMR6A or equivalent
- Choke stuck closed → Clean and lubricate choke mechanism
- Clogged air filter → Clean or replace before next attempt
- Water in fuel → Drain entire system and replace with fresh fuel
No Response When Pulling Cord
- Flywheel brake engaged → Hold handle down firmly
- Drive control engaged → Disengage completely before starting
- Low oil sensor triggered → Check and fill oil to proper level
- Sheared flywheel key → Replace key if timing is off
- Recoil starter broken → Inspect for broken spring or frayed rope
Maintenance Schedule for Reliable Starting
Weekly During Snow Season
- Check oil level before each use
- Inspect fuel for water or debris
- Clear snow and ice from controls
Monthly Checks
- Clean or replace air filter
- Inspect spark plug condition
- Replace fuel older than 30 days
Seasonal Overhaul
- Complete carburetor cleaning
- Replace fuel filter and spark plug
- Change oil and filter
- Inspect recoil starter rope
- Add stabilizer and run engine 5 minutes
When to Call Professionals
Seek authorized PowerSmart service for:
– Compression below 60 PSI (requires leak-down test)
– Valve train noise or excessive clearance
– Crankcase seal leakage
– Suspected internal engine damage
– Electrical diagnosis beyond basic testing
PowerSmart covers starting components under 2-year residential warranty or 90-day commercial warranty. Key warranty parts include ignition coil, starter motor, and recoil starter assembly. Contact PowerSmart customer service at 1-800-791-9458 for parts and warranty claims. Always keep your proof of purchase handy.
Pro tip: When your PowerSmart snow blower won’t start, begin with fuel and spark—these two systems cause 75% of all starting failures. Drain old fuel first, then test for spark. You’ll solve most no-start conditions within 30 minutes using this systematic approach. Never attempt more than three consecutive starting pulls without a 10-minute cooling period—overheating the starter coil creates secondary problems that complicate diagnosis.


