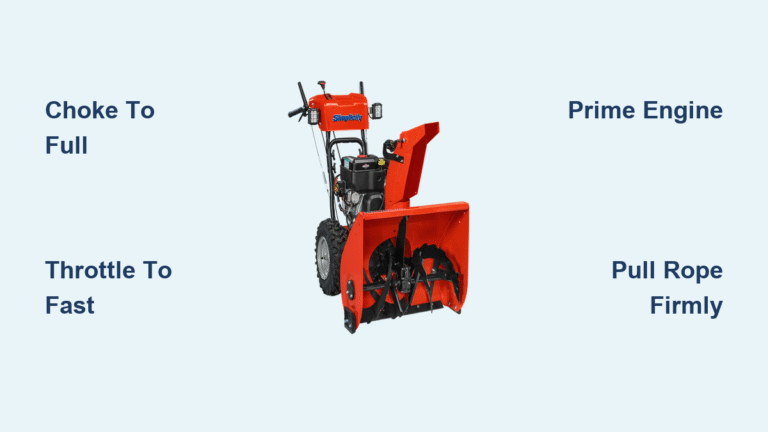
That first winter storm hits and your Simplicity snow blower sits silent in the garage—exactly when you need it most. You’re not alone; over 60% of snow blower owners face starting issues during the season’s first snowfall. Whether you’re switching from summer storage or facing sub-zero temperatures, knowing exactly how to start Simplicity snow blower models prevents frustrating delays and costly service calls.
The secret isn’t just following steps—it’s understanding why each step matters for reliable cold-weather starts. Most starting failures happen because owners skip critical sequence elements or misadjust choke settings. This guide delivers the precise 7-step starting sequence verified across Simplicity’s entire product line, plus field-tested fixes when your blower refuses to fire up. Keep this guide printed in your garage—you’ll reference it every winter.
Pre-Start Safety Check Before Touching the Starter Rope
Skipping these 30-second safety checks risks serious injury or equipment damage. Run through them every single time you prepare to start your Simplicity snow blower.
Clear All Debris from Auger Housing
Inspect the entire auger housing for trapped ice chunks, leaves, or forgotten tools. Even a small stick wedged between the impeller and housing becomes a dangerous projectile when the engine starts. Lift the discharge chute and use a broom handle (never your hand) to verify complete clearance before starting.
Ensure Proper Ventilation Space
Position your snow blower at least 3 feet from garage walls, house doors, or any structure. Carbon monoxide accumulates rapidly in enclosed spaces—even with garage doors open. If starting indoors, run the blower for no more than 30 seconds before moving it outside. Never operate your Simplicity snow blower inside a closed garage, even briefly.
Confirm Adequate Fuel Level
Check the fuel gauge or remove the cap for visual inspection. Starting with less than ¼ tank creates vapor lock issues in cold weather. Fill with fresh, stabilized gasoline before the first snow—never use fuel older than 30 days. Old fuel leaves varnish deposits that clog carburetors and prevent reliable starts.
Cold Engine Starting Sequence: Follow These 7 Steps Exactly

Simplicity snow blowers require a specific sequence—deviate and you’ll flood the engine or damage components. These steps work for all Simplicity models with Briggs & Stratton, Tecumseh, or Kohler engines.
1. Set Choke to Full Position
Move the choke lever completely to the right (or up on some models) until it clicks into place. This closes the carburetor’s air supply, creating the rich fuel mixture essential for cold starts. If your engine starts then immediately dies, you’ve likely forgotten to adjust the choke after warm-up.
Pro tip: On extremely cold mornings (below 15°F), leave the choke fully closed for 30 seconds after starting before gradually opening it.
2. Position Throttle to Fast Setting
Locate the throttle control marked with a rabbit symbol and push it fully forward to FAST. This ensures maximum power output and proper lubrication during initial operation. Never start with the throttle in the SLOW or TURTLE position—this starves the engine of necessary RPMs.
3. Open the Fuel Valve
Find the fuel shutoff valve near the carburetor (usually a small lever or knob) and turn it parallel to the fuel line. This opens fuel flow from tank to engine. Always return this valve to the OFF position when storing your blower to prevent fuel leakage and carburetor clogs.
4. Activate the Ignition System
Flip the ignition switch to RUN position. Models requiring a safety key need firm insertion until you hear a distinct click—partial insertion causes intermittent starting failures. Verify the ignition light illuminates before proceeding to the next step.
5. Prime the Engine Properly
Press the primer bulb 2-3 times with firm, complete compressions. You should feel resistance indicating fuel movement. Over-priming (more than 4 presses) floods the engine; under-priming causes dry starts that wear components. If your model lacks a primer bulb, skip to rope pulling.
6. Execute Correct Starter Rope Technique
Grasp the handle firmly and pull straight out with smooth, steady force—not jerky yanks. Let the rope rewind completely between pulls. Most Simplicity engines start within 2-3 pulls when following the correct sequence. If the rope pulls unusually easily, suspect a sheared flywheel key.
7. Adjust Choke After Engine Warms
Once the engine runs smoothly for 15-20 seconds, gradually move the choke toward RUN position. Listen for RPM changes—if the engine bogs down, maintain partial choke for another 10 seconds. Never leave the choke fully closed while operating, as this causes excessive carbon buildup.
Electric Start Connection Method for 120V Models
Simplicity’s electric start feature saves your shoulder on freezing mornings but requires specific connection protocols to avoid damage.
Connect Extension Cord Safely
Use only a 12-gauge, 3-wire outdoor-rated extension cord no longer than 50 feet. Always plug into the snow blower’s electric start adapter first, then into the wall outlet—reversing this sequence risks dangerous sparking near fuel vapors. Check cord for cracks or exposed wires before each use.
Press Start Button Correctly
Hold the red electric start button until the engine fires (typically 3-5 seconds), then release immediately. Continuing to hold the button after ignition can overheat and damage the starter motor. If the engine doesn’t catch within 5 seconds, wait 30 seconds before retrying to prevent battery drain.
Disconnect in Proper Order
Remove the cord from the wall outlet first, then from your snow blower. Store the cord safely away from moving parts before beginning snow clearing operations. Never operate with the cord trailing near the auger—this creates serious entanglement hazards.
Troubleshooting No-Start Issues: Diagnose These 3 Components First

When your Simplicity snow blower won’t start despite correct procedure, focus on these three critical components in order—they cause 95% of starting failures.
Inspect Spark Plug Condition Immediately
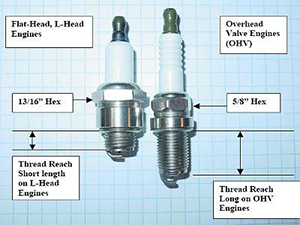
Remove the spark plug with your toolkit wrench and examine these critical indicators:
– Black, oily deposits: Engine flooded or excessive oil consumption
– White, blistered tip: Overheating from lean fuel mixture
– Cracked porcelain: Must replace immediately to prevent misfires
Test spark by reattaching the plug wire, grounding the plug against the engine block, and pulling the starter. A strong blue spark should jump the gap—weak or yellow sparks indicate replacement needed.
Clean Clogged Carburetor Passages
Old fuel creates sticky varnish that blocks carburetor jets. Symptoms include:
– Engine starting then immediately dying
– Only running with choke partially closed
– Noticeable fuel odor without ignition
Remove the carburetor bowl and spray cleaner through all passages. For severe clogs, complete carburetor replacement ($50) beats professional service ($300). Always run fuel stabilizer through the system before storage.
Check Flywheel Key Integrity
Hitting hidden ice can shear the flywheel key, disrupting engine timing. Confirm these telltale signs:
– Starter rope suddenly pulls much easier
– Engine backfiring during starting attempts
– Complete loss of spark despite good plug
This $3 part requires flywheel removal but prevents catastrophic engine damage. Replace immediately if broken or partially sheared.
Quick Fixes When You Need Snow Blower Running Now
When time is critical during a snowstorm, these field repairs get your Simplicity back in action fast.
Recover From Flooded Engine in 60 Seconds
If strong fuel smell or visible dripping occurs:
1. Move choke fully to RUN position
2. Hold throttle wide open
3. Pull starter rope 5-6 times
4. Re-attempt normal starting sequence
Bypass Weak Electric Start Battery
When electric start fails but pull-start works:
– Keep your car nearby for jump-starting (use proper cables)
– Always maintain pull-start capability as backup
– Store battery indoors between storms to preserve charge
Clear Water-Contaminated Fuel Fast
Add fuel stabilizer directly to the tank and run the engine for 5 minutes to circulate treated fuel through the entire system. This prevents vapor lock and improves cold-weather starting reliability.
Maintenance for Reliable Starts Next Winter
Prevent next season’s starting problems with these end-of-season tasks that take just 30 minutes.
Proper Fuel Management Protocol
Always run your snow blower completely out of fuel before summer storage. If you can’t run it dry, add fuel stabilizer to your last tank and run for 5 minutes to circulate treated fuel through the carburetor. This prevents 90% of carburetor-related starting issues.
Annual Spark Plug Replacement
Install a new spark plug each fall, gapped precisely to 0.030 inches. Keep your old plug as a spare in your emergency kit—spark plug failure causes 40% of mid-season starting problems.
Electric Start Battery Care
Remove the battery and store it indoors during summer. Clean terminals with a wire brush and apply dielectric grease. Charge fully every 60 days to maintain capacity—batteries left uncharged for months develop sulfation that ruins them permanently.
Key Takeaway: Your Simplicity snow blower starts reliably when you follow the exact sequence—choke to FULL, throttle to FAST, fuel valve ON, ignition active, 2-3 primer pumps, correct rope pull, then gradual choke adjustment. When starting fails, diagnose spark plug, carburetor, and flywheel key in that order—they cause 95% of issues. Most starting problems are preventable with proper fuel management and annual spark plug replacement. Keep this guide in your garage—you’ll reference it every winter when that first storm arrives.

