
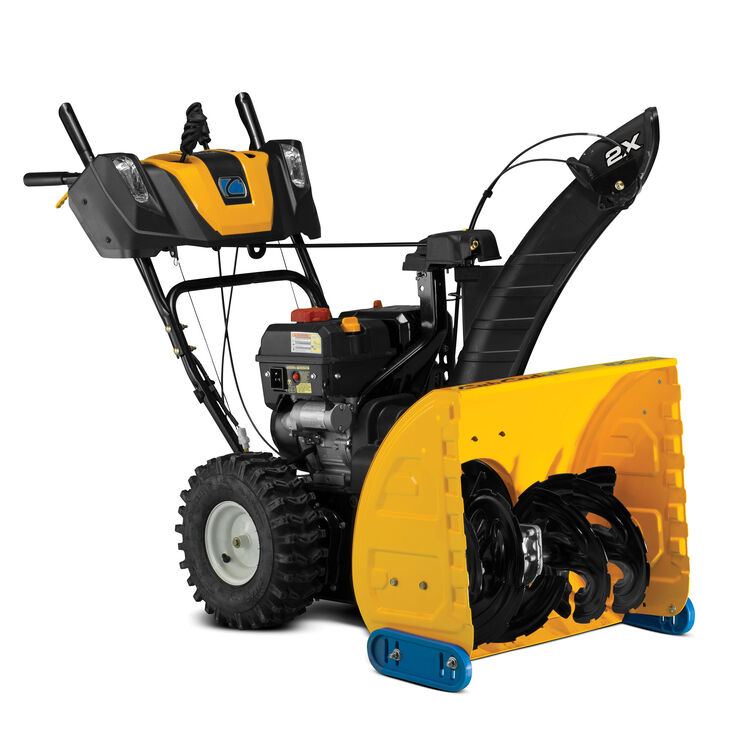
Your Cub Cadet snow blower refuses to start precisely when you need it most—during a fresh snowfall. You pull the cord or turn the key, only to hear a frustrating click or sluggish cranking. This sudden failure leaves you facing a mounting snowdrift with a machine that should be clearing your driveway. When your Cub Cadet snow blower not starting becomes a reality, understanding the core culprits saves precious time and prevents dangerous exposure to freezing conditions.
Most starting failures stem from three critical systems: fuel delivery, electrical power, or ignition spark. Unlike complex engine repairs, these issues often require simple, tool-free checks you can complete in under five minutes. By methodically verifying each component, you’ll transform a stalled machine into a reliable snow-clearing solution before your driveway disappears under fresh powder.
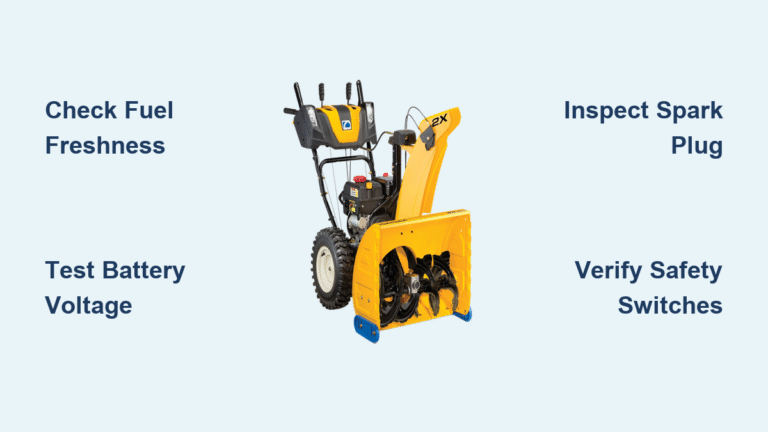
Immediate Checks Before Grabbing Tools
Skip the toolbox and run these critical verifications first—these solve most Cub Cadet snow blower not starting cases without tools:
Fuel System Verification
Confirm your tank has at least 1/4 fresh fuel—not old gasoline that’s lost volatility after 30 days. Check that the fuel shutoff valve is fully open and inspect for water contamination or cloudy fuel indicating phase separation from ethanol blends. Stale or contaminated fuel blocks proper combustion.
Electrical Quick Test
Turn the key to “ON” and verify headlights illuminate (if equipped). Listen for the distinct click of the fuel solenoid engaging. Physically wiggle battery terminals—loose connections often cause silent failures. A weak battery shows as slow cranking or single clicks instead of robust engine turnover.
Safety Switch Validation
Fully squeeze the auger control lever and ensure the drive control is in neutral. Faulty safety interlocks prevent ignition even with perfect fuel and spark. Many starting issues occur because users don’t pull the auger lever firmly enough against its stop point.
Battery and Electrical Fixes That Work

Dead Battery Diagnosis
A battery below 12.4 volts won’t crank reliably in freezing temperatures. Test with a multimeter: attach red probe to positive terminal, black to negative. If voltage drops below 12.6V when cranking, replace the battery. Cold weather drastically reduces available power—never assume last season’s battery will perform.
Terminal Corrosion Elimination
Remove cables (negative first!), then scrub terminals with a baking soda-water solution and wire brush until shiny metal appears. Reconnect cables tightly and coat with dielectric grease to block moisture. Poor connections mimic dead batteries but take five minutes to fix.
Starter Motor Failure Signs
A single loud “clunk” with no cranking points to a failed solenoid. Spinning starter motor without engine engagement indicates worn drive gears. Replace the entire starter assembly—individual component repairs fail quickly due to heat damage in the housing.
Fuel System Solutions for Stubborn Starts
Stale Fuel Emergency Protocol
Old gasoline gums up carburetors within weeks. Drain all fuel from tank and carburetor bowl immediately. Refill with fresh non-ethanol premium gas mixed with fuel stabilizer. Ethanol-blended fuels attract moisture, causing phase separation that starves the engine.
Carburetor Cleaning Procedure
Remove the carburetor bowl and spray cleaner through every jet until fluid flows freely. Pay special attention to the main jet and idle circuit—varnish from old fuel blocks microscopic passages. For persistent issues, install a complete rebuild kit rather than partial fixes.
Frozen Fuel Line Prevention
Add isopropyl-based fuel dryer (not methanol) to absorb moisture before storage. Always store with a full tank to minimize condensation. If lines freeze mid-storm, gently warm the fuel filter with a hair dryer—not open flame.
Ignition System Troubleshooting Steps

Spark Plug Inspection Protocol
Remove the plug and check for wet fouling (black, oily deposits) or dry fouling (chalky white buildup). Clean wet plugs with carb cleaner; replace dry plugs immediately. Always gap new plugs to .030 inches per Cub Cadet specifications—improper gaps cause weak sparks.
Ignition Coil Testing Method
Reattach the spark plug wire to the plug, then ground the plug against the engine block. Pull the starter cord while watching for a strong blue spark in dim light. Yellow or intermittent sparks mean immediate coil replacement—never attempt to repair ignition coils.
Safety Switch Circuit Check
Use a multimeter to test continuity through the auger control lever switch. With lever fully engaged, probes should show 0 ohms resistance. Any break in this circuit kills ignition instantly. Never bypass safety switches permanently—this creates serious auger engagement hazards.
Cold Weather Starting Techniques That Actually Work
Oil Viscosity Selection Guide
Use 5W-30 synthetic oil below 20°F—conventional 10W-30 thickens like peanut butter in extreme cold, preventing proper cranking. Check oil level before every use; low oil triggers automatic shutoff on most models. Never mix oil types during winter operation.
Correct Priming Technique
Press the primer bulb three times maximum for cold starts. Over-priming floods the cylinder, requiring 15+ minutes to evaporate excess fuel. For warm engines or restarts, prime only once. Single-stage models need precise priming due to lightweight flywheels.
Choke Adjustment Protocol
Set choke fully closed for sub-freezing starts. As the engine warms (15-20 seconds), gradually open the choke. If the engine starts then dies immediately, open the choke 25%—it’s drowning in fuel. Two-stage models often need less choke than single-stage units.
Model-Specific Starting Fixes
Single-Stage Models
These require full auger lever engagement to start—partial pulls won’t activate the safety switch. Their lightweight design demands exact priming: too little fuel won’t ignite, too much floods the engine. Always use the recoil starter vertically positioned for clean pulls.
Two-Stage Electric Start
Weak batteries cause 70% of starting failures here. Test battery voltage under load (while cranking)—static voltage deceives. Clean all connections from battery to starter solenoid. These models need sustained cranking power due to heavier flywheels.
Three-Stage EFI Systems
Newer EFI models display diagnostic codes via control panel flashes. Count the sequence (e.g., 3 flashes = fuel system error). Never attempt DIY repairs on electronic fuel injection—complex sensors require dealer diagnostics. Jump-starting may reset error codes temporarily.
Emergency Start Methods (Use Sparingly)
Flooded Engine Clearing
Remove the spark plug and pull the starter cord six times to expel excess fuel. Wipe the plug dry and reinstall without priming. Crank for 5-second intervals with choke fully open—never prime a flooded engine.
Starting Fluid Protocol
Spray 2-second bursts of small-engine starting fluid (NOT ether-based formulas) directly into the carburetor throat. Excessive use can hydrolock the cylinder. Never spray near hot exhaust components.
Safe Heat Application
Warm the carburetor and cylinder head for 3 minutes with a hair dryer held 6 inches away. Avoid heat guns—they can melt plastic components. Never use propane torches near fuel lines.
When to Call a Professional
Seek authorized service immediately if you detect metal shavings in the oil, white exhaust smoke, or knocking sounds during cranking. EFI system errors and repeated starter failures also require dealer intervention. Attempting complex repairs on warranty-covered machines (under 2 years) voids coverage—always check your manual first.
Prevent Winter Starting Failures
Conduct these monthly checks during snow season:
– Test battery voltage (must hold 12.4V under load)
– Inspect fuel for water droplets or cloudiness
– Verify oil level with dipstick (never overfill)
– Clean air filter if equipped
Before summer storage:
1. Add fuel stabilizer and run 5 minutes
2. Change oil while engine is warm
3. Remove battery and store indoors
4. Spray fogging oil through spark plug hole
5. Store uncovered in dry area (plastic traps moisture)
Critical Tip: Start your snow blower for 2 minutes every 4 weeks during summer. This prevents fuel system varnish and keeps seals lubricated—saving you hours of troubleshooting when winter hits.
Preventing Cub Cadet snow blower not starting issues begins with fresh fuel and clean connections. Address stale gasoline immediately—it’s the #1 cause of winter starting failures. Keep a spare spark plug and fuel stabilizer in your garage for instant fixes. When temperatures plummet, synthetic oil and non-ethanol fuel become non-negotiable for reliable starts. Remember: 80% of starting problems resolve with these simple checks before the snow stops falling.


