
When your lawn mower deck isn’t engaging, it’s frustrating—especially when the grass keeps growing. The most common quick fix is to check the PTO engagement system: verify the PTO switch or handle is fully engaged, the safety interlocks (seat/brake) are satisfied, and the drive belt is intact and tensioned. For many walk-behinds and riding mowers, simply reconnecting or tightening a loose deck belt or replacing a blown PTO fuse resolves the issue fast.
In this comprehensive guide, you’ll troubleshoot why your lawn mower blades won’t engage—whether you have a riding mower, lawn tractor, zero-turn, or manual lever-engaged deck. We’ll cover the most common causes, step-by-step solutions from basic to advanced, safety checks, prevention tips, and when to call a pro. By the end, you’ll know exactly how to get your mower back to cutting cleanly.
Common Causes of a Lawn Mower Deck Not Engaging
- PTO not engaged or faulty (electric PTO clutch or manual cable/lever)
- Safety interlock preventing engagement (seat switch, brake switch)
- Deck belt off, worn, or broken
- Belt tensioner or idler pulley seized or spring broken
- PTO fuse blown or wiring/connector issues
- Low battery voltage or charging system problem
- Shear key pin broken on blade spindle (rare)
- Debris jam in pulleys or around the deck
- Control cable stretched or out of adjustment (manual PTO)
- PTO clutch air gap out of spec or clutch failure (electric PTO)
- Hydrostatic transmission load/stall causing power drop (indirect symptom)
- Damaged spindle, bearings, or blade jam causing clutch to slip
How to Fix a Lawn Mower Deck Not Engaging

Important: Always remove the ignition key and disconnect the spark plug wire(s) or battery negative cable before working near blades and belts. On electric PTO systems, disconnect the battery to prevent accidental activation.
Method 1: Quick Checks (5–10 minutes)
Diagnosing the Issue
- Does the PTO switch click on? Do you hear the clutch “clack”? If not, electrical issue likely.
- Do blades try to move but slip? Belt tension or clutch may be weak.
- Does the engine bog down immediately when engaging? Possible blade jam or spindle issue.
Fix Steps
- Safety reset:
– Sit firmly on the seat, parking brake set, PTO disengaged.
– Start engine (or just key on for electric tests), increase throttle to medium.
– Engage PTO. If nothing happens, proceed. - Check safety interlocks:
– Ensure seat switch connector is secure.
– Confirm brake pedal is released if your model requires it for PTO engagement.
– Verify reverse PTO override is not required (some models need a button to mow in reverse). - Inspect PTO fuse:
– Locate the fuse block (often under the seat or dash). Replace blown PTO fuse with same rating (commonly 15–20A). - Inspect deck belt quickly:
– Look under the mower: Is the belt on all pulleys? Is it cracked, glazed, or hanging off? Re-seat if off. - Battery voltage check (if available):
– A weak battery can prevent electric clutches from engaging. Ensure battery is above 12.4V engine off; 13.5–14.5V running.
Testing
- Reattempt engagement. If it works—great. If not, continue to the next method.
Method 2: Belt, Tensioner, and Pulley Inspection (20–40 minutes)
A majority of non-engagement problems are belt-related.
Diagnosing the Issue
- Belt slips, squeals, or doesn’t turn: likely loose, worn, or off a pulley.
- Tensioner arm doesn’t move freely: seized bushing or broken spring.
- Idler pulley rough/noisy: bearing failure.
Fix Steps
- Prepare:
– Park on level ground, lower deck, remove key, disconnect battery negative.
– Wear gloves and eye protection. - Remove debris:
– Clear grass clumps, twigs, or balled-up line from around pulleys and belt path. - Inspect belt:
– Look for cracks, glazing (shiny surface), fraying, missing chunks, or stretching. Replace if worn. - Verify routing:
– Compare to the belt routing diagram (usually on the deck or in the manual). Ensure belt is seated correctly on the engine PTO pulley, deck idlers, and spindle pulleys. - Check tensioner:
– Move the tensioner arm by hand. It should pivot smoothly with spring resistance.
– Inspect the tensioner spring for breaks or stretching. Replace if weak or broken. - Spin pulleys:
– Each idler/spindle pulley should spin freely without wobble or grinding. Replace seized or noisy pulleys. - Reassemble:
– Install a new OEM-grade belt if needed. After routing, ensure the belt is in all pulley grooves and not twisted.
Testing
- Reconnect battery, start mower, set to half throttle, and engage PTO. Listen for smooth engagement. If blades still don’t turn, proceed.
Method 3: Electrical PTO System Diagnosis (Electric PTO Clutch) (30–60 minutes)
Applies to most riding mowers and zero-turns with a dashboard PTO switch.
Diagnosing the Issue
- Symptom: No “clack” when turning PTO switch on, blades don’t engage.
- Possible causes: Bad PTO switch, blown fuse, poor ground, broken wire, failed clutch, or low voltage.
Fix Steps
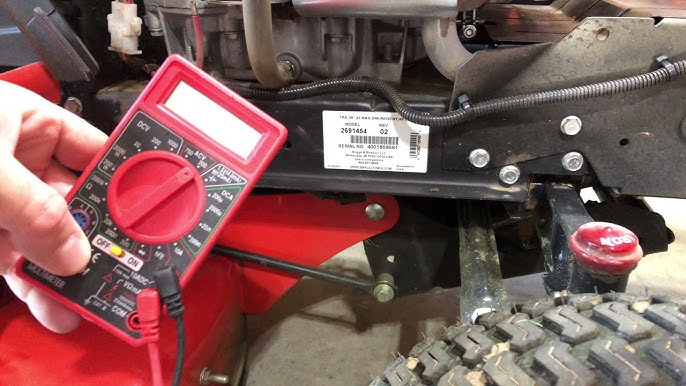
- Battery and charge:
– Measure battery: 12.6V fully charged. Running voltage 13.5–14.5V.
– If below 12.3V, charge battery and retest. Weak voltage can prevent clutch pull-in. - PTO switch test:
– Wiggle test: Toggle PTO switch while listening for clutch click. If intermittent, replace switch.
– If equipped, use a multimeter to check continuity across switch terminals per wiring diagram. - Fuse and relays:
– Verify PTO fuse again; inspect any PTO relay. Swap with a similar known-good relay if available. - Seat/brake switch continuity:
– With seat occupied, check seat switch connector and wiring. Bypass testing only for diagnosis by pressing switch firmly by hand (do not operate bypassed). Replace if faulty. - Clutch power test:
– Locate the clutch connector near the engine crank pulley.
– With engine off, key on, PTO switch on, measure voltage at clutch: should see battery voltage. If you have voltage but no engagement, clutch may be bad.
– If no voltage, trace back to switch, fuse, or interlock. - Clutch resistance and air gap:
– With battery disconnected, measure clutch coil resistance across terminals (often 2–4 ohms; check your model’s spec).
– Inspect clutch air gap with a feeler gauge (typical 0.012–0.018 inch, verify spec). Adjust using the three slot-head screws if the gap is too wide; too large a gap can prevent engagement. - Wiring and grounds:
– Check for corroded connectors, chafed wires near frame rub points, and clean grounds. Use dielectric grease after cleaning.
Testing
- After any correction, reconnect battery and test PTO engagement. If the clutch clicks but blades don’t spin, re-check belt and tension.
Method 4: Manual PTO Levers and Cable Systems (20–45 minutes)
Some tractors and walk-behind mowers engage the deck with a lever and cable or mechanical linkage.
Diagnosing the Issue
- Lever feels loose or has little resistance: stretched cable or linkage disconnected.
- Lever stiff or stuck: seized idler arm or rusty linkage.
Fix Steps
- Inspect linkage:
– Follow the lever/cable down to the deck. Ensure the cable housing is anchored and the inner cable moves the idler arm. - Adjust cable:
– Many cables have an adjustment nut at the bracket. Tighten to remove slack so the idler fully tensions the belt when engaged. - Lubricate pivot points:
– Apply dry lube or light oil to the idler pivot and linkage points. Avoid getting oil on the belt. - Replace stretched/damaged cable:
– Match by part number or length/ends. Route as original and secure clamps.
Testing
- Engage/disengage several times to confirm full belt tension and smooth action.
Method 5: Blade Spindles, Jams, and Mechanical Failures (30–90 minutes)
Diagnosing the Issue
- Loud squeal, smoke, or immediate engine bog when engaging: blade jam or spindle seized.
- One spindle spins, another doesn’t: broken spindle, stripped pulley key, or missing pulley bolt.
Fix Steps
- Inspect under deck:
– Remove battery negative and spark plug wire(s). Tip mower safely if push mower; for riders, raise deck with proper jack stands.
– Check for wire, rope, or debris wrapped around spindles or blades. Remove safely. - Spin blades by hand:
– With gloves, rotate each blade. It should turn smoothly without grinding. Replace bearings or entire spindle assembly if seized or rough. - Check pulleys:
– Ensure pulley keys/slots are intact and pulley bolts are tight and torqued to spec. - Blade hardware:
– Verify blades are installed correctly and tightened to the manufacturer’s torque.
Testing
- Reassemble and test. If still failing under load, inspect the clutch again for slipping.
How to Prevent Future Deck Engagement Issues
- Keep the deck clean: Blow off grass and debris after each mow.
- Inspect the belt every 25 hours: Replace at the first sign of cracking or glazing.
- Lubricate idler pivots and check spring tension seasonally.
- Charge/maintain battery: Store with a smart maintainer in off-season.
- Avoid wet, heavy grass that strains belts and clutches.
- Don’t ride with PTO engaged over gravel or sticks that can jam blades.
- Follow OEM torque specs and use OEM or high-quality belts for correct fit.
Pro Tips
- Always use OEM belts: Dimensions and compound matter; off-size belts slip or jump off.
- Set engine RPM to full throttle before engaging: Electric clutches engage cleaner and reduce slip at proper RPM, unless manual states otherwise.
- Adjust clutch air gap annually: A widening gap is a common cause of weak engagement in electric PTO clutches.
- Replace idler pulleys in pairs: If one bearing failed, the other may follow soon.
- Check charging system: A faulty regulator/alternator keeping voltage below ~13.2V running will cause weak clutch performance.
- Label belt routing: Take a photo or draw a diagram before removal—saves time.
- Keep spares: Belt, fuse assortment, and a PTO switch are inexpensive and reduce downtime.
When to Call a Professional
- Persistent blown fuses or melted connectors (possible short circuit).
- No voltage at clutch with all switches tested (advanced wiring fault).
- Clutch engages but immediately slips and smokes even with new belt (clutch failure).
- Spindle replacement beyond your tools/comfort (press-fit bearings, torque specs).
- Hydrostatic or engine power issues that cause bogging under PTO load.
Typical costs:
– Belt: $25–$80 (riding mower), $10–$30 (push)
– Idler pulley: $15–$40 each
– PTO switch: $15–$40
– Electric PTO clutch: $120–$300+
– Shop labor: $80–$140/hour; common deck service 1–2 hours
Warranty notes:
– Using non-OEM belts or modifying wiring can void coverage. Check your owner’s manual and retain receipts.
FAQ
Q: My blades won’t engage but the belt looks fine. What next?
A: Check the PTO fuse, PTO switch, and safety interlocks first. Then verify the belt tensioner spring and idler arm move freely. If you hear no clutch “click” on electric systems, measure voltage at the clutch connector.
Q: Should I engage the blades at idle or full throttle?
A: Most manufacturers recommend engaging at full throttle for electric PTOs to ensure strong engagement and minimal slip. Always follow your model’s manual.
Q: How tight should the deck belt be?
A: The belt should have firm tension with minimal slack when engaged, and some slack when disengaged. On many decks, about 1/2 inch of deflection with moderate finger pressure on the longest span is typical, but follow your model’s spec.
Q: My mower dies when I pull the PTO switch. Why?
A: A faulty seat switch, brake switch, or wiring can kill the engine when PTO is engaged. Also, a severely jammed blade or seized spindle can stall the engine instantly.
Q: Can a weak battery prevent blade engagement?
A: Yes. Electric PTO clutches require solid voltage to pull in. If the battery is below ~12.3V or the charging system is weak, the clutch may not engage or will slip.
Q: How do I adjust the PTO clutch air gap?
A: Disconnect the battery, find the three adjustment nuts/screws on the clutch, and use a feeler gauge to set the gap evenly around the clutch to the manufacturer’s spec (commonly 0.012–0.018 inch).
Q: The deck engages, but blades spin slowly. What causes that?
A: A slipping belt (glazed or stretched), weak tensioner spring, oil/grease on the belt, or a failing clutch can cause slow blade speed.
Q: Is it safe to bypass a safety switch to test?
A: For brief diagnosis only and with blades disengaged. Never operate with safety switches bypassed. Replace faulty switches immediately.
Alternative Solutions
Sometimes repair isn’t the best path, especially with older decks or recurring failures.
| Solution | Pros | Cons | Best For |
|---|---|---|---|
| Replace entire deck belt/pulley kit | Restores system as-new | Higher upfront cost | Decks with multiple worn parts |
| Upgrade to OEM heavy-duty belt | Longer life, better grip | Costs more than aftermarket | Frequent or heavy mowing |
| Replace electric PTO clutch | Fixes weak/slipping engagement | Moderate to high cost | Clutch coil wear or bad bearing |
| Professional deck rebuild | Expert alignment, bearings, pulleys | Labor cost | Older mowers with multiple failures |
| New mower purchase | Warranty, improved efficiency | Highest cost | Aging units with repeated deck issues |
Get Your Lawn Mower Working Again
Following this guide, you now have multiple solutions to fix a lawn mower deck not engaging:
– Quick checks of PTO switch, fuses, safety interlocks, and battery voltage
– Belt inspection, tensioner and pulley repair or replacement
– Electrical PTO diagnosis including clutch voltage, resistance, and air gap
– Manual cable/linkage adjustment and lubrication
– Spindle, blade, and mechanical failure fixes
Don’t let a non-engaging deck sideline your mowing. Work through these methods in order, and you’ll restore blade engagement and cutting performance quickly and safely.
Have you solved your lawn mower deck not engaging? Share what fixed it for your model in the comments to help other readers. Found this helpful? Bookmark it for your maintenance routine. With a few checks and the right parts, you’ll be mowing again today.


